Categories
Appetizers Produce Salads Uncategorized Vegetarian Video How-to

Roasted Asparagus w/ Grapefruit and Lemon Oil

    Asparagus with Grapefruit and Lemon Oil

    It’s day four of my blogging event: “How to host an elegant, flavorful, vegan, gluten-free dinner party” in which I feature recipes created by the wonderful Viviane Bauquet Farre of food and style. My husband and several of his friends have transitioned to a vegetarian diet and several of them are also avoiding dairy and gluten, so when I decided to celebrate G’s birthday with a dinner party, I knew I needed to turn to my friend Viviane who features such refined recipes which also happen to be meat free. Today’s installment is the third of that five-course meal. For the next course, you’ll just have to check back tomorrow.

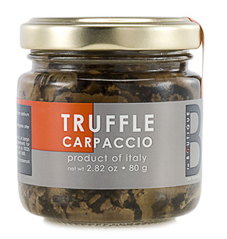
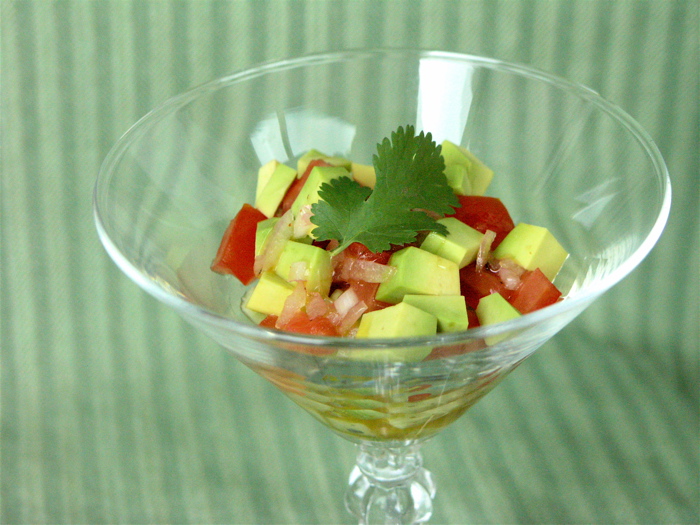
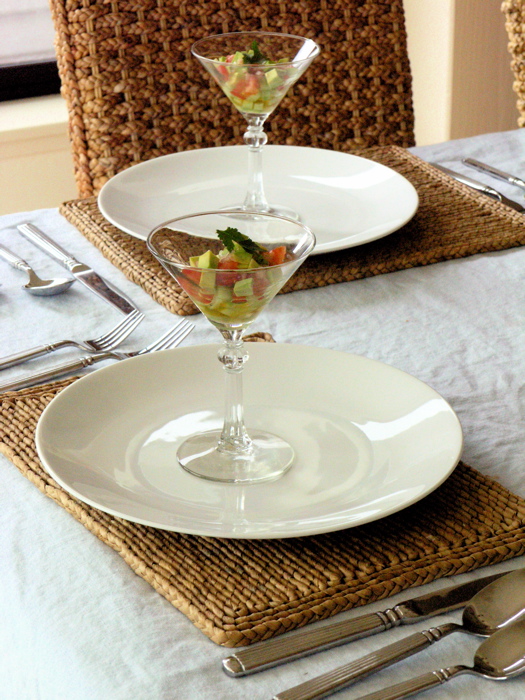
    So far in this dinner, we’ve enjoyed cucumber and avocado ceviche, and slurped down an artichoke soup with truffles on top. Now we’re ready for a scrumptious early Spring salad, so Viviane’s Roasted Asparagus with Grapefruit is just the thing. Here’s what I learned by making this recipe: It is soooo easy to make and it is easy to prepare ahead of time, when it was time for this course, I could truly relax. All I had to do was plate everything and drizzle it with oil.

    Roasted Asparagus

    The other revelation I had while making this recipe is just how easy it is to roast asparagus. Brush the spears with a little olive oil, pop them into an oven preheated to 500˚F and 7-10 minutes later you’ve got roasted asparagus. No careful chopping, no peeling, no long wait. It’s like fast food. Well, sort of.

    Brush with olive oil, then roast

    Watch Viviane’s video for more tips on roasting asparagus and to watch her demonstrate how to prepare grapefruit slices with no pith or membrane in sight. Again, now that I’ve done it once, I want to do it this way all the time. My kids love eating citrus in our house now because I prepare for them this way now.

    Roasted asparagus with pink grapefruit and lemon oil
    Adapted from the recipe by Viviane Bauquet Farre of food and style, with permission.
    See her original recipe here.
    serves 4

    1 large Texas Rio Star grapefruit
    1 1/4 lbs asparagus spears – washed and stem snapped
    2 tablespoons extra virgin olive oil
    1/4 teaspoon sea salt or to taste
    2 tablespoons pine nuts
    4 teaspoons lemon infused oil as garnish
    A bit of lemon zest for garnish
    freshly ground black pepper to taste

    1 large jellyroll pan

    Method

    1. Peel the grapefruit down to the flesh, Quarter lengthwise and remove the thin membrane around each slice, being careful not to break them. Transfer to a bowl and set aside.

    2. If your pine nuts are raw, preheat the oven to 425˚F. Place the pinenuts on a baking sheet and roast for about 2 minutes, but watch carefully through the window to make sure they don’t burn. Set aside.

    3. Increase oven temperature to 500°F. Move rack to the top of the oven. Spread the asparagus on a jellyroll pan. Brush with the olive oil and sprinkle with the salt. Bake for 7 to 10 minutes (depending on their size) until the tips begin to brown. Remove from pan and let cool for 10 minutes.

    4. Place a bundle of asparagus in the center of each plate. Top with 3-4 grapefruit slices and sprinkle with the pine nuts. Drizzle with the lemon oil and finish with a bit of fresh lemon zest and freshly ground black pepper to taste. Serve immediately.

    Roasted Asparagus with Grapefruit
      Categories
      Appetizers Soups and Stews Uncategorized Vegetarian

      Artichoke Velouté with Black Truffle Carpaccio

        Artichoke Velouté w/ Truffle Carpaccio

        It’s day three of my blogging event: “How to host an elegant, flavorful, vegan, gluten-free dinner party” for which I feature recipes created by the lovely and talented Viviane Bauquet Farre of food and style. Today’s installment is the second of the five-course meal. Check back Monday for course number three.

        Velouté in French means, “velvety,” and this soup is made velvety, not by creating a butter and flour roux, as are most French velouté sauces, but rather by puréeing the soup (including the artichokes and potatoes) in a blender and then pressing the it through a fine sieve. Whenever I strain a sauce or soup through a sieve, I am reminded of Thomas Keller because he has said that ‘nothing moves from one pot to another in the French Laundry kitchen without first passing through a sieve.’ Now that I have gotten into this habit as well, I highly recommend it.

        The other special trick for this soup is the black truffle carpaccio as the garnish. Viviane featured these in her original post, and I was compelled to order some myself. They are available at Gourmet Attitude in New York City. They FedEx them to you in a chilled box. They were a wonderful addition to this soup and I can’t wait to try them in other dishes as well. These are the first truffles to take up residence in my kitchen, so I am very excited about that.

        This would be another great occasion to own a stick blender. Every time I make a soup like this, I think it’s time to buy one, but I’ll be honest. I haven’t yet pulled the trigger.

        Parlsey and Thyme Bundle

        Artichoke Velouté with Black Truffle Carpaccio
        From a recipe by Viviane Bauquet Farre, by permission
        serves 6 (makes 8 cups)

        3 tablespoons extra virgin olive oil
        1 medium Vidalia or Spanish onion – skinned, quartered and thinly sliced
        1/2 cup dry white wine
        2 garlic cloves – skinned and finely chopped
        8 oz Yukon gold potato (1 large) – peeled and cut in 1/2” cubes
        2 8oz boxes of frozen artichoke hearts
        2 1/2 cups vegetable stock
        2 1/2 cups spring/filtered water
        1 1/4 teaspoons sea salt or to taste
        freshly ground black pepper to taste
        8 Italian parsley sprigs & 6 thyme sprigs – tied in a bundle with kitchen string

        1/2 – 2.82 oz jar Black Truffle Carpaccio or truffle oil as garnish
        1/4 cup finely chopped chives as garnish

        Method

        1. Heat a large heavy-bottomed soup pot at medium-high heat. Add the olive oil and onion, stir well and sauté for 5 to 6 minutes, until just golden, stirring from time to time. Add the garlic and wine. Stir well and continue to sauté for 2 to 3 minutes, until the wine has reduced to a syrupy sauce and has almost all evaporated. Add the potato cubes, frozen artichokes, stock, water, salt, pepper to taste and herb bundle. Bring to a boil, then reduce heat to medium-low, cover the pot and slow-simmer for 40 minutes until the artichokes are very tender. Remove the herb bundle and discard.

        2. Purée the soup with a stick blender, food processor, or blender until very smooth. Strain in a sieve and return to the soup pot and gently re-heat at medium heat. Taste and season with salt and pepper if needed.

        3. Ladle the soup into soup bowls, put a spoonful of black truffle carpaccio (or a spoonful of truffle oil), garnish with a swirl of extra virgin olive oil and a sprinkling of fresh chives and serve immediately.

        Amy’s tip: Viviane recommends straining this soup through a medium sieve. I own a fine sieve but not a medium one. It was time-consuming to strain it through the fine sieve as she warned ,but I was glad I did it anyway. I used a wooden spoon to press it through and just tried to stay patient.

        Artichoke Velouté
          Categories
          Appetizers Produce Salads Uncategorized Vegetarian

          Cucumber and Avocado Ceviche

            Avocado and Cucumber Ceviche

            It’s day two of my blogging event: “How to host an elegant, flavorful, vegan, gluten-free dinner party” for which I feature recipes created by the lovely and talented Viviane Bauquet Farre of food and style. This recipe was the first course of the dining extravaganza that was my husband’s birthday dinner this past weekend. This kicked off a wonderful five course meal. For course number two, you will have to check back tomorrow.

            Avocado and Cucumber Ceviche

            Normally, when one thinks of ceviche, one thinks of raw seafood that has been cured in a citrus marinade. Well, this is a vegetarian version of ceviche. It’s an incredibly light dish, perfect for spring and summer gatherings and it is surprisingly easy to make. I prepped all of the vegetables ahead of time except for the avocado. I waited until just before I assembled the dish to cut the avocado. Drizzling it with a lime-based marinade helps keep it from browning, but it’s important for the avocado to be fresh.

            The tabasco sauce in the marinade does give it a little kick. If your guests like spice, you can heat up it even more by adding another 1/4 tsp. For me, it was just perfect.

            I remembered having traditional ceviche served in a martini glass at a restaurant in San Francisco and I wanted to recreate that effect here, but you could just as easily serve it in a shallow bowl or on a salad plate.

            First Course of the Dinner


            Cucumber and Avocado Ceviche

            by Viviane Bauquet-Farre of food and style
            serves 6

            For the dressing
            1 small shallot – skinned and finely chopped
            1 1/2 tablespoons fresh lime juice
            1/2 teaspoon Tabasco
            3 tablespoons extra virgin olive oil
            sea salt and freshly ground pepper to taste

            For the ceviche
            1/2 of a (seedless) English cucumber, peeled and diced
            2 medium tomatoes – seeded and cut in 1/8″ cubes
            1/2 ripe but not-too-soft avocado – pit removed, skinned and cut into small cubes
            Cilantro sprigs as garnish

            Method

            1. To make the dressing, place all ingredients except the olive oil in a small bowl and toss. Gradually whisk in the olive oil, beating continuously to create an emulsion. Set aside.

            2. Toss a large spoonful of cucumber into a martini glass or shallow bowl. Place a spoonful of tomato cubes on top of the cucumber and a spoonful of avocado cubes on top of that. Drizzle with dressing and toss a bit to coat. Garnish with a sprig of fresh cilantro. Serve immediately.

            Cook’s note: This recipe can also be served as a side salad. Instead of serving it in individual small plates, serve it in a large platter.

            Avocado and Cucumber Ceviche
              Categories
              Appetizers Vegetarian

              Marinated Olives with Fennel – The Start to a Wonderful (Vegan?! Gluten-Free?!) Dinner Party

                Marinated Olives with Fennel

                This weekend, I hosted a birthday dinner for my husband, but this year was different from all the rest. The entire menu was vegan and gluten-free. Several of the guests are vegetarian and a few are gluten intolerant. In addition, many of them are trying to avoid dairy, so I decided to just take the menu all the way. I knew that I would need help to make it an elegant, flavorful dinner with these restrictions in place. I am a newly-minted vegetarian chef, so I turned to my friend and amazing gourmet blogger/writer/instructor/video-maker, Viviane Bauquet-Farre, author of the blog food and style. Viviane and I met when I featured on her cooking videos on StreamingGourmet.com. Her videos are as beautifully made as her fine cuisine.

                Viviane creates innovative, seasonal dishes that are flavorful, deceptively simple, and… as it turns out, vegetarian (not vegan or gluten-free necessarily). I read her blog and watched her videos for about six months before I even realized that they were all meatless. I knew she was the person to call for help with my menu.

                Sure enough, we were able to come up with an elegant five-course dinner free of bones, cheese, cream or wheat. Eager to know what the menu was? You’re in luck, but you’ll have to check back. All five courses will be revealed over the next five days.

                Vegan, gluten-free dinner about to begin

                Today’s post is a bit of a teaser. These marinated olives were among the hors d’oeuvres on the table during the cocktail hour, but there are five courses yet remaining. The olives were devoured, but I have a confession to make. I don’t eat olives. I don’t think an entire olive has ever passed my lips. So I can’t vouch for them myself. And because I don’t eat olives, it didn’t occur to me to put a little bowl out to collect all the pits. It also didn’t occur to me to put out little toothpicks with which to pick up the olives. You can learn from my mistake and use a dish like this one (available at Amazon.com).

                But this recipe is that good, because despite my lack of proper accoutrements, guests wolfed down these olives with their bare fingers and left the pits wherever they could hide them.

                Marinated Olives with Fennel

                Marinated Olives with Fennel
                By Viviane Bauquet Farre of food and style
                Reprinted with permission

                makes 2 cups

                1/2 small fennel bulb
                1 tablespoon coarsely chopped fennel greens
                1/4 teaspoon red pepper flakes
                1/4 teaspoon fennel seeds
                2 strips lemon zest – (use vegetable hand-peeler) and cut in 1/16” julienne strips
                1/2 cup extra virgin olive oil
                1 1/4 lb mixed olives

                Step 1: Trim and cut fennel bulb in half. Using a vegetable hand-peeler, shave 12 strips from the bulb and put in a large bowl. Place the balance of ingredients in the same bowl. Mix well and transfer to a Tupperware container.

                Step 2: Let marinate at room temperature for 1 hour before serving.
                Cook’s note: Refrigerate up to 1 month. Bring to room temperature before serving.

                  Categories
                  Rice and other Grains Sides Uncategorized Vegetarian

                  Quinoa and Millet Pilaf

                    Quinoa-Millet Pilaf

                    Recently, I was at Mollie Stone’s market in Greenbrae, CA where there is a sizable bulk foods aisle and I was gazing at all of the varieties of gluten-free grains available there. In my kitchen, I have a shelf with glass canisters filled with staples and I just love the beauty of all the different-colored grains, beans, and pastas lined up next to each other. So when I saw these beautiful grains at Mollie Stones that I hadn’t tried in years, I just had to have them. Pearl millet and quinoa were the two I chose that day and I thought, ‘Why not make a pilaf?’

                    Once I returned home, I consulted the one book in my collection that was guaranteed to include a quinoa and millet pilaf: Annemarie Colbin’s 1989 book, The Natural Gourmet: Delicious recipes for balanced, healthy eating. If you’ve been following this blog at all lately, you will know that our family (specifically my husband) has renewed its efforts to engage in balanced, healthy eating. The last time I tried to do such a thing was 1990, and I have moved this book with me from place to place ever since.

                    Rich in vitamins and minerals, as well as protein, both of these grains are gluten-free and deserve a place at everyone’s table.

                    For tips on how to make sure that your quinoa doesn’t taste bitter, see this post, How to Cook Quinoa over at my good friend Viviane Bauquet Farre’s blog, food and style.

                    Quinoa and Millet Pilaf
                    adapted from the recipe by Annemarie Colbin in her book The Natural Gourmet

                    Serves 3-4

                    1 Tbsp extra virgin olive oil
                    1 small onion, diced
                    1 medium carrot, diced
                    ½ tsp ground cumin
                    1 clove of garlic, peeled and bashed
                    ½ cup millet
                    ½ cup quinoa (rinsed well)
                    2 ½ cups vegetable stock
                    Sea salt to taste (about 1/2 tsp)
                    Fresh curly parsley to garnish

                    Method

                    1. Rinse the quinoa well. To do this, put the quinoa in a fine-mesh strainer and place a bowl underneath. Rinse with cold water while rubbing the quinoa between your fingers. The water will become cloudy. Drain, and repeat this process with fresh water two more times. Strain excess water and set aside.

                    2. Heat the olive oil in a saucepan over medium heat. Add the onion and sauté for about 4 minutes, or until soft. . Add the carrot sauté for another 4-5 minutes. If you need another touch of olive, don’t hesitate to add just a teeny bit more. Add the cumin and garlic and sautée for another minute. Now we are going to toast the grains so that they have a rich, nutty flavor. Add the millet, and sauté for 5 minutes, stirring frequently. Now add the quinoa and sauté for 2 to 3 minutes more. Again, stirring frequently to coat the grains with the olive oil, aromatic vegetables and spices, and to prevent burning.

                    3. Add the vegetable stock and salt and bring to a boil. Reduce heat, simmer and, covered for about 30 minutes, or until the water is absorbed. Fluff before serving and garnish with fresh parsley (or fresh cilantro sprigs would do well here too).

                    Quinoa and Millet Pilaf

                      Categories
                      Produce Sides Vegetarian

                      Jamie Oliver’s Roasted Root Vegetables

                        [pinterest]

                        Roasted parsnips, potatoes and carrots

                        I’ve been working on perfecting roasted root vegetables for awhile. Getting them to come out of the oven crispy on the outside and creamy on the inside is no small feat. Should you parboil first? How hot should the oven be? I’ve gone back and forth about the parboiling question. For years, I’ve been too lazy to bother and I thought that I was getting by just fine. That all changed the other day, when I followed the recipe in Jamie Oliver’s latest book, Jamie’s Food Revolution: Rediscover How to Cook Simple, Delicious, Affordable Meals. He got me to parboil again and I don’t think I will ever go back.

                        Click on the book to see more:

                        The other revelation? Heat the olive oil, along with the smashed garlic cloves and rosemary in the roasting pan first, on the stove top. Then toss the vegetables in the heated, flavored oil to coat (before roasting in a 400˚F oven). The vegetables roast evenly, and the flavor diffuses throughout.

                        See the nice browning on the potatoes? That comes as a result of scuffing up the potatoes while draining them in the colander. Scuffing the potatoes increases the surface area exposed to the warm air, shortening the time for moisture to evaporate the starches (sugars) to caramelize and turn brown.

                        And of course, don’t break the cardinal rule: make sure the vegetables are not overcrowded. Overcrowding in the roasting pan leads to “steaming” which produces limp, soggy vegetables that can’t brown. Make sure there is only one layer of vegetables and adequate space between them.

                        Jamie Oliver's Roasted Root Vegetables
                         
                        Prep time
                        Cook time
                        Total time
                         
                        Hearty roasted root vegetables perfect for Thanksgiving and throughout the autumn and winter months.
                        Author:
                        Recipe type: Side dish
                        Cuisine: British
                        Serves: 4-6
                        Ingredients
                        • 2 medium Idaho potatoes
                        • 6 parsnips
                        • 6 carrots
                        • 1 bulb of garlic
                        • 3 sprigs of fresh rosemary
                        • sea salt and freshly ground black pepper
                        • olive oil
                        Instructions
                        1. Preheat your oven to 400°F
                        2. Peel the vegetables and halve any larger ones lengthways. Break the garlic bulb into cloves, leaving them unpeeled, and bash them slightly with the palm of your hand. Strip off the rosemary leaves from the stalks.
                        3. Put the potatoes and carrots into a large pan – you may need to use two – of salted, boiling water on a high heat and bring back to the boil. Allow to boil for 5 minutes, then add the parsnips and cook for another 4 minutes. Drain in a colander and allow to steam dry. Take out the carrots and parsnips and put to one side. Fluff up the potatoes in the colander by shaking it around a little – it’s important to ‘chuff them up’ like this if you want them to have all those lovely crispy bits when they’re cooked
                        4. Put a large roasting pan over medium heat and either add 2 Tbsp of olive oil. Add the garlic and rosemary leaves. Put the vegetables into the tray with a good pinch of salt and pepper and stir them around to coat. Spread them out evenly into one layer – this is important, as you want them to roast, not steam as they will if you have them all on top of each other.
                        5. Put the baking dish in the preheated oven and cook, stirring the vegetables occasionally, until they are tender and golden brown, about 45 minutes.

                        Roasted carrots, parsnips, and potatoes

                          Categories
                          Breads Soups and Stews Uncategorized Vegetarian

                          Zesty Vegetarian Chili with Cornbread Topping

                            Vegetarian Chili with Cornbread Topping

                            I usually avoid vegetarian chili because I fear that it won’t be flavorful enough, but my husband has really laid off meat lately, and he likes his food to have a lot of kick, so I set about making a chili that would stand up to both of our flavor requirements and not include any ground meat. Sure enough, this chili delivers. In addition to chili powder, I’ve added a couple of dried red chilis (seeds and all) which manages to kick it up a notch. The other trick is to add all of the dried spices to the pot while there is hot oil in there to bring out all of the trapped flavors. While you are cooking, you should experience all of the fragrances. Adding dried spices to heated oil makes them truly fragrant.

                            The other trick to this dish is to make it in a pot that can transfer from stove to oven, like this Le Creuset Enameled Cast Iron 5 Quart Oval French Ovens. After you’ve prepared the chili on the stove, you will bake it with the cornbread batter on top for about 30 minutes.

                              Categories
                              Sides Uncategorized Vegetarian Video How-to

                              Twice-Baked Potatoes with Cabbage and Edamame

                                Twice Baked Potatoes with Cabbage and Edamame
                                Twice Baked Potatoes with Cabbage and Edamame

                                After having dinner with a bunch of friends last weekend, where the conversation centered around health and sustainable eating, my husband decided it was time to make the move towards vegetarianism that had been on his mind for some time. So, while at the public library the next day, I checked out a stack of beautiful vegetarian-leaning cookbooks. One of them was Ivy Manning’s The Adaptable Feast: Satisfying Meals for the Vegetarians, Vegans, and Omnivores at Your Table. Casting about for a recipe that would use ingredients I had on hand, including potatoes and cheese (always on hand in our household), I found an inspired variation on a tried-and-true favorite: the twice-baked potato.

                                Since this version calls for potatoes and cabbage, the author, Ivy Manning describes it as the perfect vegetarian option for a St. Patrick’s Day feast. Recently, in her own recipe blog, Ivy’s Feast, she wrote about another twice-baked potato variation that would also be appropriate for St. Patrick’s Day: Twice Baked Irish Potatoes with Kale and Stout Onions. Yum. And she even made a cooking video to boot. See it here:

                                  Categories
                                  Appetizers Salads Sauces Uncategorized Vegetarian

                                  Tarragon-Mustard Vinaigrette

                                    Tarragon-Mustard Vinaigrette
                                    Butter Lettuce with Tarragon-Mustard Vinaigrette

                                    The other day, I had lunch at The Left Bank in Larkspur, CA, and I had this lovely butter lettuce salad with a tarragon-mustard vinaigrette. The plate came with an entire head of butter lettuce and the vinaigrette was so smooth, I simply had to try to recreate it at home.

                                    I was lucky today because by chance, I already had shallots and fresh tarragon in the fridge and I remembered to pick up a head of butter lettuce on my way home from dropping off the kids at school. Lunch, here I come.

                                    When standing in front of my bottles of olive oil and vinegar, however, I thought, “I bet Michael Ruhlman’s book, Ratio: The Simple Codes Behind the Craft of Everyday Cooking has something to say about this.” Sure enough, a quick Google search yielded a guest post he wrote over at Elise Bauer’s Simply Recipes. In that post, he actually provides three different vinaigrette recipes. I chose to make the tarragon-mustard vinaigrette because I hoped it would match what I had at The Left Bank.

                                    It almost did – definitely close enough for lunch at home. Just make sure to use the highest quality ingredients you can find and whip it up with full gusto.

                                    Tarragon-Mustard Vinaigrette
                                    adapted from Michael Ruhlman’s recipe

                                    2 Tbsp sherry vinegar
                                    1 Tbsp minced shallot
                                    Salt and pepper to taste
                                    2 teaspoons Dijon mustard
                                    6 Tbsp olive oil
                                    1 Tbsp minced fresh tarragon

                                    In a tall bowl, combine the vinegar, shallot, salt, pepper, and mustard. Give it a stir with a whisk or fork to soften the shallot then drizzle the oil in while whisking continuously to form an emulsion. Wait to stir in the tarragon just before serving.

                                    For more information about Michael Ruhlman and his amazing work on ratios, check out his iPhone app and watch this video that explains it.

                                      Categories
                                      Breads Breakfast/Brunch Vegetarian

                                      Healthier Zucchini Bread

                                        Healthier Zucchini Bread
                                        Healthier Zucchini Bread

                                        A few weeks ago, I purchased whole wheat flour and oat bran at Trader Joe’s and since then, I’ve been remaking my favorite quick bread and muffin recipes to increase fiber and decrease fat. Zucchini Bread is my most recent target. Awhile ago, I posted the Zucchini Bread recipe handed down to me by my mother that I’ve been using since the early eighties. It’s great: sweet, moist, and flavorful. But it’s loaded with sugar and butter and calls for only bleached flour. If you’re in the mood for something a little healthier, try this version instead. It packs as much flavor but the pleasure comes without the guilt.

                                        Healthier Zucchini Bread
                                        2 medium loaves

                                        Ingredients

                                        3 eggs
                                        2 cups grated zucchini
                                        1 1/2 cups granulated sugar
                                        1/2 cup canola oil
                                        1/2 cup applesauce
                                        1 tsp vanilla extract
                                        1 1/2 cups whole wheat flour
                                        1 cup all-purpose (bleached) flour
                                        1/2 cup oat bran
                                        1 tsp salt
                                        1 tsp baking soda
                                        1/4 tsp baking powder
                                        1 Tbsp cinnamon
                                        1/2 tsp freshly ground nutmeg

                                        Method

                                        1. Preheat oven to 350˚F. Spray 2 9′ x 5′ baking pans with nonstick cooking spray.

                                        2. In a medium bowl, beat eggs until foamy. Add sugar, zucchini, oil, applesauce and vanilla. Mix lightly but well (with a spoon).

                                        2. In a separate bowl, mix dry ingredients.

                                        3. Add dry ingredients to egg mixture (in batches) until blended. Don’t over mix.

                                        4. Bake for 45 minutes to 1 hour or until a toothpick inserted in the middle comes out clean. Let cool for 10 minutes before removing from pans.


                                        Blog Widget by LinkWithin