Categories
Produce Salads Sides Uncategorized

Fresh Corn Salad w/ Tomatoes & Basil

    Corn Salad with Tomatoes & Basil
    Corn Salad with Tomatoes & Basil

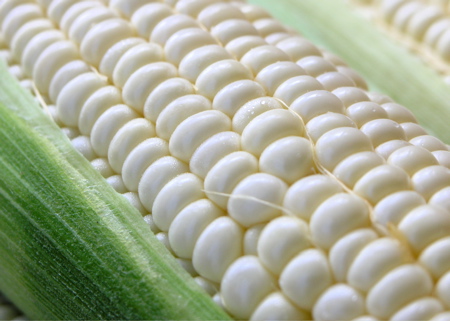
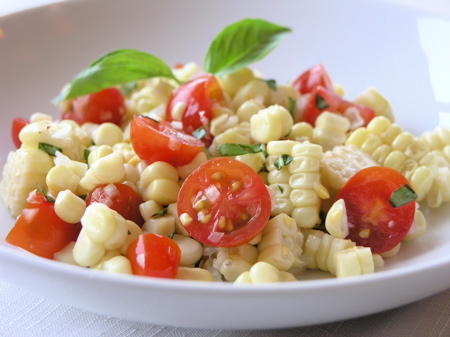
    Since local corn is back in season, corn salad is back on the menu here at StreamingGourmet. I can’t get enough of the stuff and even my kids like it. I’ve kept my corn salad simple. I like to let the vegetables speak for themselves (i.e., there’s no oil in my recipe). The key is to keep the corn crisp by boiling it for only three minutes and promptly removing it from the water. Fresh basil is the other key ingredient here. My entire kitchen smelled great while I was putting this salad together.

    Ingredients

    4 ears fresh corn, shucked
    1/2 pint cherry tomatoes, sliced in half
    1/2 small onion, diced finely
    1 Tablespoon minced fresh basil
    1 teaspoon salt
    A few spritzes of fresh lemon juice

    Method

    1. Bring a large stockpot of water to boil. Add corn and boil for 3 minutes. Remove corn from water and place on a platter to cool.

    2. Dice the onion using a mandoline on the finest dice setting. On my mandoline, I put the onion in the safety holder, sliced it thinly then swiped through perpendicular to my slices.

    3. Once the corn is cool, slice it off into a large bowl. Break up the slices into kernels gently, leaving some big chunks, but not too big. Add the tomatoes, onion, and basil and toss to distribute everything evenly. Add salt and lemon juice and toss again.

    Served chilled or at room temperature.

    Serves 4

    Scroll Down for More Corn Salad Recipes
    from Around the Food Blogosphere
    Yummy Local Corn
    Yummy Local Corn
    Other Great Corn Salad Recipes from Around the Food Blogosphere

    1. Elise Bauer at Simply Recipes has a few great recipes. One of them is Grilled Corn Salad. It’s got a Southwest twist with cilantro, chili peppers and cumin.

    2. Chuck at Sunday Night Dinner wrote a post last year called Spicy Fresh Corn Salad – A Taste of Yellow 2008 – The post was in support of the Lance Armstrong Foundation and features a simple corn salad with a spicy Thai chili pepper kick.

    3. Kevin at Closet Cooking has a recipe for Avocado and Sweet Corn Salad. He’s added a creamy salsa verde dressing that looks great.

    4. Chef John over at Foodwishes has produced a video Red Pepper and Corn Salad Recipe. For the recipe, visit Foodwishes. You can watch the video here.

      Categories
      Breakfast/Brunch

      My Favorite Breakfast

        Cheerios with blueberries
        Cheerios with blueberries

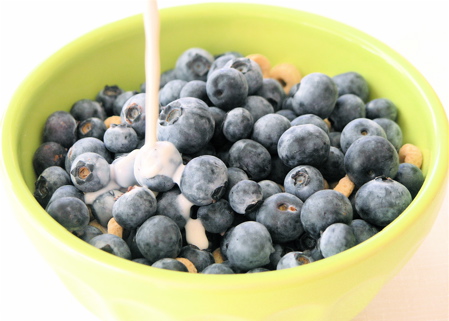
        When blueberries are in season, I can’t resist dumping half a pint of them on top of my bowl of cheerios in the morning. The mixture of flavors and textures is perfection and it’s healthy too. It’s a pleasure that is truly seasonal. I can’t bring myself to buy blueberries that have been flown in from South America. That just seems wrong. So I relish them from during these few short months.

        Ingredients

        1 1/2 cups cheerios
        1/2 pint blueberries
        3/4 cup 2% milk

        Method

        Pour cheerios into bowl.
        Pour washed blueberries on top.
        Pour in milk.
        Enjoy.
        Repeat.

          Categories
          Dessert Uncategorized

          Choo Choo Train Brownies

            Choo Choo Train Brownies
            Choo Choo Train Brownies

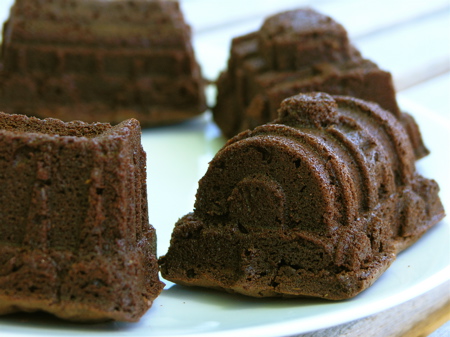
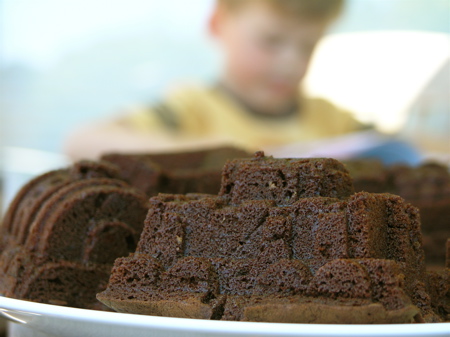
            Okay. My 4-year-old is home for the summer, so how do we spend our time? Why, baking, of course. Today, he begged me to break out the train cake mold I haven’t used since his 2nd birthday. My complaint about cake molds like this one (and Williams-Sonoma has a new cakelette mold on offer every season. Currently, they are selling a caterpillar cakelette mold) is that the little cakes are difficult to ice and come out pretty dry. So today, when confronted with this cake mold again, I immediately thought, “Brownies!” They are the perfect solution because icing them is not a necessity and it’s easier to keep brownies moist (or downright fudgy if you like them the way I do). In fact, this particular mold is the perfect size for fudgy brownies, because the individual train cars are small enough to be single-serving, yet large enough to leave the very center just a little bit under-cooked (when cooked for 25 minutes at 350˚F).

            I’ll be honest. I used a brownie mix as the basis for today’s adventure, with a few minor additions to make the brownies come out the way I like them. I used Marie Callender’s Chocolate Fudge Brownie Mix.

            Marie Callenders Brownie Mix
            Marie Callender's Brownie Mix

            I followed the directions on the package, but substituted melted butter for the vegetable oil (the same measurement) and folded in 3/4 cup of Nestlée Toll House Semi-Sweet morsels.

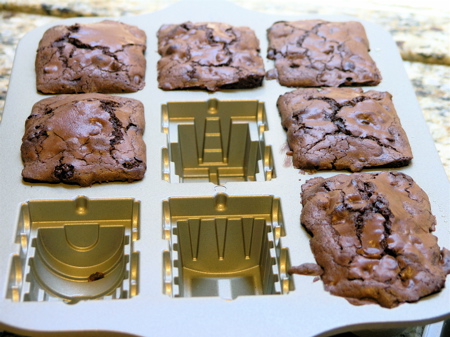
            There was not enough batter to fill every train car, but it didn’t matter.

            Just Out of the Oven
            Just Out of the Oven

            I was pleasantly surprised by the chocolaty quality of the finished product. I usually use Ghirardelli chocolate and go to a lot of fuss, but these were just as good and a lot simpler. My son had a lot of fun helping. Williams-Sonoma doesn’t sell this pan anymore, but Amazon does:

            Click on Photo to see Pan:
            Choo Choo Train Brownies
            Choo Choo Train Brownies
              Categories
              Produce Sides Uncategorized Video How-to

              Tyler Florence’s Creamed Spinach

                I discovered this video a few days after posting my version of Creamed Spinach. There are some similarities. We both use fresh nutmeg. We both add cheese. He adds Parmesan. I add Gruyère. I made a roux first. He thickened his cream by cooking it down. The revelation I want to try next time? Chopping the raw spinach before adding it to the cream. What are your secrets?

                  Categories
                  Produce Sauces Sides Uncategorized Vegetarian

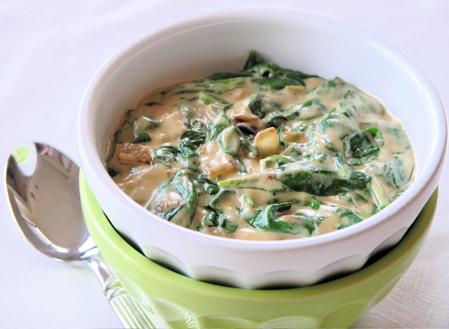
                  Creamed Spinach w/ Gruyère

                    Creamed Spinach
                    Creamed Spinach

                    It’s Gruyère week here at StreamingGourmet. I just can’t get enough of the stuff. I guess it’s also heavy cream week. Sorry! But since I bought these items for the Tarragon Chicken dish the other day, I’m determined not to waste them.

                    I became a fan of creamed spinach while waiting tables at the now defunct Ingleneuk Tea House in Swarthmore, PA. I was a vegetable girl there in 1991. As the main dishes were served, I offered each guest one of the evening’s side dishes from a large bowl I carried from table to table. I regularly ladled out maccaroni and cheese, stewed tomatoes, or creamed spinach. The restaurant served family-style meals from its opening in 1916 until its demise in a fire in 2000. With whom do I share the distinction of having served vegetables at the Ingleneuk? That would be none other than James A. Michener, a 1929 graduate of Swarthmore College. Swarthmore is a dry town, so there never were any restaurants of consequence there. Renato’s pizza and the Ingleneuk were the extent of the culinary scene in the early nineties. Except, come to think of it, for Occasionally Yours, a little café and catering company that served very decent food.

                    So it was at the Ingleneuk that I first learned about adding fresh grated nutmeg to creamy dishes like macaroni and cheese and creamed spinach, an addition I am quick to include in these dishes today.

                    Creamed Spinach
                    2 – 4 servings

                    Ingredients

                    2 Tablespoons butter
                    1 medium yellow onion, diced or 3/4 cup minced shallots
                    (For more flavor, add garlic too – Emeril does)
                    2 Tablespoons all-purpose flour
                    1/4 cup heavy cream
                    1/2 cup whole milk
                    1 6 oz bag pre-washed baby spinach
                    pinch of freshly grated nutmeg
                    1 Tablespoon freshly grated Gruyère cheese
                    Salt and pepper to taste

                    The Cream Sauce
                    The Cream Sauce

                    Method

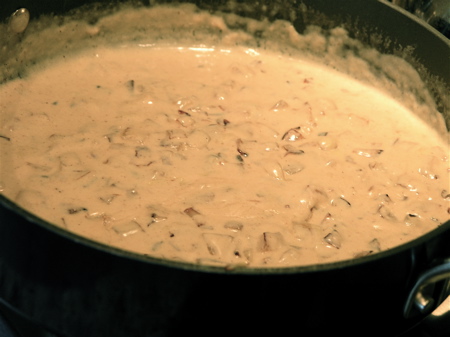
                    1. Heat milk and cream over low heat in a small saucepan. Make sure the milk doesn’t get scalded on start to boil. Meanwhile, melt the butter in a large, deep frying pan over medium-high heat. Add diced onion and sautée until the pieces are starting to turn brown, about 6 minutes. (You could cook them more gently until softened, but I like the nutty, sweet flavor that results from browning them in the butter). Reduce the heat to medium and add the flour. Mix thoroughly with a wooden spoon and allow flour, butter and onion mixture to brown for 3 minutes. This is a roux and is the basis for so many cream sauces (including my favorite mac n cheese sauces).

                    Throw the raw spinach right in the pan
                    Throw the raw spinach right in the pan

                    2. Whisk in the heated milk. Reduce heat and stir continuously while incorporating. Add pinch of nutmeg and blend. Simmer gently until sauce thickens. Add Gruyère and stir until completely melted and blended. Add salt and pepper to taste. Pour the raw spinach directly into the pan (this might break some rules, but it sure simplifies things and worked for me). Stir spinach to coat with sauce and watch the spinach wilt. Once spinach is thoroughly wilted but still a vibrant green color, remove pan from heat and serve.

                    Creamed Spinach w/ Gruyère
                    Creamed Spinach w/ Gruyère
                      Categories
                      Poultry Sauces Uncategorized

                      Chicken w/ Tarragon, Gruyère & Mushroom Cream Sauce

                        Chicken w/ Tarragon, Mushroom and Gruyère Cream Sauce
                        Chicken w/ Tarragon, Gruyère & Mushroom Cream Sauce

                        In the US, when you exit the highway for a rest and a bite to eat, you choose from among several fast food restaurants and maybe an Applebees. In France last month, when we exited the A10 to placate a crying toddler during a drive from Paris to the Loîre Valley, we rolled into a quiet, 12th century stone village named Rochefort-en-Yvelines. It was the kind of village that is shuttered and empty at noon on a Tuesday because everyone is home for lunch. But a brief walk up a cobblestone side street yielded a delightful scene. There, behind a courtyard wall were tables and tables of people enjoying lunch outside. We had stumbled upon the Brigandville Restaurant at the base of L’église Saint-Gilles-et-de-l’Assomption, a church built in the 11th and 12th centuries.

                        Lunch at the Brigandville - Rochefort-en-Yvelines
                        Lunch at the Brigandville
                        Chloe and Gerard
                        Rochefort-en-Yvelines

                        At this wonderful little spot (described so well in a blog post by Chocolat et Lavande here), my husband and I both ordered the Steak au Poivre, but it was the dish I ordered for my son that was truly memorable. It was chicken in a creamy tarragon, mushroom and Gruyére sauce served over wild rice pilaf. I’m pretty sure I ate more it than he did, the poor guy. Since returning home, I’ve wanted to recreate this amazing dish. It’s taken me awhile because I have trouble splurging on Gruyère cheese, which is $18/lb at our market, and I forget to buy fresh tarragon. But everything came together this weekend, so here it is.

                        I used a recipe that I found on the Food & Wine website as the basis for the sauce. Several differences evolved as I tweaked it. They use morels and cremini mushrooms, whereas, I just used regular white mushrooms. I used boneless, skinless thighs instead of chicken breasts. And, the Food & Wine recipe does not call for Gruyère, like mine does.

                        Ingredients

                        1 8 oz package of white mushrooms (I used pre-sliced)
                        1 tablespoon extra virgin olive oil
                        8-10 skinless, boneless chicken thighs
                        Salt and freshly ground pepper
                        2 tablespoons unsalted butter
                        1/2 cup dry white wine
                        1/2 cup chicken stock or low-sodium broth
                        1/2 cup heavy cream
                        1 tablespoon coarsely chopped tarragon
                        1 teaspoon fresh lemon juice
                        1 teaspoon lemon zest
                        1/4 cup grated Gruyère cheese

                        Method

                        1. Heat a large, deep sautée pan over medium high heat. Season chicken thighs with salt and pepper and add them to the pan. They should sizzle right away. Use tongs to open up the thighs and flatten them out. Sautée for about 4 minutes each side. Remove them from pan to a plate.

                        2. Add butter and mushrooms to the pan and sautée mushrooms until they just start to release their liquid, about 4 minutes.

                        3. Add white wine and simmer until reduced to just a couple of tablespoons, about 3 minutes.

                        4. Add chicken stock and simmer until reduced by 2/3, about 6 minutes.

                        5. Add the heavy cream and the tarragon and simmer until the sauce has thickened, about 4 minutes. Add the lemon juice and lemon zest and blend well. Add the grated Gruyère and stir constantly until melted and blended in. Season with salt and pepper.

                        6. Return chicken to the pan. (While the chicken was sitting, it sweat out a lot of juices. I did not add these back into the sauce because I felt I had gotten the balance of sauce flavors just right, but I imagine you could add that juice back in to good effect). Stir to coat chicken and simmer until heated through, about 3 minutes.

                        Serve immediately over rice or pasta.

                          Categories
                          News Sauces Uncategorized

                          Okay. Fork it Over.

                            After
                            ?@#&!

                            Tyler’s missing a fork. A high school senior prank? or an avid fan decorating his dining room with Tyler memorabilia? Police are still investigating.

                            You see, Tyler Florence’s logo contains two forks. Not one.

                            Tyler Florence Logo
                            Tyler Florence Logo

                            Word about the missing fork hit the Twitter waves when Tyler tweeted it last night at about 6:30pm.

                            Tylers 1st Tweet
                            Tyler's 1st Tweet About the Fork

                            Sales clerks at the store today were mystified. They speculate that local high school seniors who are graduating this week have perpetuated a prank on the beloved Mill Valley resident who opened the store only one year ago.

                            Meanwhile, Tyler continues to use Twitter to get the word out and plead for the return of the missing Fork.

                            Tyler Tweets
                            Tyler Tweets
                            Tyler Tweets
                            Tyler Tweets

                            He’s even using Twitpic.

                            Tylers Twitpic Stream
                            Tyler's Twitpic Stream

                            Despite the distraction, Tyler’s busy schedule pressed on as he spent the afternoon in his home kitchen preparing food for a book launch party at the store tonight. And tomorrow morning at 9AM his time (noon EDT), he’ll be cooking something for his Twitterlicious Friday cooking class. I don’t know how he manages it all.

                              Categories
                              Dessert Pizza and Pasta Uncategorized

                              Blueberry Pie

                                Blueberry Pie
                                Blueberry Pie

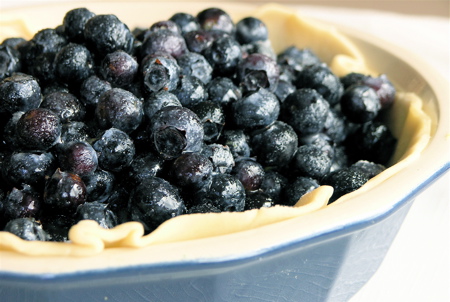
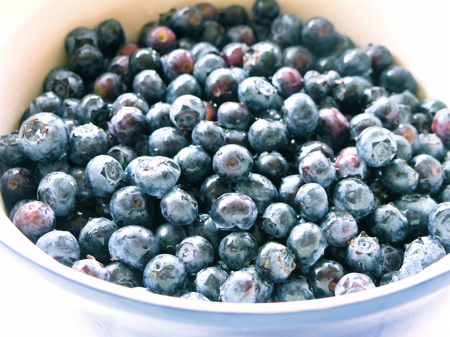
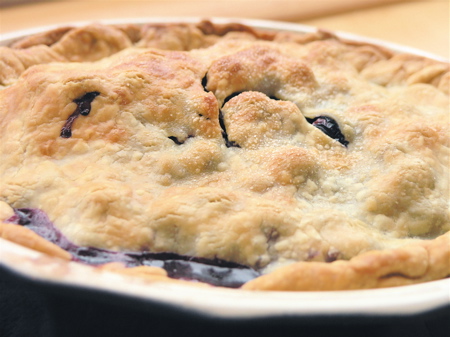
                                I confess. I was at Costco the other day. That’s where I found a 32oz clamshell of California blueberries for $6. I adore blueberries, so I bought them without a second thought. (Actually, I did check to make sure that they were grown nearby, which they were). I had recently also purchased pre-made pie crusts thinking I might make a chicken pot pie, but when I got home and saw them in the refrigerator, it was only a matter of minutes before I was putting them together with the blueberries in pie formation.

                                I’ll admit, I’m intimidated by making my own crust. I do do it, but on this busy day, the thought of being able to basically dump 2 lbs of blueberries into a pre-made crust and have a pie an hour later was totally satisfying.

                                I consulted my well-used copy of Mark Bittman’s How to Cook Everything to find a recipe. I was relieved to have the fresh lemon on hand that it calls for. I’ve also become a big fan of grating my own nutmeg with a microplane grater, by the way. So sure enough, my idea of making a pie really fast was going to become a reality with little stress or strain.

                                Since I’m reprinting the recipe here, I hope you’ll
                                1. Buy the book
                                2. Follow @bittman on Twitter
                                3. Subscribe to Mark Bittman’s NYTimes RSS Feed and subscribe to the NYTimes
                                4. Watch Mark Bittman’s videos
                                5. Otherwise throw love and money at Mark Bittman

                                It’s funny. Now that I’ve watched so many of Bittman’s videos, I can hear his voice in my head when I read the instructions in his cookbook. It’s such a relaxed and reassuring voice, like, “Anyone can cook, and most everyone should.” (which is the first sentence of the Introduction to the 1998 edition of How to Cook Everything).

                                Blueberries
                                Blueberries

                                Ingredients

                                5 cups blueberries, picked over, briefly rinsed, and lightly dried
                                1/2 to 1 cup sugar, depending on your taste and the sweetness of the berries, plus a little for the top of the pie
                                2 tablespoons cornstarch or 3 tablespoons instant tapioca
                                Pinch salt
                                1/4 teaspoon ground cinnamon
                                Pinch ground allspice or nutmeg
                                1 tablespoon freshly squeezed lemon juice
                                1 teaspoon minced lemon zest (optional)
                                1 recipe Pie Shell for a Two Crust pie (I used Pillsbury pre-made shells)
                                2 tablespoons unsalted butter, cut into bits
                                Milk as needed

                                Method

                                1. Gently toss the blueberries with the sugar, thickener, salt, and spices. Stir in the lemon juice and optional zest and pile into the rolled-out shell, making the pile a little higher in the center than at the sides. Dot with butter. Cover with the top crust. Decorate the edges with a fork or your fingers, using any of the methods illustrated on page 686 (of How to Cook Everything). Refrigerate while you preheat the oven to 450˚F.

                                2. Place the pie on a baking sheet and brush the top lightly with milk; sprinkle with sugar. Use a sharp paring knife to cut two or three 2-inch long vent holes in the top crust; this will allow steam to escape. Place in the oven and bake for 10 minutes. Reduce the heat to 350˚F and bake another 40 to 50 minutes, or until the pie is golden brown. Do not underbake. Cool on a rack before serving warm or at room temperature.

                                Blueberry Pie
                                Blueberry Pie
                                Home page basic 300 x 250
                                  Categories
                                  Produce Sides Uncategorized Video How-to

                                  Sweet Potato French Fries

                                    Sweet Potato French Fries with Roast Beef
                                    Sweet Potato French Fries with Roast Beef

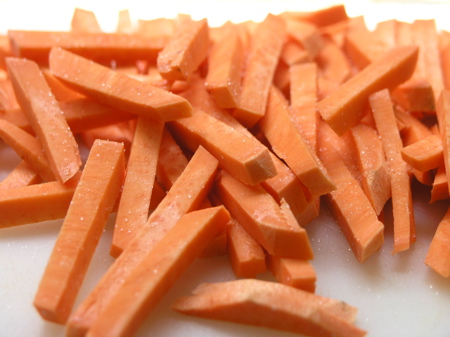
                                    While making sweet potato chips the other day (see that post here), I decided to use one of the other attachments from my new mandoline and make french fries as well. Once again, I was surprised and delighted by how easy and quick it was to turn one giant yam into a pile of matchstick fries.

                                    After hestitating for a long time (“Mandolines are too expensive,” I thought. “They’re too dangerous.”) I purchased my Swissmar Borner V Slicer Plus for only about $40 and I learned that it works great and has many built-in safety features. Click on the photo to learn more.

                                    Mandoline Magic
                                    Mandoline Magic

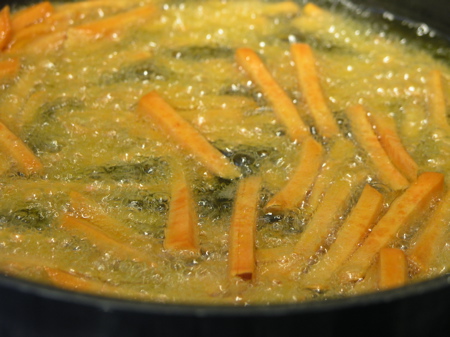
                                    As usual, I was in a rush, so I didn’t salt these for the recommended 30 minutes. I just salted them and threw them into olive oil that I had pre-heated to nearly smoking. It only took about 5 minutes before they looked done.

                                    Frying in Olive Oil
                                    Frying in Olive Oil

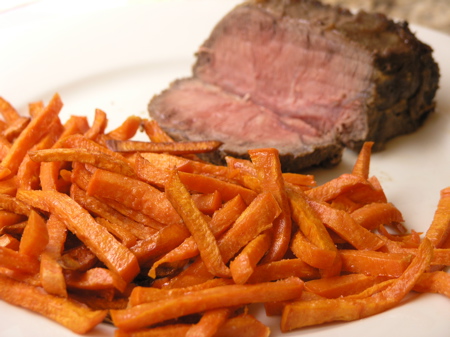
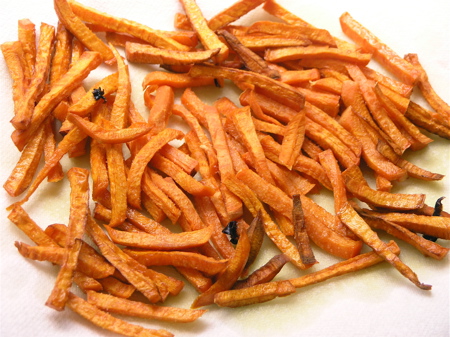
                                    With tongs, I transferred them to a paper-towel lined plate and dabbed them to remove the excess oil. I salted them again and enjoyed them with leftover roast beef from the night before. Scroll down to watch the recipe video I used for the roast beef.
                                    Although they tasted great, the sweet potato fries weren’t super crispy, so I did a little research. There’s a thread on CHOW that recommends soaking them in water first, then dredging them in cornstarch and then frying. I’m definitely going to try that next time because several people who tried this method concurred that it was a big success. You can read that thread here.
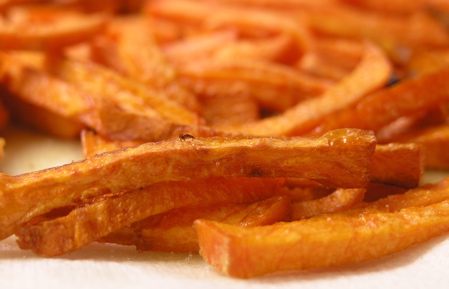
                                    Remove them from oil to a paper towel
                                    Remove them from oil to a paper towel

                                    Even without the extra cornstarch step, these fries were super yummy. The texture reminded me a bit of the French fries at In & Out Burger, not super crispy, but still good. And since they’re sweet potatoes, they’re packed with extra nutrients, right?

                                    Sweet Potato French Fries
                                    Sweet Potato French Fries

                                    Now for the roast beef video. In this video, they coat the beef with grainy mustard before roasting it. Yum.

                                      Categories
                                      Uncategorized Video How-to

                                      How to Embed a Video Collection

                                        Want to embed videos quickly on your food blog? In just a few minutes, I created this playlist at StreamingGourmet and then used the Grab Widget Code tool to create this player. Embed it on your site or create your own playlist to embed.You can also embed individual videos.

                                        Blog Widget by LinkWithin