When StreamingGourmet first started back in 2008, it was primarily a video site, hence the word, “streaming.” Today, I return to those roots by sharing this video collection of Julia Child clips. She would have turned 100 this Wednesday, August 15. Bon Appétit!
On a recent visit to Salisbury, MD, I had the chance to visit the Perdue Innovation Center where they are secretly developing the next great thing in chicken. Stay tuned for more. In the meantime, you’ll laugh out loud when you watch the vintage commercial.
I have 2 kids. A boy who is 7 and a girl who is 4. We’re lucky. They are not overweight. They are healthy. We work hard to put a variety of foods in front of them every day and to encourage fresh vegetables and fruits, whole grains and low-fat protein. We have meatless meals and Dad is a vegan. So what am I doing taking my kids to McDonald’s, you ask?
McDonald’s is on a mission. Just ask Scott Rodrick. He has spent more than 20 years building a franchise of more than a dozen McDonald’s locations in San Francisco. His father was one of Ray Kroc’s earliest franchisees, opening the first McDonald’s in South Florida in 1950. If anyone has witnessed firsthand the changes that have taken place at the McDonald’s corporation, it’s Scott Rodrick.
He was generous enough to give a few food bloggers/writers a tour of one of his San Francisco McDonald’s and to explain just what’s been going on over the past few years. The tour, and the menu sampling that occurred afterwards were eye-opening for me. Now when I’m on the run looking for a healthy snack, I actually think, McDonald’s. Crazy. Right?
Here’s why it’s not as crazy as it sounds:
1. McDonald’s sources its fresh ingredients from the same places my supermarket does. Bagged Greens? Yes. Blueberries from the Central Valley? Done. Major Brand Apple Slices? You got it.
I assume that the fresh blueberries they’re putting on top of the Blueberry Banana Nut Oatmeal won’t be on the menu year-round, but they’re here now. These aren’t freeze-dried blueberries reanimated when hot water touches the oatmeal. These are true, fresh blueberries delivered almost daily to your local McDonald’s and sprinkled on top after the oatmeal is ready. See below for more about what the inside of a McDonald’s walk-in refrigerator is like and how the produce is stacked neatly in small packages. Just like home, but better.
2. Egg McMuffins are made with eggs that are cracked right onto the griddle.
I know. Right? The cooks crack the egg into a little nonstick fry ring like the kind you can buy at Williams-Sonoma. Want to cut down on the fat and calories in an egg McMuffin? Ask them to hold the cheese or hold the ham or both. Also, the English Muffin part has Margarine in it. You could ask about not using the Margarine, but I think it is literally in it, so remove one of the pieces of bread and eat it open top. Altogether, the one pictured here contains 300 calories and 12 grams of fat. No cheese brings it down to 250 calories and 9 grams of fat. I can live with that once in awhile.
3. My kids eat the apple slices and don’t finish their fries.
In early 2012, McDonald’s modified the happy meal and reduced the french fry serving size to 1 oz (100 calories). They added a bag of apple slices to every meal too. In San Francisco, to comply with a “no free toys” law, they started charging 10 cents for the toy and donating the proceeds to build a new Ronald McDonald house at UCSF. Not a bad solution.
We usually substitute bottled water (for a modest surcharge) for the milk. And you can also request 2 bags of apple slices instead of the 1 bag each of apple slices and fries. My kids are normal “kid eaters”, but they have really turned on to apple slices and are happy to forgo the fries. Worried about salt? Ask for your fries salt-free. It takes a little longer to get the meal, but fries are made every 7 minutes at McDonald’s, so you can get yours fresh, hot and salt free and never wait longer than 7 minutes.
4. Sure the strawberry banana smoothie has a lot of sugar in it, but so do smoothies everywhere else and the ones at McDonald’s have the most vitamin C. For the record, my kids order the small strawberry-banana smoothie which is a 12 oz drink clocking in at 210 calories.
This is a special treat for my kids and one that replaces getting a milkshake or an ice cream cone (something we rarely, almost never do). Given that, the 44g of sugar 1g of fat and 210 calories don’t seem so bad.
Ever wonder just how much sugar there is in the fruit smoothies you’re out there consuming? Well, I decided to compare Jamba Juice, Starbucks and McDonald’s. Each offers a 16 oz strawberry banana smoothie. Here is how they compare:
16 oz Strawberry Smoothie
16 oz Strawberry Alive Smoothie
16 oz Strawberry Banana Smoothie
Calories: 300 cal
Total Fat: 2g
Total Carbs: 60 g
Dietart Fiber: 7g
Sugars: 41g
Protein: 16 g
% DR Vitamin C: 35%
Calories: 250 cal
Total Fat: 0g
Total Carbs: 50 g
Dietart Fiber: 2g
Sugars: 42g
Protein: 11 g
% DR Vitamin C: 60%
Calories: 260 cal
Total Fat: 1g
Total Carbs: 60g
Dietart Fiber: 3g
Sugars: 54g
Protein: 2g
% DR Vitamin C: 90%
5. The signature salads totally rock, as long as you’re not going to try to eat one in the car while driving.
McDonald’s doesn’t use preservatives in the bagged salad greens and they are delivered in regular sized bags. When you order a salad, there is a cook in the back who assembles it then. They put greens into a bowl, then sprinkle tomatoes on top, the beans, the little tortilla strips and finally, they slice a freshly grilled piece of chicken and place it on top.
Looking to control calories and fat with your salad? Skip the croutons and drizzle half of the dressing packet over the salad instead of the whole thing. Make sure you get the grilled chicken, rather than the crispy chicken.
6. The fruit and walnut salad is a great snack for the kids. It is the most hidden item on the menu. Even most employees don’t realize it’s there, but if you ask for it by name, they can find it.
The vanilla yogurt is yummy and low fat and has helped my children get over their fear of plain yogurt. This snack demonstrates to them that fruit, nuts and yogurt are a satisfying snack. It’s easy to handle in the car too.
7. The Honey Mustard Snack Wrap with Grilled Chicken is only 6 Weight Watchers® Points Plus™. I can order that when I’m driving and can’t order a signature salad.
This was a standby emergency snack the last time I did Weight Watchers. I lost 18 lbs. It helped me get over my double quarter pounder with cheese obsession.
8. The Fruit & Yogurt Parfait is a great dessert or snack. At only 150 calories and 2g of fat, what’s the big deal? It tastes great.
Another item to help introduce your children to the concept of fruit and plain yogurt. You can transition them over to organic ones that are less sugary once you convince them it’s a yummy breakfast or snack item in the first place.
9. You can ask for stuff just how you like it. No salt? Check. No mayo? Check.
Want another option that really doesn’t set you back calories and fat-wise? Try the Premium Grilled Chicken Classic Sandwich, but order it without the mayo and you’ll cut 5.5 grams of fat off of the total. Wonder how I know this? The McDonalds.com website features a nifty tool where you can deselect ingredients from any item on the menu and it will retally all of the nutritional information right in front of your eyes. See the Premium Grilled Chicken Classic Sandwich Nutrition tool here. The tool is a little buried. You will have to click on a little red plus sign next to the word Nutrition to get the tool to slide out. Once you get access, you’ll be amazed at how effectively you can cut fat and calories by eliminating mayo-based sauces and cheese. I also recommend eliminating half of a bun whenever possible.
10. The kitchens and pantries at McDonald’s are immaculate.
Photo taken by Blogger on a McDonald's tour in Mystic, CT -Photo Credit: Junior Reporter Bryson – See his post here
I toured a downtown San Francisco location right after the lunch-hour rush and everything was clean as a whistle. I expected the walk-in refrigerators to be stacked floor to ceiling with product, but that’s just not the case. Their walk-in fridge was more orderly and clean than my fridge at home. McDonald’s receives almost daily shipments, so no one shipment has to be too large. Fresh produce is picked at the farm, triple washed and delivered to McDonald’s locations within just a couple of days.
In the walk-in, we saw eggs in cartons by the dozen. A few bags of fresh greens, Maybe 10-15 fresh packs of individual serving blueberries and so on. If I hadn’t seen it for myself, I might not have believed it. We weren’t allowed to photograph it, but a nice kid from Connecticut was allowed to photograph it. His photo looks exactly like what we saw.
I’m impressed that McDonald’s is making such a huge effort to improve nutritional quality of their foods and that they are willing to invite small groups of people into their kitchens to see their efforts firsthand. Not every fast food chain is cutting salt and fat. Go to Carl’s Junior and get a The Amazing Grilled Cheese Bacon Six Dollar Burger™ and it will set you back 80g of fat!! and over 1000 calories! And that’s just for the sandwich. On the McDonald’s menu, the most fat grams you’ll encounter are about 40g for many of the bigger cheeseburgers. That is more fat that you should have in a day, so if you’re going to go the cheeseburger route, you gotta do it sparingly. The Double Double I like at In-And-Out Burger has 41 grams of fat, so even though everyone praises In-And-Out, they’ve got the same fat content as a McDonald’s Double Quarter Pounder.
All this to say, you can make healthy choices at McDonald’s if you try and you’re aware. And I’m surprised to find that it’s easier than ever and easier than elsewhere to do that for myself and my kids at McDonald’s.
I recently spent an evening with her since we share a mutual friend, and she told me that the Pumpkin Ricotta Cheesecake in the book is one of her favorites, so I made it for my annual Halloween Dinner Party (more recipes to follow from that event). It was divine. The flavor of the cheesecake is subtle and sophisticated. It’s not too sweet, but it still retains the yummy flavors reminiscent of your favorite pumpkin desserts.
Marisa Churchill
The book is full of fabulous recipes and Marisa really takes the time to explain the techniques. She provides sugar-free alternatives for each dessert as well as all of the nutritional information you need to stay on track (calories, grams of fat, etc.) and stay healthy. Get this book in time for the holidays! There are lots of cookie recipes to satisfy all of your Christmas cookie-baking needs!
For the Crust
Nonstick pan spray
6 oz honey graham crackers (about 10 cookie sheets)
2 Tbsp 1% or 2% milk
For the Cheesecake
8 oz (1 cup) reduced-fat Kraft cream cheese
1 cup sugar
1/3 cup nonfat sour cream, at room temperature
2 large eggs, at room temperature
2 egg whites from large eggs, at room temperature
1 tsp pure vanilla extract
2/3 cup canned pumpkin puree
1/2 tsp ground cinnamon
1/4 tsp ground nutmeg
1/4 tsp ground ginger
1/4 tsp salt
1/8 tsp ground cloves
1 cup plus 2 Tbsp reduced-fat ricotta cheese
2 Tbsp large pecan pieces, toasted for garnish (I used hazelnuts)
2 Tbsp pomegranate seeds for garnish
Method
For the crust
1. Coat 9-inch springform pan with pan spray. Break up the graham crackers and process them in a food processor until they are reduced to very fine crumbs. Add the milk and process for 30 seconds, or until the crumbs hold together when you squeeze them in your fist.
2. Transfer the mixture to the prepared pan. Press the crumbs firmly over the bottom and slightly up the sides of the pan, using your finger-tips to compress them.
For the cheesecake
1. Preheat the oven to 325˚F with a rack in the lower third of the oven.
2. Using an electric mixer, beat the cream cheese and sugar on medium speed for 2 to 3 minutes, until it is completely smooth and well blended. (If using a standing mixer, use the paddle attachment). Add the sour cream, eggs, egg whites, and vanilla; mix for 2 to 3 minutes longer to blend well. Scrape down the sides of the bowl as needed. Add the pumpkin, cinnamon, nutmeg, ginger, salt, and cloves and mix for 1 minute longer. Add the ricotta and mix just until it is incorporated.
3. Pour the batter over the crust and bake for 50 to 60 minutes, until the cheesecake jiggles only slightly in the center when you gently shake the pan. (If the cheesecake browns too quickly or begins to crack, tent a piece of aluminum foil over the top, without touching the filling, for the remaining baking time).
4. Transfer the pan to a wire rack and let it cool for 1 hour. Then run a knife around the edge of the pan if needed to loosen the cheesecake, remove the outer pan ring, and transfer the cake, on its base, to a serving plate. Cover the cake loosely with plastic film and refrigerate for at least 3 hours or overnight.
To serve: Cut the cheesecake into 12 wedges, and garnish them with the toasted pecans and pomegranate seeds.
Refrigerate any leftover cheesecake, tightly covered, for up to 3 days.
Nutritional Information:
Calories per serving: 221
Grams of fat: 9.5g
Watch Marisa whip up a Chocolate Mousse with Olive and Sea Salt:
You say Garbanzo Bean, I say Chickpea, but in India, it is “Chana.”
Chana Masala is one of the most popular Indian dishes. Since it’s vegan and spicy, it falls into the category of “dishes my husband likes.” I hope you enjoy it too.
Chana Masala Serves 4-6
Ingredients
1 1/2 tablespoons vegetable oil
1 whole cardamom pod
1 whole cinnamon stick
1 whole Bay Leaf
A few whole cloves
1 tsp whole cumin seeds
2 medium onions, diced
2 cloves garlic, minced
2 teaspoons grated fresh ginger
1 teaspoon ground turmeric
1 15-ounce can of diced tomatoes
chopped green chilis
1 teaspoon garam masala
1/4 tsp chili powder
1/2 tsp ground coriander
1/4 tsp turmeric
1/2 tsp cumin powder
2 (15-ounce) cans chickpeas, rinsed and drained
Salt to taste
Squeezes of lemon juice
Fresh cilantro to garnish
Method
1. Heat oil in a large skillet. Add whole spices (cadamom pod, cinnamon stick, Bay Leaf, whole cloves, cumin seeds) to the pan and sautée for 2 minutes over medium-high heat. Add onion and sautée until softened and browned, about 8 minutes. Add garlic, ginger and turmeric. Stir to combine. Sautée for a minute or two.
2. Add the canned tomatoes and green chilis. Simmer until thickened slightly, about 3 minutes. While tomatoes are simmering, mix together the garam masala powder, chili powder, ground coriander, turmeric, and cumin powder. Add this mixture to the simmering tomatoes and stir to combine.
3. Add the chickpeas. If the dish is getting dry, add up to 2/3 cup of water. Simmer uncovered for 5-10 minutes or until chickpeas are soft, but not mushy. Season with salt.
4. Fish out the Bay Leaf and cinnamon stick. Serve over rice. Squeeze lemon on top and garnish with lots of fresh cilantro.
Here is a version of Chana Masala demonstrated by ShowMeTheCurry. Their version involves using tea bags to enhance flavor and color. Cool!
In late 2009, All-Clad launched a new line of cookware that is available only at Williams-Sonoma (online and in-store). As part of the launch, All-Clad contacted food bloggers and asked them to test and review one pan of their choosing. I chose to test the 3-quart sauté pan.
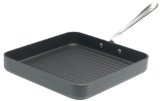
I’ll be honest. I normally don’t splurge on All-Clad. Before receiving the complimentary sauté pan in the mail, I owned just one All-Clad pan; it is one I would not want to go without, mind you, but still. It is the All-Clad LTD 11-Inch Square Nonstick Grille Pan, available at Amazon.com. It enables me to grill indoors and simplifies the cleanup immeasurably. I love it.
But this is my first time cooking with a stainless steel-interior All-Clad pan. The d5 technology improves upon All-Clad’s previous pans, because they’ve welded together not 3, but 5 layers of metal to create an incredibly stable, evenly-heating pan. Representatives from All-Clad assured me that this pan heats so evenly and holds heat so efficiently that I would not need to turn up my gas burner to high. In fact, they warned against it. I wanted to put this notion to the test by cooking something that requires high, even, sustained heat, so I decided to sear scallops.
All-Clad d5 Sauté Pan
Searing Scallops to Perfection
The trick to getting the perfect seared scallop is to start with a well-heated pan and ensure that your scallops are completely dry. Remember when you learned in grade school that the boiling point of water is 100˚C? Well, that means that water cannot reach a temperature higher than that. Steam can, but water can’t. So if the scallops are full of water, they’re going to be stuck at a measly 100˚C, which is not hot enough to produce a nice, caramelized sear. So pat those babies dry. And, if possible, buy scallops that haven’t been sitting in a brine getting water-logged in the first place. That means you’ll need to ask the man behind the fish counter for “dry scallops.”
Now that you’ve patted the scallops dry, season them with a bit of sea salt and freshly ground pepper on both sides and heat the pan. I decided to heat the d5 pan over medium-high heat (instead of high heat), because the All-Clad representatives were so convincing that the new technology warranted it. After the pan itself was good and hot, I added grapeseed oil, (because of its neutral flavor and high smoke point) and let it pre-heat as well. Sure enough, the pan performed perfectly. I knew that the temperature was right as soon as I added the scallops and I heard just the right kind of sizzle. The scallops got a nice sear going right away and the pan did not drop its heat when the three were added. Also, all three seared at the same rate.
Brown for about two minutes on first side
There was enough oil in the pan to just coat the bottom entirely and I added only three scallops so that they wouldn’t get too crowded. If you crowd scallops in the pan, they will steam each other which prevents them from getting a good, crispy sear.
After about 2 minutes, I flipped the scallops and saw the sear I was hoping to see. I let them cook for only another minute or two. It’s important not to overcook scallops and they cook very quickly. They should still be ever-so-slightly-translucent in the middle when you take them off of the heat. If you overcook them, they will become rubbery. So after about 90 seconds, I removed them from the heat and transfered them to a paper-towel-lined plate.
Be careful not to overcook scallops
Since I wanted to serve the scallops over pasta with a garlic, white wine sauce, I set to work preparing the sauce in the same pan. (The pasta had already cooked and was draining in the colander). Here’s how I pulled together the sauce in just a few minutes:
Garlic and White Wine Sauce Serves 1-2
Ingredients
1 Tbsp butter
2 cloves garlic, peeled and finely chopped
1/3 cup dry white wine
Salt and pepper to taste
1 Tbsp fresh lemon juice + a few scrapes of lemon zest
1 Tbsp fresh parsley, chopped
Method
1. Reduce heat in the pan. You don’t want to burn the garlic. Add the tablespoon of butter and let it melt. Add the garlic and sauté until fragrant, about one minute. Add the wine and simmer until thickened, about 3-4 minutes. Add salt and pepper, the lemon juice and zest and toss. Add about 2 cups of cooked pasta. Toss to coat. Remove from heat. Toss in most of the parsley then pour onto a plate. Place scallops on top. Garnish with additional parsley. Enjoy immediately.
Scallops seared to perfection
So, in conclusion, I do recommend splurging on a d5 pan. Pick one you know you’ll use again and again for recipes that require a little finesse. If you want your pan to be just the right, even temperature while sautéing meat or vegetables or whipping up fragile creamy sauces, I do think it’s worth spending a little more for a pan that will last a lifetime. I was surprised and delighted to learn that these pans are dishwasher safe. And, the new, larger handles even stay cool while you’re cooking. What’s not to love?
Disclaimer: While I did not receive money to write this review, All-Clad did provide me with a complementary pan and asked that I participate in an informational web conference, where I had an opportunity to share my feedback and ask questions. I was not required to write this post.
Want to know more about how to get the temperature of your pan just right? Watch this instructional video from Rouxbe.com. I was totally mesmerized when I watched it.
For more of the highest quality instructional videos are around, visit Rouxbe.com. Rouxbe offers over 200 step-by-step video recipes and about 250 cooking tip videos with their free basic membership. There are also a few free sample cooking school lessons to try out the cooking school content but the rest of the cooking school requires a Premium Membership. Try it free for 14 days.
It’s day six of my blogging event: “How to host an elegant, flavorful, vegan, gluten-free dinner party” in which I feature recipes created by the wonderful Viviane Bauquet Farre of food and style. With husband and friends avoiding meat, dairy and gluten, I knew I needed to turn to my friend Viviane if I was going to pull off an elegant birthday celebration. Not all of her recipes are vegan or gluten-free, but she consistently uses fresh, seasonal produce to create inspiring, yet simple dishes. Today’s installment features the final course: dessert.
Strawberries are in season again in California so I was able to purchase an entire flat of strawberries at the Mill Valley Farmer’s Market for $20 bucks. That’s 12 pints, people. Love it. So I made strawberry sorbet, strawberry ice cream, strawberry sandwiches, you name it.
Strawberries
To make the sorbet, I had to take a plunge I’ve been contemplating for years. I bought a Cuisinart ice cream machine.
I’ll be able to make sorbet, ice cream, frozen yogurt and other frozen desserts (remember sherbet)? This is going to yield fun all summer long. And I can’t wait to make pumpkin pie ice cream next fall.
But back to the sorbet.
I learned a few things about my new ice cream maker. The insulated “chilling chamber” needs to be in the freezer overnight before using it. The model I purchased (click on the photo above) came with two chilling chambers and at first I thought, “What do I need two for?” Well, as it turns out, it’s helpful to have two because if you use one to make ice cream, then it’s at least a day before you can use it again. Even still, I thought, when am I going to need to make more than one batch of ice cream in a 24-hour period? Well, for the dinner party (12 guests), I felt compelled to make two batches and I wouldn’t have been able to do it without the extra chilling chamber.
Viviane demonstrates how to make the sorbet in this video. She uses a food processor to purée her strawberries, but I did it in a blender.
I held off on adding Grand Marnier. The flavor of the strawberries jumped out of the dish all by themselves. The maple syrup made it just sweet enough. I served mine with a little piece of dark Sharfenberger chocolate: the perfect complement.
1 1/2 lbs ripe strawberries – washed and hulled
1 tablespoon lemon juice
1/4 cup Grand Marnier
2/3 cup maple syrup (grade A or B)
Mint leaves as garnish
Method
1. Place the strawberries, lemon juice, Grand Marnier (optional) and maple syrup in the bowl of a food processor (I used a blender). Process at high speed with a steel blade until ingredients are very smooth, about 2 to 3 minutes. Transfer to a bowl, cover and refrigerate until well chilled, about 2 hours to overnight in the refrigerator or 45 minutes in the freezer.
2. Pour the chilled strawberry purée into the ice-cream maker and freeze according to the instructions of your ice-cream machine.
3. Scoop sorbet in glass bowls or cocktail glasses and top with fresh mint leaf. Serve immediately. (Or put in an airtight container and store in the freezer. You may need to allow the sorbet to soften for about 10 minutes for trying to scoop it and serve).
It’s day four of my blogging event: “How to host an elegant, flavorful, vegan, gluten-free dinner party” in which I feature recipes created by the wonderful Viviane Bauquet Farre of food and style. My husband and several of his friends have transitioned to a vegetarian diet and several of them are also avoiding dairy and gluten, so when I decided to celebrate G’s birthday with a dinner party, I knew I needed to turn to my friend Viviane who features such refined recipes which also happen to be meat free. Today’s installment is the third of that five-course meal. For the next course, you’ll just have to check back tomorrow.
So far in this dinner, we’ve enjoyed cucumber and avocado ceviche, and slurped down an artichoke soup with truffles on top. Now we’re ready for a scrumptious early Spring salad, so Viviane’s Roasted Asparagus with Grapefruit is just the thing. Here’s what I learned by making this recipe: It is soooo easy to make and it is easy to prepare ahead of time, when it was time for this course, I could truly relax. All I had to do was plate everything and drizzle it with oil.
Roasted Asparagus
The other revelation I had while making this recipe is just how easy it is to roast asparagus. Brush the spears with a little olive oil, pop them into an oven preheated to 500˚F and 7-10 minutes later you’ve got roasted asparagus. No careful chopping, no peeling, no long wait. It’s like fast food. Well, sort of.
Brush with olive oil, then roast
Watch Viviane’s video for more tips on roasting asparagus and to watch her demonstrate how to prepare grapefruit slices with no pith or membrane in sight. Again, now that I’ve done it once, I want to do it this way all the time. My kids love eating citrus in our house now because I prepare for them this way now.
1 large Texas Rio Star grapefruit
1 1/4 lbs asparagus spears – washed and stem snapped
2 tablespoons extra virgin olive oil
1/4 teaspoon sea salt or to taste
2 tablespoons pine nuts
4 teaspoons lemon infused oil as garnish
A bit of lemon zest for garnish
freshly ground black pepper to taste
1 large jellyroll pan
Method
1. Peel the grapefruit down to the flesh, Quarter lengthwise and remove the thin membrane around each slice, being careful not to break them. Transfer to a bowl and set aside.
2. If your pine nuts are raw, preheat the oven to 425˚F. Place the pinenuts on a baking sheet and roast for about 2 minutes, but watch carefully through the window to make sure they don’t burn. Set aside.
3. Increase oven temperature to 500°F. Move rack to the top of the oven. Spread the asparagus on a jellyroll pan. Brush with the olive oil and sprinkle with the salt. Bake for 7 to 10 minutes (depending on their size) until the tips begin to brown. Remove from pan and let cool for 10 minutes.
4. Place a bundle of asparagus in the center of each plate. Top with 3-4 grapefruit slices and sprinkle with the pine nuts. Drizzle with the lemon oil and finish with a bit of fresh lemon zest and freshly ground black pepper to taste. Serve immediately.
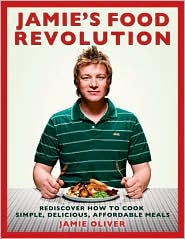
For my birthday in January, my husband gave me a copy of Jamie Oliver’s new book Jamie’s Food Revolution: Rediscover How to Cook Simple, Delicious, Affordable Meals. At the time, I didn’t realize that it was going to be part of a whole movement he is trying to ignite here in America. A few months ago, when I first looked at it, I thought, ‘These are easy recipes with real food you’d want to eat,” and I put it on the part of my kitchen counter reserved for cookbooks that I actually use. Now that I’ve seen the television show he has created, I’ve been inspired to use it even more. I’ll be blogging the results over the next couple of weeks.
You can pick up a copy of the book at Amazon, by clicking here:
Jamie Oliver hopes to change the way American children eat by helping school systems revamp their lunch programs and families revamp what’s for dinner. It’s a daunting task, but he’s been successful in his native Britain already. I was drawn to this chicken dish, because I love leek and mushroom cream sauces. I also happened to have all of the ingredients on hand. Jamie makes the process easy by keeping the recipe to one pan and the cooking time to about 20 minutes.
¼ cup long grain or basmati rice (I used brown basmati rice)
1 large leek
a big handful of crimini or oyster mushrooms (I used pre-sliced white mushrooms)
2 chicken breasts (I used the equivalent amount of chicken tenders from the butcher)
olive oil
a pat of butter
a glass of white wine
freshly ground black pepper
a bunch of fresh parsley
1¾ cups heavy cream
1 lemon
Instructions
Pour boiling water from the kettle into a 2 quart saucepan, place on a high heat and add a pinch of sea salt. Add your rice, bring back to a boil, then turn the heat down slightly. Cook for the length of time given in the instructions on the package.
Cut both ends off the leek, quarter lengthways, slice across thinly, then wash well under running water. Slice the mushrooms. Slice the chicken breasts into little, finger-size pieces.
Put a large frying pan on a high heat and add a good lug of olive oil and a pat of butter. Add the leek to the pan with the white wine, a small glass of water, and a good pinch of salt and pepper. Let it bubble away for 5 minutes, covered loosely with a piece of aluminum foil. Meanwhile, finely chop the parsley, stalks and al. Remove the foil and add the chicken strips, most of the parsley, the cream, and the mushrooms. Stir, bring back to a boil, then turn the heat down to medium and simmer for 10 minutes. Drain your rice. Just before serving, cut your lemon in half and squeeze the juice of one half into the stroganoff. Season to taste.
Spoon some rice onto each plate and top with the stroganoff. Scatter with the rest of the chopped parsley. Serve with the other lemon half, cut into wedges.
After having dinner with a bunch of friends last weekend, where the conversation centered around health and sustainable eating, my husband decided it was time to make the move towards vegetarianism that had been on his mind for some time. So, while at the public library the next day, I checked out a stack of beautiful vegetarian-leaning cookbooks. One of them was Ivy Manning’s The Adaptable Feast: Satisfying Meals for the Vegetarians, Vegans, and Omnivores at Your Table. Casting about for a recipe that would use ingredients I had on hand, including potatoes and cheese (always on hand in our household), I found an inspired variation on a tried-and-true favorite: the twice-baked potato.
Since this version calls for potatoes and cabbage, the author, Ivy Manning describes it as the perfect vegetarian option for a St. Patrick’s Day feast. Recently, in her own recipe blog, Ivy’s Feast, she wrote about another twice-baked potato variation that would also be appropriate for St. Patrick’s Day: Twice Baked Irish Potatoes with Kale and Stout Onions. Yum. And she even made a cooking video to boot. See it here: