I’ve now made this salad two days in a row. Our family just can’t get enough of it. It takes about 5 minutes to throw together and makes no mess. It’s vegan. It’s gluten-free. It’s simple and it’s yummy.
It makes me think of something I heard Thomas Keller say when I saw him speak at a TimesTalk event this week in San Francisco. He said, “Fine cuisine in New York City is all about technique. In California, it’s all about the amazing product we have here.” Even though the ingredients in this salad are pretty humble, it benefits from the fact that I am throwing in these juicy, fresh, heirloom grape tomatoes and super fresh cilantro (a personal favorite of mine). There is no technique to this salad. It’s all about letting the ingredients speak for themselves and I’m okay with that.
Photo Credit: Stepanie Im - Click on Photo for info
1 16oz (1lb) bag of frozen corn, thawed (or kernals from 3 blanched ears of corn)
1 15 oz can black beans, rinsed well
1 shallot, minced finely, (about 2 Tbsp)
1/2 of one green bell pepper, diced finely, (about 3 Tbsp)
1/2 bunch fresh cilantro, chopped, (about 4 Tbsp)
1/2 pint grape tomatoes (I used heirloom grape tomatoes), sliced in half
2 tsp ground cumin
Method
1. Mix all of the ingredients in a large bowl and toss gently. Enjoy.
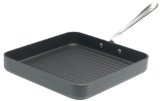
In late 2009, All-Clad launched a new line of cookware that is available only at Williams-Sonoma (online and in-store). As part of the launch, All-Clad contacted food bloggers and asked them to test and review one pan of their choosing. I chose to test the 3-quart sauté pan.
I’ll be honest. I normally don’t splurge on All-Clad. Before receiving the complimentary sauté pan in the mail, I owned just one All-Clad pan; it is one I would not want to go without, mind you, but still. It is the All-Clad LTD 11-Inch Square Nonstick Grille Pan, available at Amazon.com. It enables me to grill indoors and simplifies the cleanup immeasurably. I love it.
But this is my first time cooking with a stainless steel-interior All-Clad pan. The d5 technology improves upon All-Clad’s previous pans, because they’ve welded together not 3, but 5 layers of metal to create an incredibly stable, evenly-heating pan. Representatives from All-Clad assured me that this pan heats so evenly and holds heat so efficiently that I would not need to turn up my gas burner to high. In fact, they warned against it. I wanted to put this notion to the test by cooking something that requires high, even, sustained heat, so I decided to sear scallops.
All-Clad d5 Sauté Pan
Searing Scallops to Perfection
The trick to getting the perfect seared scallop is to start with a well-heated pan and ensure that your scallops are completely dry. Remember when you learned in grade school that the boiling point of water is 100˚C? Well, that means that water cannot reach a temperature higher than that. Steam can, but water can’t. So if the scallops are full of water, they’re going to be stuck at a measly 100˚C, which is not hot enough to produce a nice, caramelized sear. So pat those babies dry. And, if possible, buy scallops that haven’t been sitting in a brine getting water-logged in the first place. That means you’ll need to ask the man behind the fish counter for “dry scallops.”
Now that you’ve patted the scallops dry, season them with a bit of sea salt and freshly ground pepper on both sides and heat the pan. I decided to heat the d5 pan over medium-high heat (instead of high heat), because the All-Clad representatives were so convincing that the new technology warranted it. After the pan itself was good and hot, I added grapeseed oil, (because of its neutral flavor and high smoke point) and let it pre-heat as well. Sure enough, the pan performed perfectly. I knew that the temperature was right as soon as I added the scallops and I heard just the right kind of sizzle. The scallops got a nice sear going right away and the pan did not drop its heat when the three were added. Also, all three seared at the same rate.
Brown for about two minutes on first side
There was enough oil in the pan to just coat the bottom entirely and I added only three scallops so that they wouldn’t get too crowded. If you crowd scallops in the pan, they will steam each other which prevents them from getting a good, crispy sear.
After about 2 minutes, I flipped the scallops and saw the sear I was hoping to see. I let them cook for only another minute or two. It’s important not to overcook scallops and they cook very quickly. They should still be ever-so-slightly-translucent in the middle when you take them off of the heat. If you overcook them, they will become rubbery. So after about 90 seconds, I removed them from the heat and transfered them to a paper-towel-lined plate.
Be careful not to overcook scallops
Since I wanted to serve the scallops over pasta with a garlic, white wine sauce, I set to work preparing the sauce in the same pan. (The pasta had already cooked and was draining in the colander). Here’s how I pulled together the sauce in just a few minutes:
Garlic and White Wine Sauce Serves 1-2
Ingredients
1 Tbsp butter
2 cloves garlic, peeled and finely chopped
1/3 cup dry white wine
Salt and pepper to taste
1 Tbsp fresh lemon juice + a few scrapes of lemon zest
1 Tbsp fresh parsley, chopped
Method
1. Reduce heat in the pan. You don’t want to burn the garlic. Add the tablespoon of butter and let it melt. Add the garlic and sauté until fragrant, about one minute. Add the wine and simmer until thickened, about 3-4 minutes. Add salt and pepper, the lemon juice and zest and toss. Add about 2 cups of cooked pasta. Toss to coat. Remove from heat. Toss in most of the parsley then pour onto a plate. Place scallops on top. Garnish with additional parsley. Enjoy immediately.
Scallops seared to perfection
So, in conclusion, I do recommend splurging on a d5 pan. Pick one you know you’ll use again and again for recipes that require a little finesse. If you want your pan to be just the right, even temperature while sautéing meat or vegetables or whipping up fragile creamy sauces, I do think it’s worth spending a little more for a pan that will last a lifetime. I was surprised and delighted to learn that these pans are dishwasher safe. And, the new, larger handles even stay cool while you’re cooking. What’s not to love?
Disclaimer: While I did not receive money to write this review, All-Clad did provide me with a complementary pan and asked that I participate in an informational web conference, where I had an opportunity to share my feedback and ask questions. I was not required to write this post.
Want to know more about how to get the temperature of your pan just right? Watch this instructional video from Rouxbe.com. I was totally mesmerized when I watched it.
For more of the highest quality instructional videos are around, visit Rouxbe.com. Rouxbe offers over 200 step-by-step video recipes and about 250 cooking tip videos with their free basic membership. There are also a few free sample cooking school lessons to try out the cooking school content but the rest of the cooking school requires a Premium Membership. Try it free for 14 days.
I originally wrote this blog post 10 years ago, but rediscovered it now that I’m staying home to do my part to prevent the spread of the corona virus. Since we might face a time when it’s hard to get provisions from the grocery store, I wanted to remind myself that I have the capability to make my own bread, from staples that are plentiful in my pantry.
Ten years ago, I didn’t want to just to eat good bread, I wanted to make it. I didn’t have the patience to do the whole, “wait for it overnight” thing. I wanted to make bread that I could enjoy later that same day.
I’m pretty new to bread making, but I’ve been on a rampage lately, making bread, and more consistently, pizza dough.
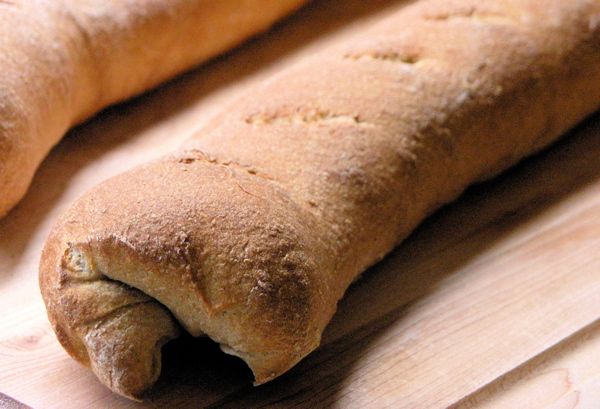
This bread came out just the way I wanted it to. Crunchy on the outside, great texture on the inside and the nutty/sweet flavor of whole wheat and honey. I didn’t have a pizza stone, so I literally just used a half-sheet pan and it worked fine. Jaden includes advice/tricks for what to do if you don’t have a pizza stone either.
Whole Wheat Baguette
Whole Wheat Sweet French Baquette Makes 2 loaves
Ingredients 2 cups whole wheat flour 1 3/4 cups all-purpose white flour 1 Tbsp honey 2 tsp instant dry yeast 2 tsp salt 1 1/2 – 2 cups warm water
Method
1. Set aside the bag of white flour to dust your surface with later. Place remaining white and whole wheat flour in the bowl of a stand-up mixer. With your spoon, swirl the yeast on one side of the bowl and then swirl the salt on the other side. Pour the warm water in a well in the middle of the flour. Using the mixer paddle, mix on low speed until the dough comes together in a mass, then switch to the dough hook. Mix on medium speed for 2 minutes. The dough should come together and clear the sides but some of it will continue to stick to the bottom. You may need to add additional water. If so, do so, one tablespoon at a time. After 2 minutes, let the dough rest for 5 minutes. After the dough has rested for 5 minutes, turn on the mixer again and knead with the dough hook for 3 minutes.
2. Take the dough out and place on a wooden cutting board dusted with the white flour. If the dough is still too sticky, you will incorporate a little more flour into while you knead it. If it doesn’t need additional flour, then just knead the dough by hand until it is very satiny, smooth, tight and formed into a nice, compact ball.
3. Place the dough in a large lightly oiled bowl (I use olive oil). Turn dough over to coat it on all sides. Cover with a damp, clean dish towel. and set in warm place for 1 1/2 hours. Dough should almost double in size during this rest time. About 1 hour into this stage, preheat the oven to 450F and place pizza stone (if you have one) into the oven to preheat it as well.
4. After the dough has risen for an hour and a half, punch it down and form it back into a ball. Cut the dough into half, placing one ball back in the bowl and covered with a towel. Pick up the dough you’re working with and stretch it out until it forms a big rectangle. On the wooden chopping block dusted with flour, fold over each end about an inch and then fold in the long sides until they touch each other. Press down on the middle seam, down the length of the dough get it all tucked in and then pinch then ends shut as well. You want to make sure there is a tight seal to allow the bread to rise and expand evenly while it is baking. Don’t overwork the dough during this stage. It just spent an hour and a half creating tiny bubbles inside and you don’t want to lose all of them at this point.
5. Turn the dough over so that the seam is on the bottom. Place it on a well-floured surface and cover it with a damp kitchen towel. Repeat the whole process with the other dough half. Let the loaves rest for 30 minutes. Then, take a sharp knife and cut several shallow, diagonal slashes on the surface of the loaf. The slashes allow steam to escape during baking so your bread doesn’t burst and crack and everything expands evenly.
6. When you are ready to transfer the dough loaves onto the pizza stone in the oven, get a 1/2 cup of water ready close by. Open the oven, put your bread in the oven and throw the water on the oven floor (literally toss the water out onto the bottom of the oven to create a big steam cloud). Immediately close the oven door to trap the steam inside. Bake for 20-25 minutes. Check temperature of the bread, like you would a steak. The internal temperature should be 190-210F. Remove and let cool slicing it.