Categories
Produce Salads Vegetarian

Superfood Salad for a Healthier 2014

    [pinterest]

    Superfood Salad
    Superfood Salad

    After completely overdoing it at the office cookie swap in December, I decided to pull myself together and start eating mindfully. I’m feeling a lot better and have even lost 10 lbs without feeling like I’m trying that hard. I’m eating super healthy foods in quantities that my body needs to not feel full. I’ve cut down on caffeine too and rarely have dairy or refined sugar. But I don’t feel deprived. I’m going to see how far this approach can take me.

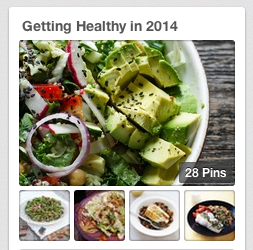
    I’ve turned to Pinterest to find new inspiration for recipes and have started a board called “Getting Healthy in 2014” Come follow along!

    Getting Healthy Board
    Getting Healthy Board

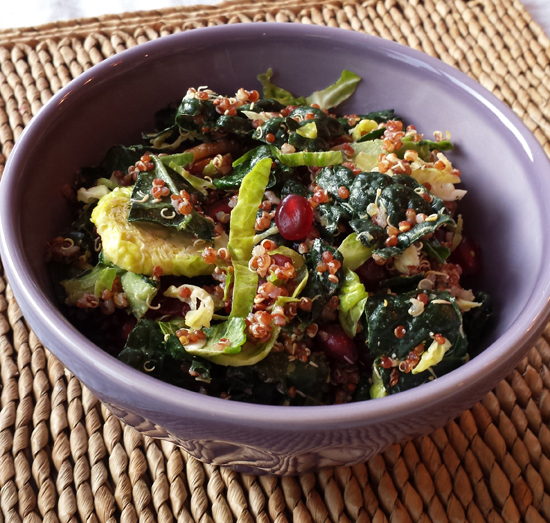
    While poking around, I found a recipe for Mustard Quinoa, Cranberry & Kale Salad. It had appeared on a blog called Green Kitchen Stories and was part of a post they had done for Bon Appétit magazine that featured vegan recipes for a Christmas dinner.

    I decided to adapt the recipe for a dinner party I was planning that was going to be super healthy and have the theme of mustard running through all three courses.

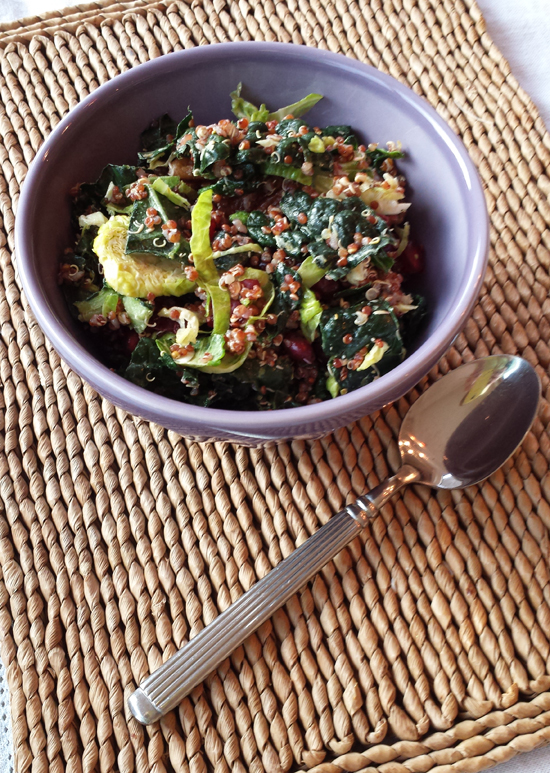
    So here is my version. I added shredded Brussels sprouts and punched up the mustard flavor using both Dijon and whole grain mustard.

    Superfood Salad
    Superfood Salad

    Superfood Salad for a Healthier 2014
     
    Prep time
    Cook time
    Total time
     
    Quinoa, Kale, Pomegranate seeds! It's a superfood extravaganza.
    Author:
    Recipe type: Appetizer
    Cuisine: American
    Serves: 8-10
    Ingredients
    • 1 cup red quinoa
    • Sea salt to taste
    • 4 Tbsp. extra virgin olive oil
    • Zest and juice of 1 lemon
    • 1 Tbsp champagne vinegar
    • ¼ cup Maille Dijon mustard
    • 1 Tbsp Maille Old Style whole grain Dijon mustard
    • Salt and pepper to taste
    • 1 10 oz bag of chopped Lacinato kale
    • About ¾ of a 10 oz bag of Trader Joe's shredded Brussels Sprouts
    • ¼ cup dried cranberries
    • ¼ cup roasted, salted pecans
    • ¼ cup fresh pomegranate seeds
    Instructions
    1. Bring 2 cups of water or vegetable stock to boil. Add quinoa and simmer on low for about 15 minutes or until all of the liquid is absorbed. Remove from heat and transfer to a bowl for cooling.
    2. In a really large bowl (the largest bowl you have), zest the lemon and squeeze out the lemon juice. Add the oil, vinegar and both mustards. Whisk vigorously until completely emulsified and smooth.
    3. Add the quinoa to the bowl (when it's cool) and toss to coat.
    4. Now add the kale, Brussels sprouts, cranberries, pecans, and pomegranate seeds and toss to coat completely. Allow this mixture to sit for several hours (in the fridge would be ideal) to soften the kale leaves and Brussels sprouts.
    5. Enjoy. Can be stored in a sealed contained and enjoyed the following day as well.


      Categories
      Casseroles Rice and other Grains Sides Uncategorized Vegetarian

      Roasted, Stuffed Acorn Squash: Barley-Bulgur Pilaf with Caramelized Apple

        Stuffed Acorn Squash

        Here is a dish elegant enough for Thanksgiving or an autumn dinner party, and hearty enough to serve as a vegetarian (vegan) main dish. Favorite fall flavors of apple, squash, and nuts come together in this healthy, whole grain pilaf. Feel free to substitute your favorite grains. Try it with millet, farro, wheatberries or wild rice. Even lentils would be a lovely addition. Substitute fresh sage or thyme for the parsley, if you prefer. Substitute pear for the apple. Try it in a pumpkin. The possibilities are endless.

        Roasted, Stuffed Acorn Squash: Barley-Bulgur Pilaf with Caramelized Apple and Almonds
         
        Prep time
        Cook time
        Total time
         
        Fall flavors come together in this hearty (vegan) side dish - elegant enough for a dinner party, yummy enough for any night.
        Author:
        Recipe type: Hearty Vegetarian Main Dish or Side Dish
        Serves: 4
        Ingredients
        • 4 Medium Acorn Squash (I chose a variety that was a lovely orange color, with smooth skin but any variety will do)
        • 2 Tbsp olive oil
        • 1 medium onion, diced
        • 2 cups vegetable stock
        • ¼ cup pearled barley
        • ¼ cup brown rice
        • ¼ cup bulgur
        • 1 apple (on the sweeter side, like Honeycrisp or Braeburn), sliced thinly
        • 2 Tbsp chopped almonds, toasted
        • ¼ cup dried apricots, sliced thinly
        • ¼ cup chopped fresh parsley
        • salt and pepper to taste
        Instructions
        1. Preheat oven to 400˚F. Cut each acorn squash in half and scoop out the seeds. Place on a rimmed baking sheet and add water to the pan so that the squash skins don't get scorched. Add a little dab of butter to each acorn squash. Bake for about 45 minutes to an hour until the squash are cooked through, but not collapsing.
        2. While the acorn squash are baking, prepare the pilaf. In a medium saucepan, heat the 2 Tbsp of olive oil over medium heat. Add the chopped onion and sautée until onions have softened and started to brown, about 8 minutes. Pour in 2 cups of vegetable stock and bring to a boil. Add the pearl barley, reduce heat and cover. The pearl barley will simmer for a total of 45-55 minutes. After 10 minutes of cooking, add the brown rice. Continue to simmer, covered on low. When 15 minutes remain, add the bulgur.
        3. In a separate frying pan, over medium heat, heat a bit of olive oil. Then add the apple slices, chopped almonds, and apricots. Toss to coat and sautée for a 3 minutes or until apples start to soften and brown. Remove from heat. Preheat oven to 375˚F.
        4. Once the grains are cooked through, drain any remaining liquid and toss in the apple mixture. Toss in the chopped parsley, reserving some for garnishing later. Season with salt and pepper.
        5. Divide the mixture evenly between the acorn squashes. Place the stuffed squashes on a baking sheet and bake in the oven for 15 minutes. Remove and garnish with the remaining fresh parsley and serve immediately.


          Categories
          Sandwiches Vegetarian

          Spicy Red Lentil Burger with Cilantro

            Spicy Red Lentil Burger
            Spicy Red Lentil Burger with Cilantro

            So today I thought I might make another lentil salad, but I accidentally overcooked the red lentils. Chango presto, it’s lentil burger time. My hubby had just requested a bean burger not made with soy, so voila. Here’s my opportunity.

            I wanted to make something with real flavor punch that would sing several notes, not just one. So instead of using Curry Powder or even a store-bought Garam Masala, I introduced Indian flavors by incorporating turmeric and fenugreek. Indian isn’t the only note playing here. With cumin and coriander, there’s a little Southwest happening and with the Cayenne pepper, the burger hits the tongue HOT. The fresh cilantro cools and sweetens. Try it today! Super healthy. Totally vegan. No flavor compromise.

            Spicy Red Lentil Burgers
            Spicy Red Lentil Burgers

            Spicy Red Lentil Burgers with Cilantro
             
            Prep time
            Cook time
            Total time
             
            Fenugreek, Cumin, Cayenne and Cilantro come together for a spicy, Indian inspired vegan burger.
            Author:
            Serves: 4
            Ingredients
            • ½ cup dry lentils
            • 1½ cups water
            • 1 small red onion
            • 8-10 mini carrots, chopped in a mini food processor
            • ½ cup raw almonds chopped in a mini food processor
            • 2 cloves chopped garlic
            • 1 Tbsp ground cumin
            • 2 tsp ground coriander
            • 1 tsp Cayenne pepper
            • ½ tsp turmeric
            • 1 tsp ground fenugreek
            • ½ cup fresh cilantro, chopped finely
            • 2 tsp salt
            • 1-2 Tbsp olive oil
            • 4 buns
            Instructions
            1. To prepare the lentils, bring water to a boil in a medium saucepan. Add lentils, reduce heat and cover partially. Simmer for about 15 minutes, which will overcook the lentils. Remove from heat and set aside uncovered.
            2. In a separate saute pan, heat a Tbsp of olive oil over medium heat. Add chopped onion and saute until onions are softened, about 5 minutes. Add shredded carrots and garlic and continue cooking, stirring frequently.
            3. Add chopped almonds, cumin, coriander, cayenne, turmeric, and fenugreek and continue to saute for a minute or two more while these flavors meld. Then remove from heat.
            4. In a medium large mixing bowl, combine the lentils, onion mixture, cilantro, and salt. Stir to combine well. Shape into 4 patties.
            5. In a large skillet over medium flame, heat the olive oil. Add patties and sautee until golden brown on one side, about 3 minutes. Flip and repeat. Serve immediately. These can be stored and cooked later.


              Categories
              Dessert Produce Vegetarian

              Plum Clafoutis and a CSA Box Giveaway

                Plum Clafoutis
                Plum Clafoutis

                A few weeks ago, a company called Full Circle reached out and offered me the opportunity to experience their CSA box delivery program free of charge for a brief period of time. They recently expanded into the Bay Area from Washington State and Idaho, and they wanted to give bloggers like me a chance to sample their new service. There was no requirement to review or purchase the product, but it is such a great service, I am happy to write about it here. In this week’s box, there were Santa Rosa Plums. I knew it was time to make Plum Clafoutis. More about that later. First, let me tell you about Full Circle Farms and invite you to enter a drawing to win one free farm box delivery from them! Details below.

                Full Circle delivers a weekly box of local & organic fruits and veggies right to your doorstep. You can pick items from their artisan grocery list too – dairy, breads, pastas, grass-fed meats, coffee, jams and more. They started as an organic farm 15 years ago in North Bend, WA. Now, they’re CSA program has grown to serve thousands in the Northwest, Alaska and most recently, the Bay Area. They work with a bunch of the best organic and family farms on the West Coast. When I check my front step on Wednesdays, it feels like Christmas morning.

                Santa Rosa Plums
                Santa Rosa Plums

                If you’d like to have fresh, organic produce delivered to your doorstep too, enter “STREAMINGGOURMET’S 1 FREE FARM BOX FROM FULL CIRCLE GIVEAWAY” Entries could include: a TWEET, a FB share, a PIN, a Google+, or a BLOG POST. All entries must link back to this post. LEAVE A COMMENT at the bottom detailing your entries and you will be entered into the drawing. The DEADLINE is Sunday, August 12 at midnight PDT. To win, you must reside within one of Full Circle’s Delivery Areas.

                FullCircleDeliveryAreas

                If you are the winner, you will be contacted by email, and given a coupon code to enter during the registration process on the Full Circle website. We will also announce the winner on FB and Twitter. You will be under no obligation to purchase any items from Full Circle. (Credit card required at signup. Membership required through online registration, automatic renewal unless cancelled.) So starting sharing and comment below to enter! The more ways you share, the better your chances of winning.

                And when you get your box, if plums are still in season, you just might want to make this classic French dessert, Plum Clafoutis. It’s like a custardy cake. Or is it a cakey custard? I like mine particularly eggy, so this one is more like a cakey custard. For extra oomph, you could do what Julia Child would do and soak your plums in cognac first, or I like the idea of soaking them in Cointreau, a French liqueur with orange overtones. I didn’t have any Cointreau on hand, so I went without and it still tasted great. Make sure you eat the clafoutis soon after it leaves the oven. Because it has certain soufflée qualities, it’s just not the same the next day.

                Plum Clafoutis
                 
                Prep time
                Cook time
                Total time
                 
                The classic French dessert, not too sweet and just right for a summer's CSA box full of plums.
                Author:
                Recipe type: Dessert
                Serves: 8
                Ingredients
                • 6-8 Santa Rosa plums (or any variety of plum or stone fruit)
                • 1 Tbsp of sugar
                • 1-2 Tbsp butter
                • 5 large eggs + 1 egg yolk
                • ¼ cup of sugar
                • 1½ cups milk (I used 2%)
                • 2 tsp vanilla extract
                • 1 cup all-purpose flour, sifted
                • Powdered sugar
                Instructions
                1. Preheat the oven to 350˚F. Spray a 9x12 baking dish with non-stick cooking spray. Slice the plums in half and remove the pits. Place the plums in the pan with the skin side down. Sprinkle with the sugar and dot with a little butter on each one.
                2. In a stand-up mixer, beat the eggs for about 2 minutes until they start to get stiff. Add the sugar and beat until sugar is nearly dissolved. Add the milk and vanilla and whisk to combine. Add the sifted flour and whisk to combine. Do not overmix.
                3. Pour the batter over the plums. Bake in the oven for about an hour. The batter will puff up and then start to brown. When it is golden brown on top, it's done.
                4. After the clafoutis has cooled a bit, dust it with the powdered sugar and serve. Clafoutis is best eaten right out of the oven! Serve with vanilla ice cream for a extra punch.

                More great clafoutis recipes from around the web:

                Cherry Almond Clafoutis

                Julia Child’s Plum Clafouti

                Cherry-Almond Clafoutis

                Cherry Clafouti

                Gratinee Blog Use Real Butter Blog Simply Recipes Blog
                  Categories
                  Appetizers Rice and other Grains Salads Sides Uncategorized Vegetarian

                  Summer Picnic Salads – Perfect for the 4th of July

                    Lemony Lentil Salad With Couscous and Arugula

                    As some of you know, I started blogging a bit for Mollie Stone’s Markets, my favorite grocery store. They have an amazing new line of infused olive oils that I have been experimenting with. This latest recipe makes use of the Lemon Infused Olive Oil. I made this lentil salad for a going-away party for friends of ours who are moving to Europe. Just when we’re going to have healthcare here after all. Oh well. To see the entire recipe, check out the post on the Mollie Stone’s Blog!

                    I equate summertime picnics with these kinds of salads: lentil salad, orzo salad, corn and bean salad and so on. They travel well, hold up during a picnic and are nutritious. They also take advantage of what’s in season. Here are just a few from the archives:

                    Lentil Salad Three Ways
                    Lentil Salad Three Ways
                    Heirloom Tomato Orzo Salad
                    Heirloom Tomato Orzo Salad
                    Wild Rice Salad
                    Wild Rice & Cranberry Salad
                    Wild Rice, Cranberry and Almond Salad
                    Fresh Corn Salad
                    Fresh Corn Salad
                    Fresh Corn Salad with Tomatoes and Basil
                      Categories
                      Pizza and Pasta Produce Uncategorized Vegetarian

                      My Favorite Broccoli White Pizza With Whole Wheat Crust

                        Broccoli White Pizza

                        I must admit. I am a total broccoli addict. I eat broccoli every day. Roasted. Steamed. With cheese melted over it on a potato and this way: on a white pizza. This is pretty guilt free. As long as you don’t eat half the pizza, like I sometimes do. But because low-fat ricotta stands in for most of the cheese, the calorie count on this dish is not terrible.

                        I was first introduced to white pizza in college outside of Philadelphia. Renato’s in Swarthmore used to make an awesome pizza with ricotta, Mozzarella, and lots of garlic. I’m pretty sure there was broccoli on that one too. So basically, I wanted to recreate that pizza here.

                        I’ve been eating this broccoli pizza almost once a week for about a month now, so I figured it was time to do a post.

                        I use freeze-dried garlic in this recipe, because it’s so much faster to just sprinkle it over the pizza, than it is to chop fresh garlic. The flavor is great. I don’t miss the fresh garlic at all. I use Litehouse brand, but you can find this other brand at Amazon:

                        You can make the crust yourself, as I used to do a lot (I just realized I’ve never posted by pizza dough recipe, which is weird), but lately, I’ve just been buying whole wheat pizza dough at the grocery store. Mollie Stone’s now carries Il Fornaio pizza dough in the frozen section. It tastes just like my homemade version, so I’ve been hard pressed to go to all the trouble of making it from scratch. Just make sure that you let the dough sit out long enough to come to room temperature, because if you’re not careful, you can run into the problem of having the toppings cook before the dough is ready, and then it just sticks to the pizza pan like crazy.

                        To help with making sure the pizza doesn’t stick, I use a nonstick, perforated pizza pan like this one available at Amazon.com (just click on it). I also spray it with a little nonstick spray:

                        Broccoli Pizza Slice


                        Broccoli White Pizza With Whole Wheat Crust
                         
                        Prep time
                        Cook time
                        Total time
                         
                        White pizza with lots of broccoli and garlic
                        Author:
                        Recipe type: Entree
                        Serves: 4
                        Ingredients
                        • 1 package of pizza dough (I use whole wheat)
                        • Semolina or whole wheat flour to handle the dough
                        • 2 heads of broccoli, chopped into florets (about 3 cups)
                        • 1 Tablespoon freeze-dried garlic
                        • ¾ cup reduced fat ricotta cheese
                        • ½ cup shredded part-skim Mozzarella cheese
                        • Salt to taste
                        Instructions
                        1. Preheat the oven to 500˚F
                        2. If you have purchased frozen pizza dough, make sure it thaws overnight. Then let it rest on the counter for at least 20 minutes before shaping it into a pizza.
                        3. While the pizza dough is resting on the counter, you can steam the broccoli. Put the florets in a medium saucepan with 2 cups of rapidly boiling water. Steam for 3-4 minutes. Watch carefully. When the broccoli is ready, it will be bright green still, and tendercrisp. It is better for it to be undercooked than overcooked. Remove from the heat and drain completely. Then rinse with cold water to stop the cooking process and drain again. Pour the broccoli out onto some paper towels. You don't want to transfer any water to the surface of the pizza.
                        4. When you are ready to shape the dough, put a couple of tablespoons of flour (semolina or wheat) onto a large cutting board. Coat the dough ball with the flour. Flatten the ball into a disc. Then with your fingertips, work your way around the edges, stretching it all out as you go. Put your fist in the middle of the growing circle and let the sides stretch down. Move your arm up and down to help it stretch out. Then work your fingers around the edge of the circle one more time.
                        5. Spray the pizza pan with a little nonstick cooking spray and spread the circle of dough onto the pan. With the back of a spoon, spread the ricotta evenly over the pizza. Then sprinkle with the dried garlic. Arrange the broccoli pieces over the surface evenly. Sprinkle with the Mozzarella. Season with salt.
                        6. Bake in the oven for 10-15 minutes. Watch carefully. If the cheese starts to brown too quickly (before the crust has had a chance to brown), back off the heat a little bit. When the cheese and the crust are just starting to brown, remove from the oven and let cool for 2 minutes. Then slice and serve immediately.


                          Categories
                          Appetizers Rice and other Grains Uncategorized Vegetarian

                          Crunchy California Avocado Fritters

                            Crunchy California Avocado Fritters

                            With Cinqo de Mayo around the corner, what better way to celebrate the flavors of Mexico than to try out new recipes featuring the avocado, now back in season, here in California.

                            This year, Americans will consume 81 million pounds of avocados on Cinco de Mayo alone! That’s more than 160 million avocados in one day. Get in on the fun by trying this recipe, created for the California Avocado Commission by celebrity chefs, Mary Sue Milliken and Susan Feniger, known as the “Too Hot Tamales,” and co-chef/owners of the popular Border Grill restaurants in Santa Monica, Calif., Downtown Los Angeles and Las Vegas. This dynamic duo were Food Network pioneers when their show “Too Hot Tamales” premiered in 1995. They’ve gone on to compete on Bravo’s “Top Chef Masters,” and have now partnered with the California Avocado Commission to create innovative, fresh recipes featuring California avocados.

                            I love how this recipe is new and different and yet reminiscent of food I love. It reminds me of falafel of course, but there is also something very sushi maki about it too – like, if you were to take a california roll and fry it. Hey wait a minute. I think I’m onto something.

                            The recipe uses quinoa (pronounced “KEEN wah”), the high-protein, ancient Andean grain everyone is eating these days. It also calls for Cotija (pronounced “ko-TEE-hah”) cheese, a Mexican cheese with a grainy texture used as an accent by adding a tangy saltiness to dishes when grated on top. If your local grocer doesn’t sell Cotija cheese, order it on Amazon or substitute grated Parmesan.

                            Crunchy California Avocado Fritters
                             
                            Prep time
                            Cook time
                            Total time
                             
                            Author:
                            Recipe type: Appetizer
                            Serves: 8
                            Ingredients
                            • ⅔ cup white or black quinoa, rinsed and well drained
                            • 1⅓ cups water
                            • ¼ cup all-purpose flour
                            • ¼ cup grated cotija cheese
                            • ¾ tsp salt
                            • 4 green onions, white and light green parts only, finely chopped
                            • ½ bunch Italian parsley
                            • 1 egg
                            • 1 egg yolk
                            • ¾ cup canola or grape seed oil for frying
                            • 1 ripe, fresh California avocado, seeded, peeled and cut in ½-3/4 inch dice
                            • Salt to taste
                            • Ground black pepper, to taste
                            • 1 cup Aji Amarillo Aioli (see make-ahead recipe below)
                            Instructions
                            1. Place a small, dry saucepan over high heat. Add quinoa and toast for about 5 minutes, shaking and stirring constantly to prevent scorching. Transfer to a large saucepan and add water. Bring to a boil, reduce to a simmer and cook, covered, until water is absorbed, about 10 minutes. Set aside to cool.
                            2. In a large bowl, combine cooked quinoa, flour, cheese and salt. Add onions, parsley, egg and yolk. Stir thoroughly with a spoon until the mixture has the consistency of soft dough. Chill for 30 minutes.
                            3. Heat oil in a large skillet over medium heat.
                            4. In a small mixing bowl, season avocado with salt and pepper to taste and toss gently to coat.
                            5. Using hands, create round fritters about the size of a walnut shell with a piece of avocado in the center of each fritter.
                            6. Working in batches, gently slide fritters into the hot oil. Fry until golden brown, about 3 to 4 minutes, turning as necessary. Drain on paper towels and serve warm, topped with Aji Amarillo Aioli.
                            Notes
                            If cotija cheese is not available, parmesan cheese can be substituted Yields about 24 fritters

                            Aji Amarillo Aioli

                            Ingredients

                            1 cup mayonnaise
                            1 lime, juiced
                            1/2 tsp salt
                            2 Tbsp aji amarillo chile paste
                            1 Tbsp finely chopped Italian parsley

                            Instructions

                            1.    Combine ingredients in small bowl. Taste and adjust seasoning as necessary. Refrigerate until ready to use.

                            Not sure where to get Aji Amarillo Chile Paste? It is available on Amazon:

                              Categories
                              Appetizers Vegetarian

                              Halloween Party Starter: Jack O’Lantern Puking Guacamole

                                [pinterest]

                                Halloween Party Dish

                                Halloween = parties for me, so I’m always on the lookout for inspiring buffet food. I can’t remember where I first saw the idea of having guacamole come out of pumpkin as if the Jack O’Lantern is throwing up, but I thought it was hilarious. If you know the source, please tell me and I will attribute it. **Update: I first read it in the book, Extreme Halloween: The Ultimate Guide to Making Halloween Scary Again by, Tom Nardone. Check out his website, ExtremePumpkins.com. **

                                The recipe for guacamole here is a little different than what you might usually see. Here, it is prepared the Guatemalan way (our Guatemalan friend showed me how to do it). She leaves the avocado in big chunks and chops the tomatoes in large cubes. This approach seemed particularly appropriate for the presentation and turned out to lend great flavor. Now when I make guacamole at home, I always do it this way. Luckily, the pumpkin vomiting guacamole doesn’t inspire any real vomit.

                                Guacamole the Guatemalan Way
                                 
                                With the avocado in big chunks, this guacamole really stands out and is perfect for the puking pumpkin rendition.
                                Author:
                                Recipe type: Appetizer
                                Cuisine: Guatemalan
                                Serves: 8-10
                                Ingredients
                                • 2 ripe but not mushy avocados, chopped in large cubes
                                • 1 medium tomato, chopped in fairly large chunks
                                • ¼ cup finely chopped red onion
                                • 1 fresh green chile, chopped
                                • ¼ cup fresh cilantro, chopped
                                • 1 tsp salt
                                • Juice of 1 lime
                                • 1 Bag of Multicolored Tortilla Chips
                                Instructions
                                1. In a large bowl, gently toss (so as not to mush the avocado), the avocado, tomato, red onion, green chile, cilantro, salt and lime juice. Leave the pit in until you are ready to transfer to the platter. Chill in the fridge until 15 minutes before guests arrive.
                                2. For the presentation: Carve a small pumpkin to have a face that looks like it is puking. Haha. Place it on a large platter with a candle inside. Spoon the guacamole onto the platter in front of the jack o'lantern's face. Distribute multi-colored tortilla chips around the perimeter of the guacamole. Enjoy! Happy Halloween!


                                  Categories
                                  Rice and other Grains Salads Sides Uncategorized Vegetarian

                                  Wild Rice, Cranberry and Almond Salad with a hint of Orange

                                    Wild Rice, Cranberry & Almond Salad
                                    Wild Rice, Cranberry & Almond Salad

                                    My friend Raquel is the master of the wild rice salad. She tosses it up in huge quantities for party buffets at her house and there’s never any left over. I’ve been meaning to do a version of my own and today was the day. The only difference between my version and hers, is that I’ve added an orange juice-based vinaigrette – just a wee-tiny bit, because this salad can even stand on its own without any vinaigrette, but I love orange and cranberry flavors together, so I thought it would only make this great salad greater.

                                    Hey, it’s vegan and gluten-free. Can’t beat that.

                                    Wild Rice, Cranberry and Toasted Almond Salad with a hint of Orange
                                    Serves 4 as a side

                                    Ingredients

                                    2 cups cooked wild rice (still warm)
                                    3/4 cup dried cranberries
                                    1/2 cup toasted almonds slivers

                                    Vinaigrette:
                                    1 Tbsp olive oil
                                    1 Tbsp orange juice
                                    1 tsp Dijon mustard
                                    1 tsp finely diced onion

                                    Optional addition: orange zest.

                                    Method

                                    1. Cook rice according to package directions (it takes about 45 minutes). Meanwhile, toast the almonds in a frying pan with no oil over medium high heat for about 5 minutes or until just starting to brown.

                                    2. While the rice is still warm, toss it with the dried cranberries and the almonds. This will allow the cranberries to swell and their flavor to meld.

                                    3. While the rice mixture is cooling, whisk together the ingredients for the vinaigrette until an emulsion is formed. Once rice mixture has cooled to room temperature toss the vinaigrette with the rice and mix thoroughly. Refrigerate and serve chilled.

                                    Wild Rice Salad
                                    Wild Rice Salad
                                      Categories
                                      Dessert Produce Uncategorized Vegetarian

                                      Blueberry Cobbler: Fast, Fresh and Easy

                                        Blueberry Cobbler
                                        Blueberry Cobbler

                                        Blueberries are in season and therefore, they’re on sale at Trader Joe’s for just $6.99 for a 2 lb basket. Time for cobbler when that happens.

                                        I wanted to see if I could toss a bunch of fresh blueberries into pie plate with as few other ingredients as possible and come out with a tasty cobbler half an hour later. The answer is yes. Yes I can.

                                        I use less sugar and butter in this recipe than most recipes out there, because I know that these berries can stand on their own. And I don’t stew them first, because I want them to maintain their structure. You can see in the photograph that the berries are still berries. That’s just how I like it.

                                        See if you like it too. Subtract some berries and add peaches if you’ve got those lying around too.

                                        Blueberry Cobbler: Fast, Fresh and Easy
                                        Serves up to 9

                                        Ingredients

                                        2 1/2 cups Bisquick baking mix
                                        2/3 cup reduced fat milk
                                        4ish cups fresh blueberries
                                        1/4 cup of sugar
                                        2 Tbsp butter, cut into little pieces

                                        Method

                                        1. Preheat oven to 400˚F.

                                        2. Put 3.5 – 4 cups of blueberries in a pie plate. Sprinkle 1/4 cup sugar (or a little more to taste) over the berries. Sprinkle the slices of butter around, evenly, on top of the berries.

                                        3. If the oven is ready, put the pie plate with just the blueberry mixture into the over for 10 minutes to get the mixture heated through.

                                        4. While berries are heating, mix together the Bisquick and the milk and stir until dough forms. Let sit for remaining time. (No kneading, no rolling – these will be like drop biscuits on top).

                                        5. Remove berries from the oven at the end of 10 minutes. Increase the oven temperature to 425˚F. Drop the biscuit dough on top of the blueberries, trying to drop 8 dollups in a circle plus one in the middle. Bake uncovered for an additional 15 minutes or until biscuits are golden brown.

                                        Serve immediately, if possible. Also sits well in the oven at low temperature. Cobbler is great with a scoop of vanilla ice cream too!

                                        Blueberry Cobbler
                                        Blueberry Cobbler w/Bisquick Biscuits
                                        Home page basic 300 x 250
                                        Blog Widget by LinkWithin