The book, Chicken and Other Poultry, published by the California Culinary Academy in 1986 was a mainstay in my college apartment kitchen in 1992. So much so, that when I took a guy named John P. to the “Screw Your Roommate Dance” at Swarthmore that year, I made this dish for our special candlelight dinner beforehand. The book describes the dish as “elegant enough for guests, looks impressive, but it actually couldn’t be easier to put together.” It was perfect for a food-obsessed, but novice college chef like me. And if I could pull it off at age 20, and remember what it tasted like lo these 21 years later, this dish is worth adding to your repertoire, right?
I’ve adapted the recipe a bit here to account for all of the changes we’ve seen over the last 20 years. For example, when the book was published in 1986, boneless, skinless chicken breasts were not available at the grocery store, so they go to the trouble of telling you to split, bone and skin the breasts. I’ve boosted the flavorings a bit, by increasing the onions and mushrooms, but the the essence of the recipe is the same: a vermouth reduction serves as the foundation for a classic mushroom cream sauce.
If you like Jamie Oliver’s Chicken and Leek Stroganoff, you’ll love this dish too. Orange replaces lemon in this dish for the citrus burst that lightens the cream sauce. It’s a nice little surprise.
This dish is easy and fast. Make it for dinner tonight!
Elegant enough for guests, easy enough for novice home chefs.
Author: Adapted from California Culinary Academy's book, Chicken and Other Poultry by Julie Renaud and Jane Horn
Recipe type: Entree
Serves: 4
Ingredients
4 boneless, skinless chicken breast halves
2 Tbsp olive oil
1 clove garlic, minced
2 shallots, minced
¾ cup dry vermouth
½ pint sliced mushrooms
1 cup whipping cream
Salt and freshly ground pepper to taste
1 egg yolk
1 Tbsp grated orange rind
Wedges from leftover orange for garnish
4 Tbsp flat, Italian parsley, chopped
Instructions
Preheat oven to 200˚F.
In a medium sautée pan over medium flame, heat oil with garlic, being careful not to scorch the garlic. Sauté breast halves in the oil until browned on both sides (about 7 minutes per side for thick breasts)
Remove breasts to an ovenproof serving dish, keeping as much of the oil in the sautée pan as possible. Keep breasts warm in the oven while you prepare the cream sauce.
If necessary, add another dab of olive oil and heat through. Then add the shallot and sautée until softened and turning golden brown. Add the vermouth and deglaze the pan, scraping brown pits from the side of the pan. simmer until reduced by about half. Add mushrooms and quickly heat through. Pour in cream and increase the flame to high. Bring to a boil and allow to thicken. Reduce the heat and season with salt and pepper.
To add the egg yolk, beat it in a small bowl and stir in a few tablespoons of the hot sauce. Pour this mixture into the pan and stir to combine completely and thicken. Keep the heat low so that the egg doesn't curdle.
Add the orange rind and simmer to heat through and release essential oils.
Pour the sauce over the chicken, sprinkle parsley over the sauce, garnish with orange slices and serve. I like to serve it with jasmine rice, to have something to soak up all that yummy sauce.
I’m going through a tarragon phase right now, and whenever I cook with tarragon, I think of Sauce Béarnaise. Sauce Béarnaise is a butter emulsion sauce like Hollandaise. Hollandaise is flavored with lemon juice while Béarnaise Sauce is flavored with shallots, chervil, pepper and tarragon.
Sauce Béarnaise on Asparagus
For this burger, I wanted the flavor profile of a Sauce Bérnaise without actually making Sauce Béarnaise. It’s a legendarily difficult sauce to get right and uses an entire stick of butter. It’s a great sauce that goes well with steak or asparagus or lots of other things. If you want to try making it yourself, try the recipe at Fine Cooking. Feel free to also pour the sauce over a burger, but in this recipe, we take the ingredients of Sauce Béarnaise and add them to ground beef, so they are right in the burger.
I used Gruyère Cheese on my burger and added sautéed onions and mushrooms. I used 85/15 ground beef to achieve a balance between fat and flavor.
Bérnaise Burger Makes 4 Burgers
Ingredients
1-2 Tbsp diced shallots
1/2 tsp fresh chervil, finely chopped (optional)
1 1/2 Tbsp fresh tarragon, finely chopped)
1 egg
1 lb of ground beef (85/15 or 80/20)
Salt and pepper to taste
1 Tbsp butter
1/2 lb sliced mushrooms
2-3 Tbsp diced onion
4 slices of Gruyère cheese
4 slices of butter lettuce
4 hamburger buns – I used sandwich thins by Oroweat
Method
1. Mix the shallots, chervil, tarragon, egg, ground beef, salt and pepper in a large bowl. Form into 4 patties. Heat a grill pan over medium heat. Spray with cooking spray. Add the patties and cook for about 7 minutes on each side, depending on how well done you like your burgers and how hot your pan is. Cover, vented, while cooking.
2. Meanwhile, heat a medium sautée pan over medium heat. Melt the butter and add the onions. Sautée until just starting to soften, about 5 minutes. Add the mushrooms, and continue to sautée until mushrooms sweat out their moisture and start to brown.
3. Add the cheese to burgers and continue to cook, with the vented cover, until cheese has melted. Toast the buns. Prepare the lettuce slices.
4. Assemble the burgers with lettuce on the bottom, burger patty with cheese in the middle and mushrooms and onions on top. Serve immediately.
Pumpkin month continues here at StreamingGourmet. I love to make savory pumpkin dishes and this is one of my favorites. You can use this sauce with Gnocchi or Ravioli stuffed with squash or pumpkin, or penne, shells or spaghetti. You can make a vegan version (see the link at the bottom) or you can load it up with butter, cream, and cheese. Either way, go easy on the nutmeg. A pinch goes a long way. You could add a little cinnamon, but I don’t like it when these sauces start to taste like pie. We’ll get to pie later.
Pasta with Pumpkin Sauce Serves 4
Ingredients
1 lb pasta (spaghetti or penne or shells)
1 Tbsp olive oil
2 garlic cloves, minced
2 tsp chopped fresh sage or 1 tsp dried sage
1 large onion, chopped
2 large carrots, finely diced
1/2 cup white wine
I cup canned puréed pumpkin
3/4 cup vegetable stock
1 tsp salt
Pepper to taste
1/2 cup heavy cream
1/4 tsp grated nutmeg
1/4 cup fresh grated Parmesan cheese
Additional Parmesan cheese for garnish
Additional fresh sage for garnish
Method
1. Heat the oil in a heavy-bottom stock pot over medium-high heat. Add the garlic and sautée for one minute. Add the sage, onion, and carrot and sautée until softened and slightly browned, about five minutes. Add the white wine and simmer until reduced by half. Add the pumpkin and vegetable stock and stir well to combine. Season with salt and pepper. Reduce heat to medium-low. Simmer uncovered for 10 minutes.
2. While the sauce is simmering, cook your pasta according to package directions.
3. Once the sauce has simmered, reduce the heat even further. Add heavy cream and nutmeg. Stir well and heat through for about 3 minutes. Add Parmesan cheese and stir. Add pasta to the pan and allow the sauce to soak in. Spoon into bowls. Garnish with additional Parmesan cheese and sprigs of fresh sage.
In late 2009, All-Clad launched a new line of cookware that is available only at Williams-Sonoma (online and in-store). As part of the launch, All-Clad contacted food bloggers and asked them to test and review one pan of their choosing. I chose to test the 3-quart sauté pan.
I’ll be honest. I normally don’t splurge on All-Clad. Before receiving the complimentary sauté pan in the mail, I owned just one All-Clad pan; it is one I would not want to go without, mind you, but still. It is the All-Clad LTD 11-Inch Square Nonstick Grille Pan, available at Amazon.com. It enables me to grill indoors and simplifies the cleanup immeasurably. I love it.
But this is my first time cooking with a stainless steel-interior All-Clad pan. The d5 technology improves upon All-Clad’s previous pans, because they’ve welded together not 3, but 5 layers of metal to create an incredibly stable, evenly-heating pan. Representatives from All-Clad assured me that this pan heats so evenly and holds heat so efficiently that I would not need to turn up my gas burner to high. In fact, they warned against it. I wanted to put this notion to the test by cooking something that requires high, even, sustained heat, so I decided to sear scallops.
All-Clad d5 Sauté Pan
Searing Scallops to Perfection
The trick to getting the perfect seared scallop is to start with a well-heated pan and ensure that your scallops are completely dry. Remember when you learned in grade school that the boiling point of water is 100˚C? Well, that means that water cannot reach a temperature higher than that. Steam can, but water can’t. So if the scallops are full of water, they’re going to be stuck at a measly 100˚C, which is not hot enough to produce a nice, caramelized sear. So pat those babies dry. And, if possible, buy scallops that haven’t been sitting in a brine getting water-logged in the first place. That means you’ll need to ask the man behind the fish counter for “dry scallops.”
Now that you’ve patted the scallops dry, season them with a bit of sea salt and freshly ground pepper on both sides and heat the pan. I decided to heat the d5 pan over medium-high heat (instead of high heat), because the All-Clad representatives were so convincing that the new technology warranted it. After the pan itself was good and hot, I added grapeseed oil, (because of its neutral flavor and high smoke point) and let it pre-heat as well. Sure enough, the pan performed perfectly. I knew that the temperature was right as soon as I added the scallops and I heard just the right kind of sizzle. The scallops got a nice sear going right away and the pan did not drop its heat when the three were added. Also, all three seared at the same rate.
Brown for about two minutes on first side
There was enough oil in the pan to just coat the bottom entirely and I added only three scallops so that they wouldn’t get too crowded. If you crowd scallops in the pan, they will steam each other which prevents them from getting a good, crispy sear.
After about 2 minutes, I flipped the scallops and saw the sear I was hoping to see. I let them cook for only another minute or two. It’s important not to overcook scallops and they cook very quickly. They should still be ever-so-slightly-translucent in the middle when you take them off of the heat. If you overcook them, they will become rubbery. So after about 90 seconds, I removed them from the heat and transfered them to a paper-towel-lined plate.
Be careful not to overcook scallops
Since I wanted to serve the scallops over pasta with a garlic, white wine sauce, I set to work preparing the sauce in the same pan. (The pasta had already cooked and was draining in the colander). Here’s how I pulled together the sauce in just a few minutes:
Garlic and White Wine Sauce Serves 1-2
Ingredients
1 Tbsp butter
2 cloves garlic, peeled and finely chopped
1/3 cup dry white wine
Salt and pepper to taste
1 Tbsp fresh lemon juice + a few scrapes of lemon zest
1 Tbsp fresh parsley, chopped
Method
1. Reduce heat in the pan. You don’t want to burn the garlic. Add the tablespoon of butter and let it melt. Add the garlic and sauté until fragrant, about one minute. Add the wine and simmer until thickened, about 3-4 minutes. Add salt and pepper, the lemon juice and zest and toss. Add about 2 cups of cooked pasta. Toss to coat. Remove from heat. Toss in most of the parsley then pour onto a plate. Place scallops on top. Garnish with additional parsley. Enjoy immediately.
Scallops seared to perfection
So, in conclusion, I do recommend splurging on a d5 pan. Pick one you know you’ll use again and again for recipes that require a little finesse. If you want your pan to be just the right, even temperature while sautéing meat or vegetables or whipping up fragile creamy sauces, I do think it’s worth spending a little more for a pan that will last a lifetime. I was surprised and delighted to learn that these pans are dishwasher safe. And, the new, larger handles even stay cool while you’re cooking. What’s not to love?
Disclaimer: While I did not receive money to write this review, All-Clad did provide me with a complementary pan and asked that I participate in an informational web conference, where I had an opportunity to share my feedback and ask questions. I was not required to write this post.
Want to know more about how to get the temperature of your pan just right? Watch this instructional video from Rouxbe.com. I was totally mesmerized when I watched it.
For more of the highest quality instructional videos are around, visit Rouxbe.com. Rouxbe offers over 200 step-by-step video recipes and about 250 cooking tip videos with their free basic membership. There are also a few free sample cooking school lessons to try out the cooking school content but the rest of the cooking school requires a Premium Membership. Try it free for 14 days.
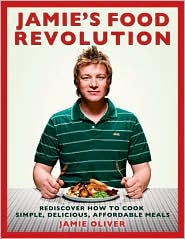
For my birthday in January, my husband gave me a copy of Jamie Oliver’s new book Jamie’s Food Revolution: Rediscover How to Cook Simple, Delicious, Affordable Meals. At the time, I didn’t realize that it was going to be part of a whole movement he is trying to ignite here in America. A few months ago, when I first looked at it, I thought, ‘These are easy recipes with real food you’d want to eat,” and I put it on the part of my kitchen counter reserved for cookbooks that I actually use. Now that I’ve seen the television show he has created, I’ve been inspired to use it even more. I’ll be blogging the results over the next couple of weeks.
You can pick up a copy of the book at Amazon, by clicking here:
Jamie Oliver hopes to change the way American children eat by helping school systems revamp their lunch programs and families revamp what’s for dinner. It’s a daunting task, but he’s been successful in his native Britain already. I was drawn to this chicken dish, because I love leek and mushroom cream sauces. I also happened to have all of the ingredients on hand. Jamie makes the process easy by keeping the recipe to one pan and the cooking time to about 20 minutes.
¼ cup long grain or basmati rice (I used brown basmati rice)
1 large leek
a big handful of crimini or oyster mushrooms (I used pre-sliced white mushrooms)
2 chicken breasts (I used the equivalent amount of chicken tenders from the butcher)
olive oil
a pat of butter
a glass of white wine
freshly ground black pepper
a bunch of fresh parsley
1¾ cups heavy cream
1 lemon
Instructions
Pour boiling water from the kettle into a 2 quart saucepan, place on a high heat and add a pinch of sea salt. Add your rice, bring back to a boil, then turn the heat down slightly. Cook for the length of time given in the instructions on the package.
Cut both ends off the leek, quarter lengthways, slice across thinly, then wash well under running water. Slice the mushrooms. Slice the chicken breasts into little, finger-size pieces.
Put a large frying pan on a high heat and add a good lug of olive oil and a pat of butter. Add the leek to the pan with the white wine, a small glass of water, and a good pinch of salt and pepper. Let it bubble away for 5 minutes, covered loosely with a piece of aluminum foil. Meanwhile, finely chop the parsley, stalks and al. Remove the foil and add the chicken strips, most of the parsley, the cream, and the mushrooms. Stir, bring back to a boil, then turn the heat down to medium and simmer for 10 minutes. Drain your rice. Just before serving, cut your lemon in half and squeeze the juice of one half into the stroganoff. Season to taste.
Spoon some rice onto each plate and top with the stroganoff. Scatter with the rest of the chopped parsley. Serve with the other lemon half, cut into wedges.
The other day, I had lunch at The Left Bank in Larkspur, CA, and I had this lovely butter lettuce salad with a tarragon-mustard vinaigrette. The plate came with an entire head of butter lettuce and the vinaigrette was so smooth, I simply had to try to recreate it at home.
I was lucky today because by chance, I already had shallots and fresh tarragon in the fridge and I remembered to pick up a head of butter lettuce on my way home from dropping off the kids at school. Lunch, here I come.
When standing in front of my bottles of olive oil and vinegar, however, I thought, “I bet Michael Ruhlman’s book, Ratio: The Simple Codes Behind the Craft of Everyday Cooking has something to say about this.” Sure enough, a quick Google search yielded a guest post he wrote over at Elise Bauer’s Simply Recipes. In that post, he actually provides three different vinaigrette recipes. I chose to make the tarragon-mustard vinaigrette because I hoped it would match what I had at The Left Bank.
It almost did – definitely close enough for lunch at home. Just make sure to use the highest quality ingredients you can find and whip it up with full gusto.
2 Tbsp sherry vinegar
1 Tbsp minced shallot
Salt and pepper to taste
2 teaspoons Dijon mustard
6 Tbsp olive oil
1 Tbsp minced fresh tarragon
In a tall bowl, combine the vinegar, shallot, salt, pepper, and mustard. Give it a stir with a whisk or fork to soften the shallot then drizzle the oil in while whisking continuously to form an emulsion. Wait to stir in the tarragon just before serving.
For more information about Michael Ruhlman and his amazing work on ratios, check out his iPhone app and watch this video that explains it.
Okay, I’m officially back on a health kick, which is why I’ve been blogging a little less frequently lately. I actually go to the gym now! But, I’m determined to eat delicious, healthy dishes and am eager to share them all with you, so here we go. Today’s installment is a seared halibut with mashed potatoes and kale chips. Now, I didn’t totally skimp on the ingredients here. I use real butter and olive oil and even whole milk in the mashed potatoes – one could substitute skim milk, cooking spray and so on, but my strategy is to eat flavorful foods but be careful with the portions and to choose foods that have tons of vitamins and minerals and aren’t high in bad fat. We’ll see if it works.
The sauce below breaks some rules because I needed to use ingredients that were on hand. The good news is that it turned out great anyway. Normally, I would have used heavy cream and wine and so on, but I didn’t have any of either, so I used chicken stock and whole milk instead and to my delight, the sauce thickened up nicely and was flavorful too. Again this sauce could easily be tweaked. You could take out the mustard and put in sour cream and paprikah instead or you could keep the mustard and also add capers or olives. I just love mustard and leeks, so that’s how I did it.
Pan Seared Halibut with Leek-Dijon Sauce Serves 4
Ingredients
4 Halibut fillets about 1/2 lb each
Salt and pepper
Olive oil
2 Tbsp Dijon mustard
1 Tbsp olive oil
1/2 cup chicken stock or white wine
1/2 cup whole milk
1 Tbsp butter
1 leek, trimmed and finely chopped
1 tsp grated lemon zest
1 Tbsp freshly squeezed lemon juice
Method
1. Season halibut fillets with salt and pepper and set aside. In a medium bowl, whisk together mustard, olive oil, chicken stock, and milk. Set aside.
2. Heat about 2 tbsp of olive oil in a large sautée pan over medium-high heat. Add fillets to the pan and sautée on one side for about 3 minutes. Flip carefully and sautée for another 3-5 minutes. If the fillets are very thick, they may take a little longer, but be careful not to overcook them. They should flake with a fork and be just opaque (maybe even a little teeny bit translucent in the very middle depending on your taste). Remove to a warmed plate.
3. Add butter to the same pan. Add leeks and sautée gently until softened, about 2 minutes. Add the milk and mustard mixture. Simmer over medium heat until thickened, about 5 minutes. Grate lemon zest over the sauce and squeeze about a Tbsp of lemon juice into the sauce. Stir to mix. Spoon sauce over fish (and mashed potatoes) and serve immediately.
Creamy Leek Mashed Potatoes Serves 4
Ingredients
4 Yukon Gold Potatoes
Salt and pepper
1 leek trimmed and chopped finely
1 Tbsp butter
1/2 cup whole milk or more
Method
1. Peel potatoes and cut into one-inch pieces. Boil for about 15 minutes or until fork tender. In the meantime, melt butter over medium heat in a medium sautée pan. Add leeks and sautée until softened and slightly browned, about 4-5 minutes. Spoon into large bowl. Drain potatoes into same bowl. Add milk and mash either with hand masher or electric hand mixer. Season with salt and pepper.
Kale Chips Serves 4
Ingredients
4 large leaves of Dino Kale (curly leaf kale can work too)
1 Tbsp of extra virgin olive oil
Sea salt to taste
Method
1. Preheat oven to 400˚F or use your convection setting and preheat it to 375˚F.
2. Wash and dry kale leaves. I left the stems on mine, but it really is better to remove them, because they remain tough and stringy while the rest of the pieces of kale becomes paper thin and crispy. Remove a stem by folding the kale in half and cutting away the stem.
3. Brush kale leaves with olive oil and season with fresh ground sea salt. Lay them side by side on a cookie sheet and bake for about 5 minutes. Flip them over and bake for another 5-7 minutes or until leaves are slightly browned, paper thin and crispy. Serve immediately as garnish over the fish.
Day 6 of 14 Days of Apple and I bought an apple peeler/corer/slicer today. Yes! It turns a whole apple into peeled, perfectly uniform thin slices in a snap. I’m going to make apple tarts every day now.
Apple peeler, corer, slicer It’s available on Amazon:
Tonight, I’m hosting a dinner party for some friends and when I was at the grocery store yesterday, I saw they had fresh, organic, free-range turkeys. I decided to cook an early Thanksgiving dinner since I won’t be cooking the full meal later this month. I thought it would be fun to create a cran-apple compote – or chutney – or relish – or sauce. Does anyone know the difference?
This recipe is so easy because you bake it in the oven rather than simmer it on the stove. There was no mess and no risk of burning it. The other day, I left something simmering and reducing on the stove and came back from an extensive Twitter session to find a kitchen full of smoke and a dead saucepan. This recipe is super easy and open to interpretation, so feel free to play with it. Add raisins for a more texture or cinnamon for another flavor accent. Most of all, have fun.
Stay tuned for more posts from my pre-Thanksgiving Thanksgiving dinner.
Apple Cranberry Sauce Serves 6
Ingredients
3 medium Granny Smith apples, peeled, cored, sliced
2 cups fresh cranberries
A few squeezes of fresh lemon juice
5-6 large orange zest pieces
1/2 cup granulated sugar
1 cup orange juice
Method
1. Lay all of the ingredients in a baking pan. Cover and bake in a pre-heated 350˚F oven for about 1 hour. Remove and let cool. Pour off excess liquid when transferring to a bowl. Stir to mix and crush ingredients further. Cool completely. Serve chilled.
It’s day 4 of 14 Days of Apple and I have been mulling over (get it?) creating a savory apple recipe. Everyone knows “pork chops and applesauce.” In essence, this dish is a variation on that theme. Apple slices are stewed in the apple-pomegranate glaze while it simmers and thickens and are served as a side dish and garnish.
I first learned about pomegranate glazes when I watched Tyler Florence’s video Pomegranate-Rosemary Roasted Turkey. This time, I wanted to change up things and incorporate apple flavor into the pomegranate glaze. I knew that apples and pomegranates would work well together because last year, I made an Apple-Pomegranate Quick Bread. Sure enough, these flavors meld perfectly and the cooked apples are the ideal accent. I served this dish with a side of roasted potatoes and Brussels sprouts.
Apple Pomegranate Glazed Pork Tenderloin
Apple-Pomegranate Glazed Pork Tenderloin Serves 4
Ingredients
1.3 lb pork tenderloin
1 Tbsp olive oil
salt & pepper to taste
1 Tbsp unsalted butter
1 apple, peeled and sliced (I used Jonagold)
1/4 cup brown sugar, divided
1 cup Pomegranate juice
1/2 cup apple juice
1/4 cup honey
Method
1. In a small sauce pan, over medium heat, melt the butter. Add half of the brown sugar and the apple slices. Toss the apple slices to coat and sautée for about 2 minutes. Add the pomegranate juice, apple juice, remaining brown sugar and honey. Stir to mix and dissolve ingredients. Bring to a boil. Let boil for 10 minutes. Remove apples and set them aside. Continue simmering for another 10 minutes or until sauce has thickened and coats the back of a spoon. Reduce heat to a low simmer.
2. Heat a grill pan over medium-high heat. Season pork with salt and pepper on all sides. Heat oil in the grill pan. Add pork to pan and brown on all side, turning 1/4 turn every 3-4 minutes. Once browned on all sides, reduce heat to medium and spoon glaze over the pork. Continue glazing and turning every 4-5 minutes until pork has reached an internal temperature of 145˚F – 150˚F for medium rare pork. (A total cooking time of about 30 minutes). Allowing the pork to rest for 5 minutes will bring up its internal temperature another 5˚F. Transfer pork to a serving platter and slice. Garnish with the reserved apples and pomegranate quarters. Serve with roasted Brussels sprouts and potatoes.
Day 22 of 31 days of pumpkin and I am really moving out of my comfort zone now. I’ve never made gnocchi before, or any fresh pasta for that matter, but I was inspired by a beautiful cookbook I have, A16 Food + Wine, the cookbook for the restaurant A16 in the Marina district of San Francisco. It’s called A16 after the highway in Italy between Naples and Canosa. The book is a beautifully designed and photographed tome that I am just getting into, but when I spotted a recipe for Ricotta Gnocchi, I thought, “I could put pumpkin in that,” and that’s what I did. And it worked.
Choosing the sauce to go with pumpkin gnocchi was a no-brainer: it has to be a sage cream sauce. Pumpkin and sage, they’re like Abbot and Costello, Brad and Angelina, Click and Clack (you know, the Tappit brothers).