


To help celebrate Grilled Cheese Month and to join in Panini Happy’s Grilled Cheese Pageant and because I just had a craving for a dish like this, I decided to make an indulgent, grilled cheese sandwich filled with scrambled eggs.

To help celebrate Grilled Cheese Month and to join in Panini Happy’s Grilled Cheese Pageant and because I just had a craving for a dish like this, I decided to make an indulgent, grilled cheese sandwich filled with scrambled eggs.


Recently, I was at Mollie Stone’s market in Greenbrae, CA where there is a sizable bulk foods aisle and I was gazing at all of the varieties of gluten-free grains available there. In my kitchen, I have a shelf with glass canisters filled with staples and I just love the beauty of all the different-colored grains, beans, and pastas lined up next to each other. So when I saw these beautiful grains at Mollie Stones that I hadn’t tried in years, I just had to have them. Pearl millet and quinoa were the two I chose that day and I thought, ‘Why not make a pilaf?’
Once I returned home, I consulted the one book in my collection that was guaranteed to include a quinoa and millet pilaf: Annemarie Colbin’s 1989 book, The Natural Gourmet: Delicious recipes for balanced, healthy eating. If you’ve been following this blog at all lately, you will know that our family (specifically my husband) has renewed its efforts to engage in balanced, healthy eating. The last time I tried to do such a thing was 1990, and I have moved this book with me from place to place ever since.
Rich in vitamins and minerals, as well as protein, both of these grains are gluten-free and deserve a place at everyone’s table.
For tips on how to make sure that your quinoa doesn’t taste bitter, see this post, How to Cook Quinoa over at my good friend Viviane Bauquet Farre’s blog, food and style.
Quinoa and Millet Pilaf
adapted from the recipe by Annemarie Colbin in her book The Natural Gourmet
Serves 3-4
1 Tbsp extra virgin olive oil
1 small onion, diced
1 medium carrot, diced
½ tsp ground cumin
1 clove of garlic, peeled and bashed
½ cup millet
½ cup quinoa (rinsed well)
2 ½ cups vegetable stock
Sea salt to taste (about 1/2 tsp)
Fresh curly parsley to garnish
Method
1. Rinse the quinoa well. To do this, put the quinoa in a fine-mesh strainer and place a bowl underneath. Rinse with cold water while rubbing the quinoa between your fingers. The water will become cloudy. Drain, and repeat this process with fresh water two more times. Strain excess water and set aside.
2. Heat the olive oil in a saucepan over medium heat. Add the onion and sauté for about 4 minutes, or until soft. . Add the carrot sauté for another 4-5 minutes. If you need another touch of olive, don’t hesitate to add just a teeny bit more. Add the cumin and garlic and sautée for another minute. Now we are going to toast the grains so that they have a rich, nutty flavor. Add the millet, and sauté for 5 minutes, stirring frequently. Now add the quinoa and sauté for 2 to 3 minutes more. Again, stirring frequently to coat the grains with the olive oil, aromatic vegetables and spices, and to prevent burning.
3. Add the vegetable stock and salt and bring to a boil. Reduce heat, simmer and, covered for about 30 minutes, or until the water is absorbed. Fluff before serving and garnish with fresh parsley (or fresh cilantro sprigs would do well here too).


[pinterest]

I’ve been working on perfecting roasted root vegetables for awhile. Getting them to come out of the oven crispy on the outside and creamy on the inside is no small feat. Should you parboil first? How hot should the oven be? I’ve gone back and forth about the parboiling question. For years, I’ve been too lazy to bother and I thought that I was getting by just fine. That all changed the other day, when I followed the recipe in Jamie Oliver’s latest book, Jamie’s Food Revolution: Rediscover How to Cook Simple, Delicious, Affordable Meals. He got me to parboil again and I don’t think I will ever go back.
Click on the book to see more:

The other revelation? Heat the olive oil, along with the smashed garlic cloves and rosemary in the roasting pan first, on the stove top. Then toss the vegetables in the heated, flavored oil to coat (before roasting in a 400˚F oven). The vegetables roast evenly, and the flavor diffuses throughout.
See the nice browning on the potatoes? That comes as a result of scuffing up the potatoes while draining them in the colander. Scuffing the potatoes increases the surface area exposed to the warm air, shortening the time for moisture to evaporate the starches (sugars) to caramelize and turn brown.
And of course, don’t break the cardinal rule: make sure the vegetables are not overcrowded. Overcrowding in the roasting pan leads to “steaming” which produces limp, soggy vegetables that can’t brown. Make sure there is only one layer of vegetables and adequate space between them.


I usually avoid vegetarian chili because I fear that it won’t be flavorful enough, but my husband has really laid off meat lately, and he likes his food to have a lot of kick, so I set about making a chili that would stand up to both of our flavor requirements and not include any ground meat. Sure enough, this chili delivers. In addition to chili powder, I’ve added a couple of dried red chilis (seeds and all) which manages to kick it up a notch. The other trick is to add all of the dried spices to the pot while there is hot oil in there to bring out all of the trapped flavors. While you are cooking, you should experience all of the fragrances. Adding dried spices to heated oil makes them truly fragrant.
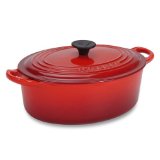
The other trick to this dish is to make it in a pot that can transfer from stove to oven, like this Le Creuset Enameled Cast Iron 5 Quart Oval French Ovens. After you’ve prepared the chili on the stove, you will bake it with the cornbread batter on top for about 30 minutes.

[pinterest]

For my birthday in January, my husband gave me a copy of Jamie Oliver’s new book Jamie’s Food Revolution: Rediscover How to Cook Simple, Delicious, Affordable Meals. At the time, I didn’t realize that it was going to be part of a whole movement he is trying to ignite here in America. A few months ago, when I first looked at it, I thought, ‘These are easy recipes with real food you’d want to eat,” and I put it on the part of my kitchen counter reserved for cookbooks that I actually use. Now that I’ve seen the television show he has created, I’ve been inspired to use it even more. I’ll be blogging the results over the next couple of weeks.
You can pick up a copy of the book at Amazon, by clicking here:
Jamie Oliver hopes to change the way American children eat by helping school systems revamp their lunch programs and families revamp what’s for dinner. It’s a daunting task, but he’s been successful in his native Britain already. I was drawn to this chicken dish, because I love leek and mushroom cream sauces. I also happened to have all of the ingredients on hand. Jamie makes the process easy by keeping the recipe to one pan and the cooking time to about 20 minutes.


After having dinner with a bunch of friends last weekend, where the conversation centered around health and sustainable eating, my husband decided it was time to make the move towards vegetarianism that had been on his mind for some time. So, while at the public library the next day, I checked out a stack of beautiful vegetarian-leaning cookbooks. One of them was Ivy Manning’s The Adaptable Feast: Satisfying Meals for the Vegetarians, Vegans, and Omnivores at Your Table. Casting about for a recipe that would use ingredients I had on hand, including potatoes and cheese (always on hand in our household), I found an inspired variation on a tried-and-true favorite: the twice-baked potato.
Since this version calls for potatoes and cabbage, the author, Ivy Manning describes it as the perfect vegetarian option for a St. Patrick’s Day feast. Recently, in her own recipe blog, Ivy’s Feast, she wrote about another twice-baked potato variation that would also be appropriate for St. Patrick’s Day: Twice Baked Irish Potatoes with Kale and Stout Onions. Yum. And she even made a cooking video to boot. See it here:


The other day, I had lunch at The Left Bank in Larkspur, CA, and I had this lovely butter lettuce salad with a tarragon-mustard vinaigrette. The plate came with an entire head of butter lettuce and the vinaigrette was so smooth, I simply had to try to recreate it at home.
I was lucky today because by chance, I already had shallots and fresh tarragon in the fridge and I remembered to pick up a head of butter lettuce on my way home from dropping off the kids at school. Lunch, here I come.
When standing in front of my bottles of olive oil and vinegar, however, I thought, “I bet Michael Ruhlman’s book, Ratio: The Simple Codes Behind the Craft of Everyday Cooking has something to say about this.” Sure enough, a quick Google search yielded a guest post he wrote over at Elise Bauer’s Simply Recipes. In that post, he actually provides three different vinaigrette recipes. I chose to make the tarragon-mustard vinaigrette because I hoped it would match what I had at The Left Bank.
It almost did – definitely close enough for lunch at home. Just make sure to use the highest quality ingredients you can find and whip it up with full gusto.
Tarragon-Mustard Vinaigrette
adapted from Michael Ruhlman’s recipe
2 Tbsp sherry vinegar
1 Tbsp minced shallot
Salt and pepper to taste
2 teaspoons Dijon mustard
6 Tbsp olive oil
1 Tbsp minced fresh tarragon
In a tall bowl, combine the vinegar, shallot, salt, pepper, and mustard. Give it a stir with a whisk or fork to soften the shallot then drizzle the oil in while whisking continuously to form an emulsion. Wait to stir in the tarragon just before serving.
For more information about Michael Ruhlman and his amazing work on ratios, check out his iPhone app and watch this video that explains it.


A few weeks ago, I purchased whole wheat flour and oat bran at Trader Joe’s and since then, I’ve been remaking my favorite quick bread and muffin recipes to increase fiber and decrease fat. Zucchini Bread is my most recent target. Awhile ago, I posted the Zucchini Bread recipe handed down to me by my mother that I’ve been using since the early eighties. It’s great: sweet, moist, and flavorful. But it’s loaded with sugar and butter and calls for only bleached flour. If you’re in the mood for something a little healthier, try this version instead. It packs as much flavor but the pleasure comes without the guilt.
Healthier Zucchini Bread
2 medium loaves
Ingredients
3 eggs
2 cups grated zucchini
1 1/2 cups granulated sugar
1/2 cup canola oil
1/2 cup applesauce
1 tsp vanilla extract
1 1/2 cups whole wheat flour
1 cup all-purpose (bleached) flour
1/2 cup oat bran
1 tsp salt
1 tsp baking soda
1/4 tsp baking powder
1 Tbsp cinnamon
1/2 tsp freshly ground nutmeg
Method
1. Preheat oven to 350˚F. Spray 2 9′ x 5′ baking pans with nonstick cooking spray.
2. In a medium bowl, beat eggs until foamy. Add sugar, zucchini, oil, applesauce and vanilla. Mix lightly but well (with a spoon).
2. In a separate bowl, mix dry ingredients.
3. Add dry ingredients to egg mixture (in batches) until blended. Don’t over mix.
4. Bake for 45 minutes to 1 hour or until a toothpick inserted in the middle comes out clean. Let cool for 10 minutes before removing from pans.


With the intention of creating heart-healthy, low-sodium, nutritious dishes, I bring you a white bean soup with kale. I’ve described it as creamy, but there is no cream. The creaminess comes from puréeing the beans themselves. To make this a vegan dish, simply swap out the chicken stock for vegetable stock. This recipe is also gluten-free (as long as the stock you use is gluten free). I’m eating it right now and it is totally hitting the spot. The heartiness of the puréed beans makes bread an unnecessary companion, which is good, since I’m trying to avoid that too.
You can garnish this soup with grated Parmesan cheese and certainly season it with additional salt, but since we’re cutting back on salt and fat, I’ve left out both.
Creamy White Bean Soup with Kale
Ingredients
1 lb of dried Great Northern Beans
2 Tbsp olive oil
2 cups diced onions
3 garlic cloves, minced
2 carrots, chopped or diced
1 Tbsp fresh rosemary, chopped finely
5-6 cups low-salt chicken stock
3/4 of a bunch of kale (I used curly kale)
Freshly ground pepper
Method
1. Rinse and sort beans. In a large stockpot, cover with water (about 6 cups) and bring to a boil. Boil for 2 minutes. Remove from heat, cover and let sit 1 hour. This is the quick replacement for soaking overnight. Once they are soaked, drain the water.
2. In a large stockpot, heat olive oil over medium heat. Add onions, garlic and carrots and sautée gently until softened and golden, about 15 minutes. (Watch heat carefully to ensure onions don’t brown too much).
3. Add rosemary and sauée 1 minute. Add beans, then add chicken stock and bring to a boil. Reduce and simmer for about 20 minutes (unless your beans were really tender, in which case, you may be able to simmer for as little as 10 minutes).
4. While soup is simmering, blanch the kale. Here’s how. Trim stems off of the kale leaves by folding them in half and slicing along the spine of the stem. Bring a small amount of water to a boil. Add kale and boil for 2 minutes. Rinse with cold water. Pat dry on paper towels and cut kale into small, bite-size pieces. Set aside.
5. Once the beans have simmered long enough to be fork tender, purée the soup in batches in a blender and then return it to the pot. Reheat and add most of the kale. Save a few pieces of kale for garnish. Pepper to taste. Serve immediately or chill and reheat later.


Okay, I’m officially back on a health kick, which is why I’ve been blogging a little less frequently lately. I actually go to the gym now! But, I’m determined to eat delicious, healthy dishes and am eager to share them all with you, so here we go. Today’s installment is a seared halibut with mashed potatoes and kale chips. Now, I didn’t totally skimp on the ingredients here. I use real butter and olive oil and even whole milk in the mashed potatoes – one could substitute skim milk, cooking spray and so on, but my strategy is to eat flavorful foods but be careful with the portions and to choose foods that have tons of vitamins and minerals and aren’t high in bad fat. We’ll see if it works.
The sauce below breaks some rules because I needed to use ingredients that were on hand. The good news is that it turned out great anyway. Normally, I would have used heavy cream and wine and so on, but I didn’t have any of either, so I used chicken stock and whole milk instead and to my delight, the sauce thickened up nicely and was flavorful too. Again this sauce could easily be tweaked. You could take out the mustard and put in sour cream and paprikah instead or you could keep the mustard and also add capers or olives. I just love mustard and leeks, so that’s how I did it.
Pan Seared Halibut with Leek-Dijon Sauce
Serves 4
Ingredients
4 Halibut fillets about 1/2 lb each
Salt and pepper
Olive oil
2 Tbsp Dijon mustard
1 Tbsp olive oil
1/2 cup chicken stock or white wine
1/2 cup whole milk
1 Tbsp butter
1 leek, trimmed and finely chopped
1 tsp grated lemon zest
1 Tbsp freshly squeezed lemon juice
Method
1. Season halibut fillets with salt and pepper and set aside. In a medium bowl, whisk together mustard, olive oil, chicken stock, and milk. Set aside.
2. Heat about 2 tbsp of olive oil in a large sautée pan over medium-high heat. Add fillets to the pan and sautée on one side for about 3 minutes. Flip carefully and sautée for another 3-5 minutes. If the fillets are very thick, they may take a little longer, but be careful not to overcook them. They should flake with a fork and be just opaque (maybe even a little teeny bit translucent in the very middle depending on your taste). Remove to a warmed plate.
3. Add butter to the same pan. Add leeks and sautée gently until softened, about 2 minutes. Add the milk and mustard mixture. Simmer over medium heat until thickened, about 5 minutes. Grate lemon zest over the sauce and squeeze about a Tbsp of lemon juice into the sauce. Stir to mix. Spoon sauce over fish (and mashed potatoes) and serve immediately.
Creamy Leek Mashed Potatoes
Serves 4
Ingredients
4 Yukon Gold Potatoes
Salt and pepper
1 leek trimmed and chopped finely
1 Tbsp butter
1/2 cup whole milk or more
Method
1. Peel potatoes and cut into one-inch pieces. Boil for about 15 minutes or until fork tender. In the meantime, melt butter over medium heat in a medium sautée pan. Add leeks and sautée until softened and slightly browned, about 4-5 minutes. Spoon into large bowl. Drain potatoes into same bowl. Add milk and mash either with hand masher or electric hand mixer. Season with salt and pepper.
Kale Chips
Serves 4
Ingredients
4 large leaves of Dino Kale (curly leaf kale can work too)
1 Tbsp of extra virgin olive oil
Sea salt to taste
Method
1. Preheat oven to 400˚F or use your convection setting and preheat it to 375˚F.
2. Wash and dry kale leaves. I left the stems on mine, but it really is better to remove them, because they remain tough and stringy while the rest of the pieces of kale becomes paper thin and crispy. Remove a stem by folding the kale in half and cutting away the stem.
3. Brush kale leaves with olive oil and season with fresh ground sea salt. Lay them side by side on a cookie sheet and bake for about 5 minutes. Flip them over and bake for another 5-7 minutes or until leaves are slightly browned, paper thin and crispy. Serve immediately as garnish over the fish.
