Pumpkin month continues here at StreamingGourmet. I love to make savory pumpkin dishes and this is one of my favorites. You can use this sauce with Gnocchi or Ravioli stuffed with squash or pumpkin, or penne, shells or spaghetti. You can make a vegan version (see the link at the bottom) or you can load it up with butter, cream, and cheese. Either way, go easy on the nutmeg. A pinch goes a long way. You could add a little cinnamon, but I don’t like it when these sauces start to taste like pie. We’ll get to pie later.
Pasta with Pumpkin Sauce Serves 4
Ingredients
1 lb pasta (spaghetti or penne or shells)
1 Tbsp olive oil
2 garlic cloves, minced
2 tsp chopped fresh sage or 1 tsp dried sage
1 large onion, chopped
2 large carrots, finely diced
1/2 cup white wine
I cup canned puréed pumpkin
3/4 cup vegetable stock
1 tsp salt
Pepper to taste
1/2 cup heavy cream
1/4 tsp grated nutmeg
1/4 cup fresh grated Parmesan cheese
Additional Parmesan cheese for garnish
Additional fresh sage for garnish
Method
1. Heat the oil in a heavy-bottom stock pot over medium-high heat. Add the garlic and sautée for one minute. Add the sage, onion, and carrot and sautée until softened and slightly browned, about five minutes. Add the white wine and simmer until reduced by half. Add the pumpkin and vegetable stock and stir well to combine. Season with salt and pepper. Reduce heat to medium-low. Simmer uncovered for 10 minutes.
2. While the sauce is simmering, cook your pasta according to package directions.
3. Once the sauce has simmered, reduce the heat even further. Add heavy cream and nutmeg. Stir well and heat through for about 3 minutes. Add Parmesan cheese and stir. Add pasta to the pan and allow the sauce to soak in. Spoon into bowls. Garnish with additional Parmesan cheese and sprigs of fresh sage.
In late 2009, All-Clad launched a new line of cookware that is available only at Williams-Sonoma (online and in-store). As part of the launch, All-Clad contacted food bloggers and asked them to test and review one pan of their choosing. I chose to test the 3-quart sauté pan.
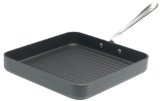
I’ll be honest. I normally don’t splurge on All-Clad. Before receiving the complimentary sauté pan in the mail, I owned just one All-Clad pan; it is one I would not want to go without, mind you, but still. It is the All-Clad LTD 11-Inch Square Nonstick Grille Pan, available at Amazon.com. It enables me to grill indoors and simplifies the cleanup immeasurably. I love it.
But this is my first time cooking with a stainless steel-interior All-Clad pan. The d5 technology improves upon All-Clad’s previous pans, because they’ve welded together not 3, but 5 layers of metal to create an incredibly stable, evenly-heating pan. Representatives from All-Clad assured me that this pan heats so evenly and holds heat so efficiently that I would not need to turn up my gas burner to high. In fact, they warned against it. I wanted to put this notion to the test by cooking something that requires high, even, sustained heat, so I decided to sear scallops.
All-Clad d5 Sauté Pan
Searing Scallops to Perfection
The trick to getting the perfect seared scallop is to start with a well-heated pan and ensure that your scallops are completely dry. Remember when you learned in grade school that the boiling point of water is 100˚C? Well, that means that water cannot reach a temperature higher than that. Steam can, but water can’t. So if the scallops are full of water, they’re going to be stuck at a measly 100˚C, which is not hot enough to produce a nice, caramelized sear. So pat those babies dry. And, if possible, buy scallops that haven’t been sitting in a brine getting water-logged in the first place. That means you’ll need to ask the man behind the fish counter for “dry scallops.”
Now that you’ve patted the scallops dry, season them with a bit of sea salt and freshly ground pepper on both sides and heat the pan. I decided to heat the d5 pan over medium-high heat (instead of high heat), because the All-Clad representatives were so convincing that the new technology warranted it. After the pan itself was good and hot, I added grapeseed oil, (because of its neutral flavor and high smoke point) and let it pre-heat as well. Sure enough, the pan performed perfectly. I knew that the temperature was right as soon as I added the scallops and I heard just the right kind of sizzle. The scallops got a nice sear going right away and the pan did not drop its heat when the three were added. Also, all three seared at the same rate.
Brown for about two minutes on first side
There was enough oil in the pan to just coat the bottom entirely and I added only three scallops so that they wouldn’t get too crowded. If you crowd scallops in the pan, they will steam each other which prevents them from getting a good, crispy sear.
After about 2 minutes, I flipped the scallops and saw the sear I was hoping to see. I let them cook for only another minute or two. It’s important not to overcook scallops and they cook very quickly. They should still be ever-so-slightly-translucent in the middle when you take them off of the heat. If you overcook them, they will become rubbery. So after about 90 seconds, I removed them from the heat and transfered them to a paper-towel-lined plate.
Be careful not to overcook scallops
Since I wanted to serve the scallops over pasta with a garlic, white wine sauce, I set to work preparing the sauce in the same pan. (The pasta had already cooked and was draining in the colander). Here’s how I pulled together the sauce in just a few minutes:
Garlic and White Wine Sauce Serves 1-2
Ingredients
1 Tbsp butter
2 cloves garlic, peeled and finely chopped
1/3 cup dry white wine
Salt and pepper to taste
1 Tbsp fresh lemon juice + a few scrapes of lemon zest
1 Tbsp fresh parsley, chopped
Method
1. Reduce heat in the pan. You don’t want to burn the garlic. Add the tablespoon of butter and let it melt. Add the garlic and sauté until fragrant, about one minute. Add the wine and simmer until thickened, about 3-4 minutes. Add salt and pepper, the lemon juice and zest and toss. Add about 2 cups of cooked pasta. Toss to coat. Remove from heat. Toss in most of the parsley then pour onto a plate. Place scallops on top. Garnish with additional parsley. Enjoy immediately.
Scallops seared to perfection
So, in conclusion, I do recommend splurging on a d5 pan. Pick one you know you’ll use again and again for recipes that require a little finesse. If you want your pan to be just the right, even temperature while sautéing meat or vegetables or whipping up fragile creamy sauces, I do think it’s worth spending a little more for a pan that will last a lifetime. I was surprised and delighted to learn that these pans are dishwasher safe. And, the new, larger handles even stay cool while you’re cooking. What’s not to love?
Disclaimer: While I did not receive money to write this review, All-Clad did provide me with a complementary pan and asked that I participate in an informational web conference, where I had an opportunity to share my feedback and ask questions. I was not required to write this post.
Want to know more about how to get the temperature of your pan just right? Watch this instructional video from Rouxbe.com. I was totally mesmerized when I watched it.
For more of the highest quality instructional videos are around, visit Rouxbe.com. Rouxbe offers over 200 step-by-step video recipes and about 250 cooking tip videos with their free basic membership. There are also a few free sample cooking school lessons to try out the cooking school content but the rest of the cooking school requires a Premium Membership. Try it free for 14 days.
Day 6 of 14 Days of Apple and I bought an apple peeler/corer/slicer today. Yes! It turns a whole apple into peeled, perfectly uniform thin slices in a snap. I’m going to make apple tarts every day now.
Apple peeler, corer, slicer It’s available on Amazon:
Tonight, I’m hosting a dinner party for some friends and when I was at the grocery store yesterday, I saw they had fresh, organic, free-range turkeys. I decided to cook an early Thanksgiving dinner since I won’t be cooking the full meal later this month. I thought it would be fun to create a cran-apple compote – or chutney – or relish – or sauce. Does anyone know the difference?
This recipe is so easy because you bake it in the oven rather than simmer it on the stove. There was no mess and no risk of burning it. The other day, I left something simmering and reducing on the stove and came back from an extensive Twitter session to find a kitchen full of smoke and a dead saucepan. This recipe is super easy and open to interpretation, so feel free to play with it. Add raisins for a more texture or cinnamon for another flavor accent. Most of all, have fun.
Stay tuned for more posts from my pre-Thanksgiving Thanksgiving dinner.
Apple Cranberry Sauce Serves 6
Ingredients
3 medium Granny Smith apples, peeled, cored, sliced
2 cups fresh cranberries
A few squeezes of fresh lemon juice
5-6 large orange zest pieces
1/2 cup granulated sugar
1 cup orange juice
Method
1. Lay all of the ingredients in a baking pan. Cover and bake in a pre-heated 350˚F oven for about 1 hour. Remove and let cool. Pour off excess liquid when transferring to a bowl. Stir to mix and crush ingredients further. Cool completely. Serve chilled.
Day 22 of 31 days of pumpkin and I am really moving out of my comfort zone now. I’ve never made gnocchi before, or any fresh pasta for that matter, but I was inspired by a beautiful cookbook I have, A16 Food + Wine, the cookbook for the restaurant A16 in the Marina district of San Francisco. It’s called A16 after the highway in Italy between Naples and Canosa. The book is a beautifully designed and photographed tome that I am just getting into, but when I spotted a recipe for Ricotta Gnocchi, I thought, “I could put pumpkin in that,” and that’s what I did. And it worked.
Choosing the sauce to go with pumpkin gnocchi was a no-brainer: it has to be a sage cream sauce. Pumpkin and sage, they’re like Abbot and Costello, Brad and Angelina, Click and Clack (you know, the Tappit brothers).
In the US, when you exit the highway for a rest and a bite to eat, you choose from among several fast food restaurants and maybe an Applebees. In France last month, when we exited the A10 to placate a crying toddler during a drive from Paris to the Loîre Valley, we rolled into a quiet, 12th century stone village named Rochefort-en-Yvelines. It was the kind of village that is shuttered and empty at noon on a Tuesday because everyone is home for lunch. But a brief walk up a cobblestone side street yielded a delightful scene. There, behind a courtyard wall were tables and tables of people enjoying lunch outside. We had stumbled upon the Brigandville Restaurant at the base of L’église Saint-Gilles-et-de-l’Assomption, a church built in the 11th and 12th centuries.
Lunch at the Brigandville
Rochefort-en-Yvelines
At this wonderful little spot (described so well in a blog post by Chocolat et Lavande here), my husband and I both ordered the Steak au Poivre, but it was the dish I ordered for my son that was truly memorable. It was chicken in a creamy tarragon, mushroom and Gruyére sauce served over wild rice pilaf. I’m pretty sure I ate more it than he did, the poor guy. Since returning home, I’ve wanted to recreate this amazing dish. It’s taken me awhile because I have trouble splurging on Gruyère cheese, which is $18/lb at our market, and I forget to buy fresh tarragon. But everything came together this weekend, so here it is.
I used a recipe that I found on the Food & Wine website as the basis for the sauce. Several differences evolved as I tweaked it. They use morels and cremini mushrooms, whereas, I just used regular white mushrooms. I used boneless, skinless thighs instead of chicken breasts. And, the Food & Wine recipe does not call for Gruyère, like mine does.
Ingredients
1 8 oz package of white mushrooms (I used pre-sliced)
1 tablespoon extra virgin olive oil
8-10 skinless, boneless chicken thighs
Salt and freshly ground pepper
2 tablespoons unsalted butter
1/2 cup dry white wine
1/2 cup chicken stock or low-sodium broth
1/2 cup heavy cream
1 tablespoon coarsely chopped tarragon
1 teaspoon fresh lemon juice
1 teaspoon lemon zest
1/4 cup grated Gruyère cheese
Method
1. Heat a large, deep sautée pan over medium high heat. Season chicken thighs with salt and pepper and add them to the pan. They should sizzle right away. Use tongs to open up the thighs and flatten them out. Sautée for about 4 minutes each side. Remove them from pan to a plate.
2. Add butter and mushrooms to the pan and sautée mushrooms until they just start to release their liquid, about 4 minutes.
3. Add white wine and simmer until reduced to just a couple of tablespoons, about 3 minutes.
4. Add chicken stock and simmer until reduced by 2/3, about 6 minutes.
5. Add the heavy cream and the tarragon and simmer until the sauce has thickened, about 4 minutes. Add the lemon juice and lemon zest and blend well. Add the grated Gruyère and stir constantly until melted and blended in. Season with salt and pepper.
6. Return chicken to the pan. (While the chicken was sitting, it sweat out a lot of juices. I did not add these back into the sauce because I felt I had gotten the balance of sauce flavors just right, but I imagine you could add that juice back in to good effect). Stir to coat chicken and simmer until heated through, about 3 minutes.
Usually for this blog, I document my attempts to make recipes I’ve never tried with ingredients that are new to me. I must confess that I have been working on perfecting a Bolognese sauce for years. I think I’ve finally got it.
This Bolognese sauce has a secret ingredient that you won’t find in most Bolognese sauces. But we’ll get to that later.
First a little background.
For a long time, I was dissatisfied with the results of my Bolognese attempts. The sauces always seemed relatively tasteless and never thick enough. My normal approach was to brown onions and ground beef, add dried herbs (like oregano and such), add a jar of prepared sauce (like Classico) and let it simmer for a long time. I thought that the longer it simmered, the tastier it would be, and that was a little bit true, but not all that much. I tried adding garlic and then adding more and more garlic, to give it flavor. It worked a little, but it seemed that the garlic flavor just disappeared. I tried adding red wine. That worked a little too. I tried adding lots of olive oil once. Again, it enhanced the flavor a bit, but it came at a cost and didn’t give the dramatic flavor I was after.
I’m a huge fan of chicken Marsala and veal Marsala, but I’ve got a craving for a pork chop, so I figure “why not try pork Marsala?” At the store, a double thick pork chop catches my eye and once again I think, “Why not?” (read on to find out why not). I’ve never made Marsala sauce before, but I figure it’s a variation on the Fig Sauce I did in September, just with mushrooms and Marsala wine instead of figs and Balsamic vinegar. Let’s see how this one turns out. An ingredients list (of sorts) is at the end of this post.
I’ve scoured the internet for a recipe to use for tonight’s fig adventure. I am surprised at how few recipes there are out there for fresh, green figs. Most of the recipes I found were dessert-oriented or were for dried figs, or were for Mission Figs which are black figs. Mission Figs are sweeter than green figs. People dry green figs because they are not considered sweet enough fresh, but I’ve got a tree full of fresh green figs and I want to use some today, so we’ll just have to see what happens. I’ll put some of my green figs aside for drying and try them out later.
Sprinkle pork with salt and pepper. Heat 1 tablespoon oil in heavy large skillet over medium-high heat. Add 4 pork slices and saute until brown, about 2 minutes per side. Transfer pork to baking sheet. Add remaining 1/2 tablespoon oil to skillet. Repeat with remaining 4 pork slices. Transfer pork to oven to keep warm.
Melt 1 tablespoon butter in same skillet over medium-high heat. Add shallots and saute until tender, about 2 minutes. Add 2 tablespoons balsamic vinegar. Simmer until vinegar evaporates, scraping up any browned bits on bottom of skillet, about 1 minute. Add chicken broth. Simmer until mixture is reduced by half, about 4 minutes. Add figs and whipping cream. Simmer until sauce thickens slightly, about 4 minutes. Add remaining 1 tablespoon vinegar and any accumulated juices from pork. Simmer until sauce thickens enough to coat spoon, about 2 minutes longer. Season sauce to taste with salt and pepper.
Arrange pork on plates. Spoon sauce over. Sprinkle with parsley and serve.