Categories
Appetizers Produce Sides Uncategorized Vegetarian

Thrasher’s French Fries: Best Fries on the Boardwalk? My Attempt to Make Them at Home


[pinterest]

Thrasher's French Fries

For over 80 years, the Thrasher’s French Fries stand at 401 South Atlantic Avenue, in Ocean City, MD, has served as a kind of gatekeeper to the famous boardwalk. At Thrasher’s, the potatoes are cut fresh, fried twice, doused with vinegar, and served in buckets. Big buckets. With only three sizes available (16 oz, 32 oz and 53 oz buckets), the smallest serving you can buy is a pound. But, there is something about these fries that makes them so addictive that a pound often is not enough and Thrasher’s fans are adamant. These are the best fries on the planet.

Thrasher's French Fries
Always a line of people waiting for their fries

With more than eight decades of frying and over 22,000 fans of the unofficial facebook page, who’s to argue? In 1933, Thrasher’s weathered a hurricane that not only destroyed vast sections of the boardwalk, but actually severed off Assateague peninsula to create the now-famous Assateague island across the inlet. Thrasher’s then went on to survive the Great Depression, two World Wars, Reaganomics, and the “freedom fries” era. Featured in countless magazine and newspaper articles, like the Woman’s Day 8 Best Boardwalk Food in the U.S., and inevitably found in the comments section of any web article about the “best fries,” these fries inspire a fanaticism usually reserved for politics and religion.

So, when I was heading back to my native Maryland Eastern Shore, I knew that it was time to make a pilgrimage to the place where I first learned what a French fry is supposed to taste like. Sure enough, there is something irresistible about these fries. They aren’t particularly crispy, but the flavor is pure potato. In fact, Thrasher’s is so proud of the fresh potato flavor, they don’t provide (or even allow) ketchup.

NO KETCHUP.

Katherine Bunting-Howarth of Delaware remembers using so much vinegar once, she soaked a hole through the bottom of the bucket and she’s not the only who considers the vinegar to be an essential element of the Thrasher’s experience. 939 people on facebook have “liked” the Thrasher’s facebook update, “[…] diggin’ the Apple Cider Vinegar with no ketchup!” and dozens more have added their two cents.”


OC, MD 3073 miles

After returning to California, more than 3000 miles away, I began to wonder. Can I recreate true Thrasher’s French Fries at home? I know the basic ingredients: Russet potatoes, peanut oil, salt and vinegar. But can I get that same balance of tender and crispy? And can I reproduce the rich, potato flavor? I set out to find the answer. But it would not come directly from the source. Thrasher’s is part of the Bayshore Development Corporation which also owns the Jolly Roger amusement parks. My attempts to reach someone at Bayshore willing to talk about Thrashers Fries were unsuccessful. Buddy Jenkins, chair of the board of the Bayshore Development Corporation, has always been secretive about the magic of these fries. According to a 2004 Washington Post article, Jenkins said, “We have a process that I certainly don’t intend to divulge,” but that the secret involves a “recipe and cooking times.”

Well, a recipe and cooking times were just what I set out to develop. I knew that part of what makes boardwalk fries, boardwalk fries is that they are soaked in a brine solution before they are fried twice, so I knew that I would try brining the potatoes as part of the solution. But how hot should the oil be? How long should the fries, well, fry? To find some answers, I turned to The Food Lab at SeriousEats.com. In May, J. Kenji Lopez-Alt set out to determine what makes a McDonald’s french fry so darn good and I have applied some of his learnings to this project. But Thrasher’s French Fries are not like McDonad’s French Fries. They’re thicker for one thing, and they’re served in buckets; they’re never frozen, and, must I say it again? They’re eaten with vinegar, not ketchup. But, they do need to come out with a crispy exterior and a fluffy, fully-cooked interior and that is where the “recipe and cooking times” come in. In his article, Lopez-Alt discovers that McDonald’s actually blanches its fries in nearly-boiling water before frying them, so I decided to add this step to my process as well. Blanching them at 170˚F rinses off excess sugars and starch which in turn prevents over-browning later. It also strengthens the cell walls of the potato so it doesn’t completely lose its structure during the frying process. Again, Lopez-Alt explains all of this really well here.

Following the multi-step process of brining, blanching, frying, cooling, frying meant that I could enjoy something approaching a bucket of Thrasher’s French Fries without having to leave the state of California. And that, my friends, is worth a day’s effort. Are you with me on this one? If you are, read on for the complete recipe.

Homemade French Fries

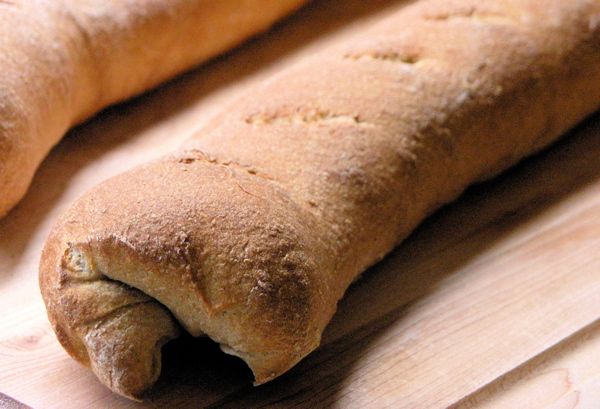
My best attempt at recreating
Thrasher’s French Fries at Home
Serves 2 (or one, really)

Ingredients

4 Russet potatoes, peeled and sliced into 3/4-inch thick slices
Peanut Oil, enough for fries to be submerged
Sea Salt
Apple Cider Vinegar (or malt vinegar, if you prefer)

For the brine
2 quarts water
1 cup salt

Tools
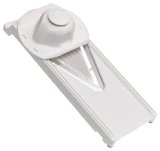
I don’t have a lot of deep-frying tools in my kitchen. No wire basket, no electric fryer. But the one instrument that is indispensable for this recipe is a Candy/Deep Fry Thermometer, like the one pictured here:

Russet Potatoes

Method

1. Mix the water and salt in a large glass bowl. Stir to dissolve salt. Add potato slices and allow to sit for 30 minutes. Drain in a colander and rinse.

2. In a large stock pot over medium heat, bring a bath of water to 170˚F. Remember, the boiling point of water is 212˚F, so you don’t want to let it boil. There will just be a few bubbles. Add the potatoes and let them sit in this warm bath for 17 minutes. Continue to check the temperature periodically to ensure that you are spot on. Remove potato slices to a paper towel-lined cutting board or cookie sheet and allow them to dry. They must be completely dry before submerging them in the hot oil, so do what you need to do to ensure that they are dry.

3. In a dutch oven or heavy-bottom pot, heat the peanut oil to a whopping 400˚F. Beware. Hot oil is hot. Wear protective clothing and make sure you do not allow any drop of water to fall into the hot oil bath. It will splatter and burn you. Don’t ask me how I know this. Carefully lower about 1/3 of the potato slices into the oil and allow them to fry for 80 seconds. Make sure they are not sticking to each other during this process. If you notice them starting to turn brown, remove them immediately. During this stage of the process, they should only just begin to take on a golden color. Remove them to a paper-towel lined surface and repeat with two more batches. Allow the oil to come back to the proper temperature between batches. This is what they look like after the first frying session:

After the first fry

4. Allow the fries to cool for at least 30 minutes. Then, bring the oil back up to a temperature of 375˚F. Again, in batches, allow the fries to cook for 3 – 4 minutes. Watch carefully so that they don’t get too brown. Remove them to a paper-toweled lined surface and salt immediately. They can be kept warm in a 200˚F oven on a parchment-lined cookie sheet while you are frying the other batches, but I found it wasn’t necessary because everything moved so fast.

5. Serve in paper-lined cups (I used tall coffee cups) and sprinkle with salt and, of course, cider vinegar! Enjoy immediately.

Perfect French Fries at Home

What are your memories of Thrasher’s French Fries? What tips do you have for making the best fries at home? What boardwalk food do you love the best? Share your memories, tips and opinions in the comment section below.

If you liked this article, please become click “like” on StreamingGourmet facebook fan page.

For great cooking videos like this one introducing you to French fry techniques, check out Rouxbe.com:

Rouxbe Online Cooking School & Video Recipes
Categories
Breads Pantry

Whole Wheat Sweet French Baguette

baguette
Whole Wheat Baguette

I originally wrote this blog post 10 years ago, but rediscovered it now that I’m staying  home to do my part to prevent the spread of the corona virus. Since we might face a time when it’s hard to get provisions from the grocery store, I wanted to remind myself that I have the capability to make my own bread, from staples that are plentiful in my pantry.

Ten years ago, I didn’t want to just to eat good bread, I wanted to make it. I didn’t have the patience to do the whole, “wait for it overnight” thing. I wanted to make bread that I could enjoy later that same day.

I found the kind of recipe I was looking for over at SteamyKitchen.com, but I adapted it to incorporate whole wheat flour (and also added a little honey). Jaden Hair, the author of the SteamyKitchen.com blog as well as The Steamy Kitchen Cookbook: 101 Asian Recipes Simple Enough for Tonight’s Dinner does a wonderful job explaining how to make bread in a day and as usual, includes beautiful photographs of the steps you need to take.

I’m pretty new to bread making, but I’ve been on a rampage lately, making bread, and more consistently, pizza dough.

This bread came out just the way I wanted it to. Crunchy on the outside, great texture on the inside and the nutty/sweet flavor of whole wheat and honey. I didn’t have a pizza stone, so I literally just used a half-sheet pan and it worked fine. Jaden includes advice/tricks for what to do if you don’t have a pizza stone either.

Baguette
Whole Wheat Baguette

Whole Wheat Sweet French Baquette
Makes 2 loaves

Ingredients
2 cups whole wheat flour
1 3/4 cups all-purpose white flour
1 Tbsp honey
2 tsp instant dry yeast
2 tsp salt
1 1/2 – 2 cups warm water

Method

1. Set aside the bag of white flour to dust your surface with later. Place remaining white and whole wheat flour in the bowl of a stand-up mixer. With your spoon, swirl the yeast on one side of the bowl and then swirl the salt on the other side. Pour the warm water in a well in the middle of the flour. Using the mixer paddle, mix on low speed until the dough comes together in a mass, then switch to the dough hook. Mix on medium speed for 2 minutes. The dough should come together and clear the sides but some of it will continue to stick to the bottom. You may need to add additional water. If so, do so, one tablespoon at a time. After 2 minutes, let the dough rest for 5 minutes. After the dough has rested for 5 minutes, turn on the mixer again and knead with the dough hook for 3 minutes.

2. Take the dough out and place on a wooden cutting board dusted with the white flour. If the dough is still too sticky, you will incorporate a little more flour into while you knead it. If it doesn’t need additional flour, then just knead the dough by hand until it is very satiny, smooth, tight and formed into a nice, compact ball.

3. Place the dough in a large lightly oiled bowl (I use olive oil). Turn dough over to coat it on all sides. Cover with a damp, clean dish towel. and set in warm place for 1 1/2 hours. Dough should almost double in size during this rest time. About 1 hour into this stage, preheat the oven to 450F and place pizza stone (if you have one) into the oven to preheat it as well.

4. After the dough has risen for an hour and a half, punch it down and form it back into a ball. Cut the dough into half, placing one ball back in the bowl and covered with a towel. Pick up the dough you’re working with and stretch it out until it forms a big rectangle. On the wooden chopping block dusted with flour, fold over each end about an inch and then fold in the long sides until they touch each other. Press down on the middle seam, down the length of the dough get it all tucked in and then pinch then ends shut as well. You want to make sure there is a tight seal to allow the bread to rise and expand evenly while it is baking. Don’t overwork the dough during this stage. It just spent an hour and a half creating tiny bubbles inside and you don’t want to lose all of them at this point.

5. Turn the dough over so that the seam is on the bottom. Place it on a well-floured surface and cover it with a damp kitchen towel. Repeat the whole process with the other dough half. Let the loaves rest for 30 minutes. Then, take a sharp knife and cut several shallow, diagonal slashes on the surface of the loaf. The slashes allow steam to escape during baking so your bread doesn’t burst and crack and everything expands evenly.

6. When you are ready to transfer the dough loaves onto the pizza stone in the oven, get a 1/2 cup of water ready close by. Open the oven, put your bread in the oven and throw the water on the oven floor (literally toss the water out onto the bottom of the oven to create a big steam cloud). Immediately close the oven door to trap the steam inside. Bake for 20-25 minutes. Check temperature of the bread, like you would a steak. The internal temperature should be 190-210F. Remove and let cool slicing it.

Categories
Poultry Sauces Uncategorized

Chicken w/ Tarragon, Gruyère & Mushroom Cream Sauce

Chicken w/ Tarragon, Mushroom and Gruyère Cream Sauce
Chicken w/ Tarragon, Gruyère & Mushroom Cream Sauce

In the US, when you exit the highway for a rest and a bite to eat, you choose from among several fast food restaurants and maybe an Applebees. In France last month, when we exited the A10 to placate a crying toddler during a drive from Paris to the Loîre Valley, we rolled into a quiet, 12th century stone village named Rochefort-en-Yvelines. It was the kind of village that is shuttered and empty at noon on a Tuesday because everyone is home for lunch. But a brief walk up a cobblestone side street yielded a delightful scene. There, behind a courtyard wall were tables and tables of people enjoying lunch outside. We had stumbled upon the Brigandville Restaurant at the base of L’église Saint-Gilles-et-de-l’Assomption, a church built in the 11th and 12th centuries.

Lunch at the Brigandville - Rochefort-en-Yvelines
Lunch at the Brigandville
Chloe and Gerard
Rochefort-en-Yvelines

At this wonderful little spot (described so well in a blog post by Chocolat et Lavande here), my husband and I both ordered the Steak au Poivre, but it was the dish I ordered for my son that was truly memorable. It was chicken in a creamy tarragon, mushroom and Gruyére sauce served over wild rice pilaf. I’m pretty sure I ate more it than he did, the poor guy. Since returning home, I’ve wanted to recreate this amazing dish. It’s taken me awhile because I have trouble splurging on Gruyère cheese, which is $18/lb at our market, and I forget to buy fresh tarragon. But everything came together this weekend, so here it is.

I used a recipe that I found on the Food & Wine website as the basis for the sauce. Several differences evolved as I tweaked it. They use morels and cremini mushrooms, whereas, I just used regular white mushrooms. I used boneless, skinless thighs instead of chicken breasts. And, the Food & Wine recipe does not call for Gruyère, like mine does.

Ingredients

1 8 oz package of white mushrooms (I used pre-sliced)
1 tablespoon extra virgin olive oil
8-10 skinless, boneless chicken thighs
Salt and freshly ground pepper
2 tablespoons unsalted butter
1/2 cup dry white wine
1/2 cup chicken stock or low-sodium broth
1/2 cup heavy cream
1 tablespoon coarsely chopped tarragon
1 teaspoon fresh lemon juice
1 teaspoon lemon zest
1/4 cup grated Gruyère cheese

Method

1. Heat a large, deep sautée pan over medium high heat. Season chicken thighs with salt and pepper and add them to the pan. They should sizzle right away. Use tongs to open up the thighs and flatten them out. Sautée for about 4 minutes each side. Remove them from pan to a plate.

2. Add butter and mushrooms to the pan and sautée mushrooms until they just start to release their liquid, about 4 minutes.

3. Add white wine and simmer until reduced to just a couple of tablespoons, about 3 minutes.

4. Add chicken stock and simmer until reduced by 2/3, about 6 minutes.

5. Add the heavy cream and the tarragon and simmer until the sauce has thickened, about 4 minutes. Add the lemon juice and lemon zest and blend well. Add the grated Gruyère and stir constantly until melted and blended in. Season with salt and pepper.

6. Return chicken to the pan. (While the chicken was sitting, it sweat out a lot of juices. I did not add these back into the sauce because I felt I had gotten the balance of sauce flavors just right, but I imagine you could add that juice back in to good effect). Stir to coat chicken and simmer until heated through, about 3 minutes.

Serve immediately over rice or pasta.

Categories
Produce Sides Uncategorized Video How-to

Sweet Potato French Fries

Sweet Potato French Fries with Roast Beef

While making sweet potato chips the other day (see that post here), I decided to use one of the other attachments from my new mandoline and make french fries as well. Once again, I was surprised and delighted by how easy and quick it was to turn one giant yam into a pile of matchstick fries.

After hestitating for a long time (“Mandolines are too expensive,” I thought. “They’re too dangerous.”) I purchased my Swissmar Borner V Slicer Plus for only about $40 and I learned that it works great and has many built-in safety features. Click on the photo to learn more.

Mandoline Magic
Mandoline Magic

As usual, I was in a rush, so I didn’t salt these for the recommended 30 minutes. I just salted them and threw them into olive oil that I had pre-heated to nearly smoking. It only took about 5 minutes before they looked done.

Frying in Olive Oil
Frying in Olive Oil

With tongs, I transferred them to a paper-towel lined plate and dabbed them to remove the excess oil. I salted them again and enjoyed them with leftover roast beef from the night before. Scroll down to watch the recipe video I used for the roast beef.
Although they tasted great, the sweet potato fries weren’t super crispy, so I did a little research. There’s a thread on CHOW that recommends soaking them in water first, then dredging them in cornstarch and then frying. I’m definitely going to try that next time because several people who tried this method concurred that it was a big success. You can read that thread here.

Remove them from oil to a paper towel

Even without the extra cornstarch step, these fries were super yummy. The texture reminded me a bit of the French fries at In & Out Burger, not super crispy, but still good. And since they’re sweet potatoes, they’re packed with extra nutrients, right?

Sweet Potato French Fries

Now for the roast beef video. In this video, they coat the beef with grainy mustard before roasting it. Yum.

Categories
Soups and Stews Uncategorized

Asparagus Soup

Chopped asparagus
Chopped asparagus

It’s Asparagus season in Northern California. Bunches that normally go for $5.99 or $6.99/lb now go for $1.29/lb. That’s when I know it’s time for my favorite soup recipe: Asparagus Soup.

I’ve taken this recipe from the book Celebrating the Impressionist Table, by Pamela Todd. Published in 1997, it is now out-of-print, but it is full of sumptuous recipes. I love the premise of this book: to provide recipes for the foods seen in the paintings of Renoir, Monet, Toulouse-Lautrec, Manet and others. Part art history, part cultural history, part cookbook, it satisfies the curiosity of anyone interested in understanding the day-to-day lives of these artists and their families as well as the role food played in their 19th century French lives.

Most important, though, is the fact that this soup is darn tasty.

Potage Argenteuil – Asparagus Soup

Ingredients

3 Tbsp butter
1 lb asparagus, trimmed and chopped with tips reserved
2 leeks, rinsed, trimmed and chopped
1 1/2 cups potatoes, peeled and diced
4 1/2 cups vegetable stock (I used chicken stock)
6 Tbsp light cream
2 Tbsp chopped fresh chives (I didn’t have any this time, but I recommend using them)
pinch of grated nutmeg
salt and pepper
fresh chives, to garnish

Instructions

1. Melt the butter in a large saucepan. Add the chopped asparagus, leeks, and potato, and sauté for 5 minutes. Add the stock and bring to the boil, then lower the heat, cover and simmer for 20 minutes. Transfer to a blender or food processor and blend until very smooth. (You could even strain it through a fine strainer).

2. Return the soup to a clean pan. Stir in the cream and chives and season with the nutmeg, salt and pepper; keep warm.

3. Blanch the reserved asparagus tips in boiling water for 2 minutes, then drain and refresh immediately under cold water. Pat dry with paper towels.

4. Spoon the soup into warmed bowls and garnish with the asparagus tips and chives.

Potage Argenteuil (Asparagus Soup)


Blog Widget by LinkWithin