Categories
Beef Sandwiches Sauces Uncategorized

Béarnaise Burger

Béarnaise Burger

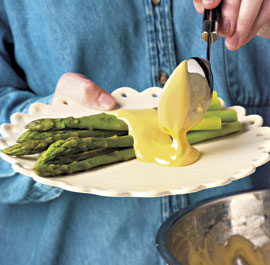
I’m going through a tarragon phase right now, and whenever I cook with tarragon, I think of Sauce Béarnaise. Sauce Béarnaise is a butter emulsion sauce like Hollandaise. Hollandaise is flavored with lemon juice while Béarnaise Sauce is flavored with shallots, chervil, pepper and tarragon.

Sauce Béarnaise on Asparagus

For this burger, I wanted the flavor profile of a Sauce Bérnaise without actually making Sauce Béarnaise. It’s a legendarily difficult sauce to get right and uses an entire stick of butter. It’s a great sauce that goes well with steak or asparagus or lots of other things. If you want to try making it yourself, try the recipe at Fine Cooking. Feel free to also pour the sauce over a burger, but in this recipe, we take the ingredients of Sauce Béarnaise and add them to ground beef, so they are right in the burger.

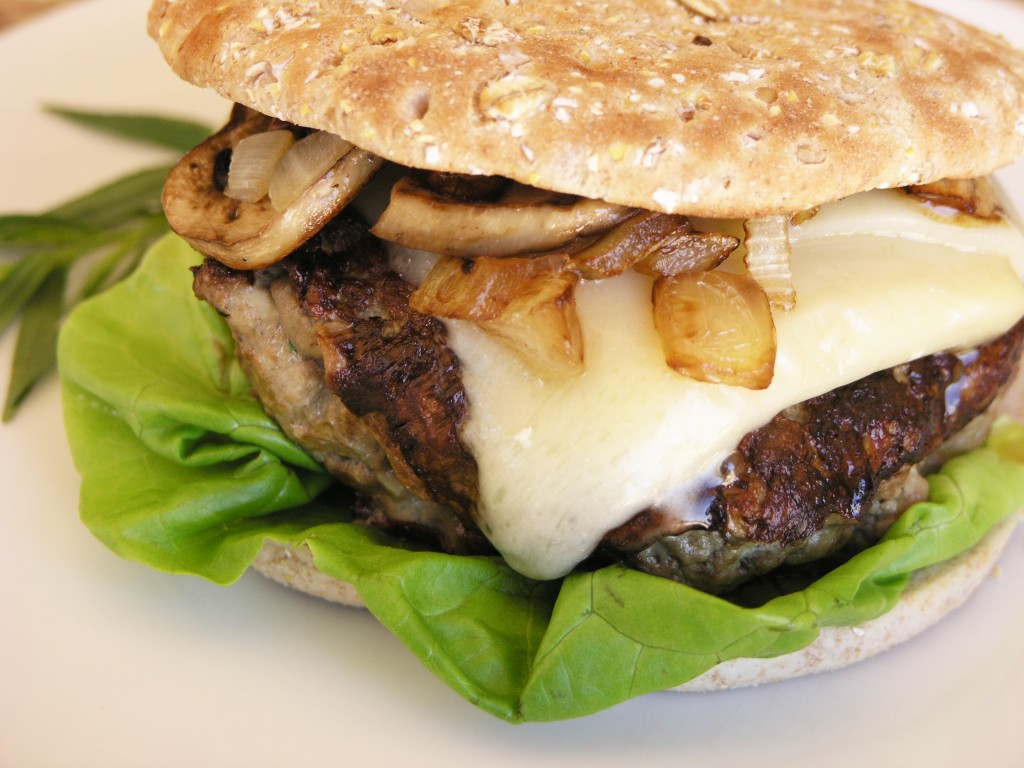
I used Gruyère Cheese on my burger and added sautéed onions and mushrooms. I used 85/15 ground beef to achieve a balance between fat and flavor.

Bérnaise Burger
Makes 4 Burgers

Ingredients

1-2 Tbsp diced shallots
1/2 tsp fresh chervil, finely chopped (optional)
1 1/2 Tbsp fresh tarragon, finely chopped)
1 egg
1 lb of ground beef (85/15 or 80/20)
Salt and pepper to taste
1 Tbsp butter
1/2 lb sliced mushrooms
2-3 Tbsp diced onion
4 slices of Gruyère cheese
4 slices of butter lettuce
4 hamburger buns – I used sandwich thins by Oroweat

Method

1. Mix the shallots, chervil, tarragon, egg, ground beef, salt and pepper in a large bowl. Form into 4 patties. Heat a grill pan over medium heat. Spray with cooking spray. Add the patties and cook for about 7 minutes on each side, depending on how well done you like your burgers and how hot your pan is. Cover, vented, while cooking.

2. Meanwhile, heat a medium sautée pan over medium heat. Melt the butter and add the onions. Sautée until just starting to soften, about 5 minutes. Add the mushrooms, and continue to sautée until mushrooms sweat out their moisture and start to brown.

3. Add the cheese to burgers and continue to cook, with the vented cover, until cheese has melted. Toast the buns. Prepare the lettuce slices.

4. Assemble the burgers with lettuce on the bottom, burger patty with cheese in the middle and mushrooms and onions on top. Serve immediately.
Categories
Casseroles Pizza and Pasta Sides Uncategorized

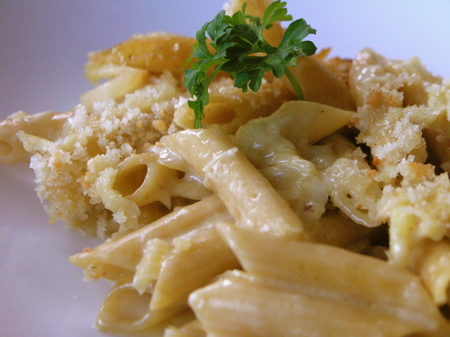
Dungeness Crab Mac-n-Cheese

Dungeness Crab Mac n Cheese

The Dungeness Crab season is in full swing here in the Bay Area and while my appreciation for Dungeness Crab is limited by my upbringing on the Eastern Shore of MD (Chesapeake country, blue crabs), I can’t resist this pale imitation once a year, so when I saw the price had dropped to $5.99/lb at Mollie Stone’s, I jumped. I paid $9.50 for a single crab which yielded about 1 cup of crabmeat.

Last year, I made a crab-picking video which has been playing continuously ever since on my livestream channel. You can check it out here: Livestream.com/StreamingGourmet It’s embarrassing for me to watch and I can’t stand the sound of my own voice, so although I host StreamingGourmet (the blog and video site) I don’t make very many videos. I felt compelled to demonstrate how easy it can be to yank big chunks of crab meat out of the back fin of a crab, though, since it can be a little intimidating. I like to confess that I picked dungeness crab on my very first date with my (now) husband, so if he can fall in love with me with crab juice dripping down my chin and crab meat wedged in my fingernails, then we’ll probably be fine when we’re 65.

Dungeness Crab
Dungeness Crab

Dungeness Crab Mac-n-Cheese
Serves 3-4

Ingedients
1/2 lb penne
Olive oil
1 cup heavy cream
1 cup shredded sharp cheddar cheese
1 cup shredded Gruyére cheese
1 tsp salt
freshly ground pepper
freshly grated nutmeg
1 Tbsp butter
1/4 cup chopped onion
1 large clove of garlic, minced
1 cup crab meat
1/2 cup white wine
1/2 cup Panko bread crumbs
1/4 cup grated Parmesan cheese
a few dabs of butter

Method

1. Prepare penne according to al dente package directions. When drained, toss with a bit of olive oil to keep it from sticking together while you prepare the other elements of the dish. Set aside.

2. Preheat oven to 350˚F.

It’s best if you work on steps 3 and 4 simultaneously. Read them through to see what I mean.

3. In a medium saucepan, slowly bring the cream to a boil. Allow it to thicken and reduce by half, watching carefully not to scald the cream or let it boil over. Turn off the heat and let it cool for about a minute. Then add the cheddar and Gruyére cheeses in small batches, incorporating each batch before adding the next. Try not to over stir the mixture as this could make it stringy. Halfway through adding the cheese, you can pop the heat back on low, but be careful to keep the heat as low as possible while still promoting the melting process. Heat that is too high will cause the cheese fats to separate from the proteins. If that happens, there’s no going back. After the last batch of shredded cheese is incorporated, add salt, pepper and nutmeg to the sauce. Turn off heat and let sit, stirring occasionally.

4. While the milk is simmering and reducing, (before you are melting the cheese into it) prepare the other part of the sauce: In a medium saucepan, melt the butter over medium heat. Add the garlic and onion and sautée until onions are softened, but not browned, about 4 minutes. Add wine and simmer to reduce wine by half, about 15 minutes. Add crab meat and continue to simmer until wine has reduced by half again. Remove from heat.

5. Stir the wine & crab meat mixture into the cheese sauce until fully combined. Spray a casserole dish with nonstick cooking spray. (You could also prepare this dish in individual serving-sized gratin dishes). Add pasta to the casserole dish and then pour the wine/cheese sauce over the pasta and toss to combine. Top with bread crumbs. Dab with butter and sprinkle Parmesan cheese across the top.

6. Bake for 20-25 minutes, or until bubbly. If the top is not browned by the end of the baking process, stick it under the broiler for a few minutes. Let cool for 5 minutes and then enjoy immediately.

Categories
Casseroles Sides Uncategorized Vegetarian

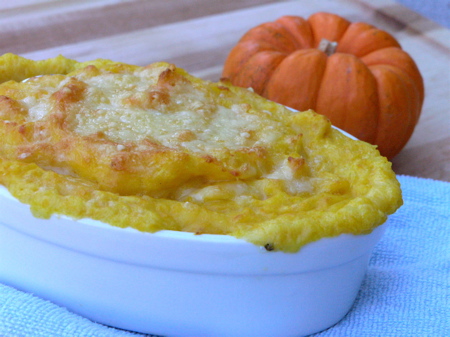
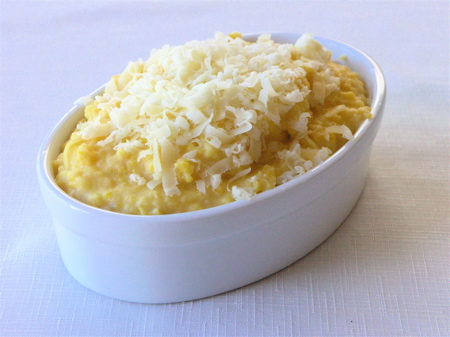
Creamed Pumpkin Potatoes

Creamed Pumpkin Potatoes

Day 29 of 31 days of pumpkin and you’re still here? You’re crazy.

Just kidding.

I’ve been doing a lot of fattening up of recipes lately and this one is no exception. In fact, I actually adapted this one from a lighter recipe in Cooking Light Five Star Recipes: The Best of 10 Years. The book was published in 1997 and is out of print, but it’s available on Amazon:

The difference between the recipe in the book and the one I’ve published here is that Cooking Light leave out the extra 1/4 cup of Gruyere that I added and they use 1/4 cup of fat free sour cream instead of 1/4 cup of heavy whipping cream. If I had had sour cream on hand, I would have used it, but to be honest, I had a lot of heavy whipping cream on hand because of the all the garnishes I’ve had to do this week, so I just substituted it in. Their recipe also didn’t call for nutmeg, which I added in because it’s a flavor I love to mix with Gruyere and with pumpkin, so it was a natural addition.

The last difference is that the Cooking Light recipe does not call for baking the mixture in the oven with a little bit more cheese on top. That’s all me.

This is a great side dish, and perhaps a fun addition to a Thanksgiving lineup. It could use a bit more flavor, however. Next time, I might add chives to the ensemble or other fresh herbs. The pumpkin flavor was subtle. You can substitute two cups of canned pumpkin if you don’t have the fresh pumpkin all peeled, deseeded and chopped on hand. I actually did have it on hand because of this crazy pumpkin month I’ve been having.

Creamed Pumpkin Potatoes

Creamed Pumpkin Potatoes
Yields 5- 1 cup servings
Adapted (and fattened up a bit) from Cooking Light Five Star Recipes: The Best of 10 Years
Ingredients

4 cups peeled, cubed baking potato (about 1 1/2 lbs)
3 cups peeled, cubed pumpkin flesh
1/4 cup shredded Sharp cheddar cheese
1/4 cup shredded Gruyere cheese, divided
1/4 cup heavy whipping cream, at room temperature
1/2 tsp salt (or more)
1/4 tsp ground pepper
Pinch ground nutmeg

Method

1. Place potato and raw, fresh pumpkin chunks in a large saucepan; add water to cover and bring to a boil. Cover and cook for 20-30 minutes or until tender; drain.

2. Preheat oven to 375˚F. Combine potato, pumpkin, cheddar cheese, half of the Gruyere cheese, whipping cream and seasonings in a large mixing bowl. Beat at medium speed with an electric mixer until smooth. (You could even pass it through a sieve to make it really smooth). Transfer mixture to an oven proof dish like a Gratin dish and sprinkle remaining Gruyere on top. Bake in oven for 15-20 minutes or until top is golden brown. Let stand for 5-10 minutes before serving.

Categories
Appetizers Uncategorized

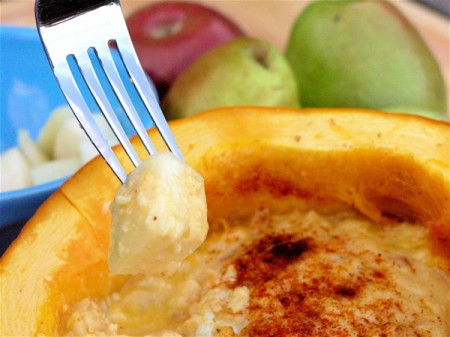
Cheese Fondue in a Pumpkin

Pumpkin Fondue
Pumpkin Fondue

Day 19 of 31 days of pumpkin and it’s time for more cheese. This time, let’s just have it straight up, shall we?

I’ll be honest. I had never made fondue before and this time was not exactly a 5 star success. But if you avoid my mistakes, yours will come out perfectly. The flavor of this fondue was great, but the consistency was not quite creamy enough. Can you tell in the photo? So, I’m going to spend time in this post explaining what can go wrong when making a fondue and how to avoid it.

Are you with me?

My tagline is “We risk disaster, so you don’t have to,” for a reason.

Categories
Breakfast/Brunch Uncategorized Vegetarian

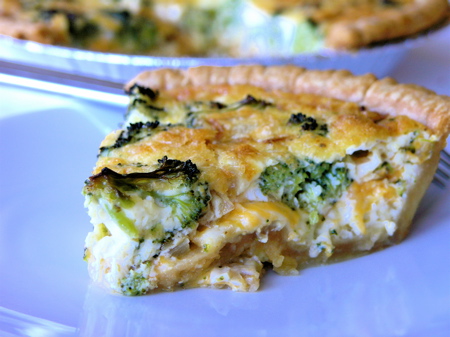
Broccoli, Jack & Cheddar Quiche

Broccoli Quiche
Broccoli Quiche

I wasn’t kidding when I said that I was adding broccoli to everything right now. I’m still working through this 5lb bag of broccoli wokly florets.

I’ve been wanting to conquer quiche for awhile. Achieving just the creamy, cheesy consistency is not trivial. Today, I feel more successful than ever. I’ve made quiche before and blogged about it, but I must admit that this recipe tops the Salmon one for smooth, rich, creamy texture. Finally!

The trick? Heavy cream, for one, and lots of it. Also, a mixture of Monterrey Jack cheese (which is supremely meltable) and cheddar. And finally, I believe putting the grated cheese in the bottom of the crust and then layering everything else on top of it, rather than mixing the cheese in with the eggs and cream, helped create this exemplary texture. See what you think.

Broccoli Quiche with Monterry Jack and Cheddar
Serves 4-6

Ingredients

1/2 cup of diced onion
1 tsp olive oil
1 generous cup of broccoli florets
3 large eggs
1 cup heavy cream
1/2 cup whole milk
pinch of freshly ground nutmeg
salt and pepper to taste
1/3 cup shredded Monterrey Jack cheese
1/3 cup shredded Cheddar Cheese
1 frozen, 9-inch deep-dish pie crust, thawed

Method

1. Pull the pie crust out of the freezer to let it thaw and preheat your oven to 400˚F.

2. Heat olive oil in a small frying pan and sautée onions gently until starting to brown, about 8 minutes.

3. Pick over the broccoli florets and trim to them to ensure that they are small enough and of uniform size. Bring a small amount of water to boil in a small saucepan and add the broccoli florets. Boil/steam for 2 minutes tops. Remove from heat, drain water and set aside.

4. Beat together the eggs, cream, milk, salt, pepper and nutmeg. Leave on counter during the rest of the preparation to allow it to come to room temperature.

5. Prick the bottom of the pie crust to prevent air bubbles from forming. Bake crust for 11-15 minutes or until golden brown. Remove from oven and allow to cool.

6. Change oven temperature to 375˚F. Spread cheeses evenly along the bottom of the pie crust. Distribute broccoli florets and cooked onions evenly over the cheese. Pour milk and egg mixture on top. Season with a bit more salt and pepper. Place on a baking sheet and bake for 35 – 40 minutes. Allow to cool a bit before serving. I actually turned off my oven a few minutes early and allowed the quiche to sit in the cooling oven for awhile, which kept it warm and cooking without overdoing it.

Looking for more broccoli recipes? Check out ComfyCook’s collection of Broccoli recipes from BSI participants around the blogosphere.

Categories
Casseroles Pizza and Pasta Sides Uncategorized Vegetarian Video How-to

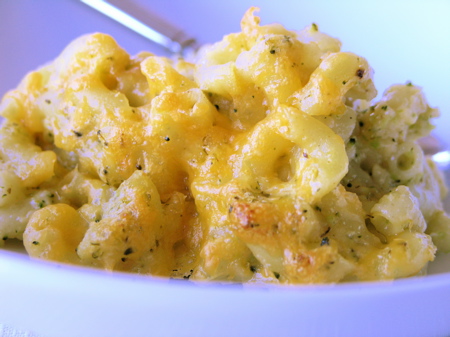
Mac-n-Cheese w/ Hidden Broccoli & Cauliflower

Mac-n-Cheese w/ Broccoli & Cauliflower Hidden Inside

My four-year old is a very picky eater. If he could have macaroni and cheese at every meal, he would. So I’ve taken to hiding healthy foods in the mac-n-cheese to ensure he’s getting enough nutrition. This version worked pretty well. If I were making it for myself, I would have used stronger cheeses like (you guessed it) Gruyére, and I would have added other punchy flavors like garlic or nutmeg. But I wanted this dish to go down without a fuss, so cheddar ruled the day.

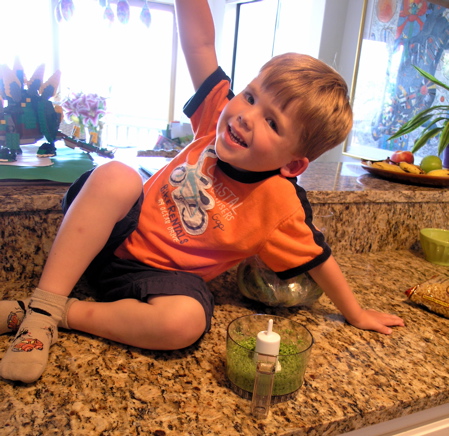
I didn’t conceal from him the fact that I was concealing healthy foods in his macaroni and cheese. In fact, I enlisted his help during the broccoli and cauliflower grinding process. He loves to push the button. We used my new Cuisinart mini chopper. It’s a snap to pull out, use, and clean up.

Cuisinart Mini Prep Plus
Available at Amazon - Click here
Iain
My son
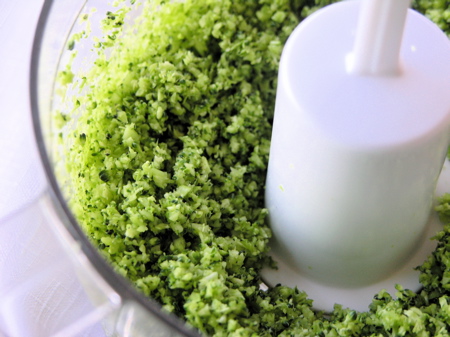
Broccoli Chopped in the Mini Prep

Macaroni & Cheese with Broccoli and Cauliflower
Serves 4

Ingredients

1 1/2 cups broccoli florets
1 1/2 cups cauliflower florets
1 tsp olive oil
1/2 lb elbow macaroni
3 Tbsp butter
2 Tbsp flour
1 1/4 cup whole milk (or heavy cream to make it really decadent)
2 cups shredded sharp cheddar cheese (we had fun shredding ours in a vintage Mouli)
1 tsp salt
1/2 cup bread crumbs
1 Tbsp melted butter

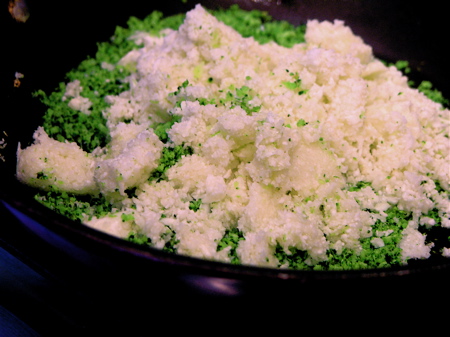
Broccoli & Cauliflower sautéeing

Method

1. Preheat oven to 350˚F. Put broccoli florets into food processor and grind into teeny weeny pieces. Remove to a bowl. Repeat with cauliflower.

2. Heat olive oil in a skillet over medium heat. Add broccoli and cauliflower and toss. Basically, we’re browning these vegetables just a little bit to enhance the nutty sweet flavors they bring to the dish. After a few minutes, turn off the heat and leave for later.

3. Bring salted water to boil in a large pot and boil the macaroni. Since you’re going to be baking this dish, you can shave off a minute from the boiling time recommended on the package.

4. In the meantime, for the roux, heat the milk in a saucepan to almost boiling. Remove from heat for later. Melt butter in a heavy-bottom saucepan. Add flour and whisk continuously. Sautée flour for 3 minutes. Don’t let it brown or it will get bitter. Add the warm milk in a steady stream and whisk continuously. Simmer gently (no boiling!) until thickened, about 2 minutes. Add shredded cheese in small batches, incorporating each batch completely. Season with salt. Add broccoli and cauliflower and stir until well combined. At this stage, you have a kind of broccoli-cheddar cream soup. You could use this sauce for lots of different things. I put it over a baked potato and it was awesome.

5. Mix bread crumbs and melted butter in a small bowl.

6. To assemble, pour macaroni into a baking dish that has been sprayed with non-stick cooking spray. I used this small Le Creuset dish. Stir in the sauce, coating all of the macaroni completley. Top with the buttered bread crumbs. Bake uncovered for 25 minutes or until bubbly. If topping is not already browned, you can put it under the broiler for a minute at the end.

Le Creuset. Available at Amazon

Want to see a bunch more macaroni and cheese ideas? Check out this video collection at StreamingGourmet.com:

Looking for more broccoli recipes? Check out ComfyCook’s collection of Broccoli recipes collected from BSI participants around the blogosphere.

Categories
Casseroles Produce Uncategorized

Gratin Dauphinois of Potatoes, Jerusalem Artichokes (Sunchokes) and Leeks

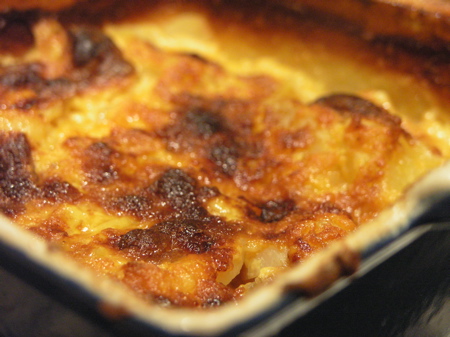
Gratin of Potatoes, Jerusalem Artichokes and Leeks

When a friend of mine told me she had a bumper crop of Jerusalem Artichokes in her backyard, I saw an opportunity to try yet another overlooked, underappreciated vegetable.

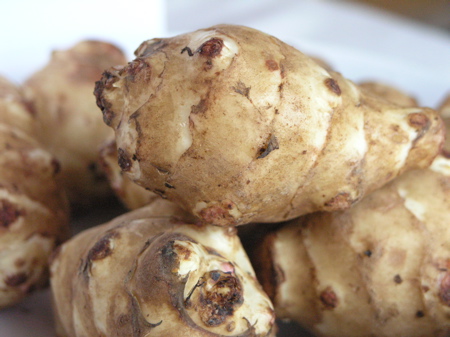
I had never heard of Jerusalem Artichokes (now often called Sunchokes), though once she dropped them off, I recognized them from that isle in the produce department devoted to intimidating root vegetables. Jerusalem Artichokes are not actually a kind of artichoke though they are in the artichoke family. They are a kind of sunflower and are native to North America. They were grown by Native Americans before Samuel de Champlain discovered them and brought them back to France in the early 1600’s.

Jerusalem Artichokes

When picking sunchokes, look for ones that are firm to the touch and plump. They should be crispy when you slice them raw. As sunchokes sit around, they get mushy.

I figured the best way to cook this unfamiliar root vegetable would be to add it to a Gratin Dauphinois. I used the Gratin Dauphinois in Jacques Pépin’s book as the basis for my recipe.

Chez Jacques: Traditions and Rituals of a Cook

I adapted the recipe by adding the sunchokes, the leeks and the nutmeg. Also, I made a few substitutions based on what I had on hand in my kitchen. For example, I didn’t have Gruyère cheese, nor did I have half and half or heavy cream, so I substituted 4-year aged cheddar for the Gruyère and 2% milk for the half and half. It came out great, so you should feel confident making these kinds of substitutions in a pinch.

Categories
Appetizers Salads Uncategorized

Roasted Beet Salad with Goat Cheese

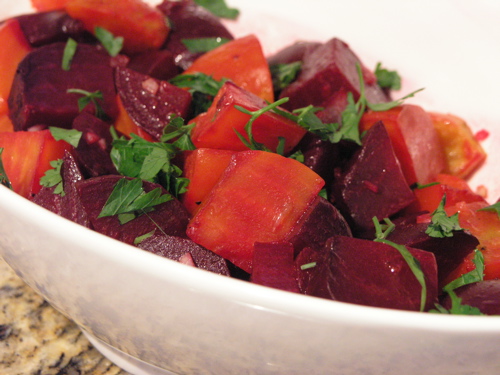
Beet Salad
Beet Salad

Roasted beet salad is one of my absolute favorites and recently at Le Garage in Sausalito, I had a beet salad with some scrumptious goat cheese on it. I was inspired to make beet salad at home and add a little goat cheese myself.

The goat cheese does not appear in the photograph but I dropped slices of it as a garnish right before serving the salad.

Ingredients

6 medium beets (3 red, 3 yellow)
Olive oil for roasting

3 Tbsp Olive oil
Juice of half a lemon
1 Tbsp fresh grated orange zest
Juice of one orange
1 Tbsp shallot, minced
1/2 tsp dijon mustard
1 1/2 Tbsp Fresh Italian parsley, chopped
1 3 oz package of herbed goat cheese – room temperature

I’ve been looking for a better way to roast beets and this time I found one from who else? Martha Stewart. Following her advice, I drizzled each beet with olive oil and wrapped it aluminum foil lined with parchment paper. I also seasoned the beets with salt and pepper before folding them up into their individual packets. Then I roasted them for about an hour in an oven heated to 450˚F. They were delicious right from the get-go and needed little adornment for the salad.

Categories
Panini Sandwiches Uncategorized

Ham & Cheese Panini with Fig Jam

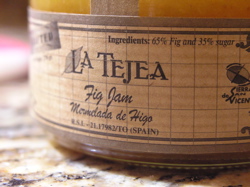
Fig Jam purchased at Jacuzzi Family Vineyards in Sonoma, CA.

While Americans often refer to a grilled sandwich as a Panini, when we say “panini,” we’re actually using the Italian word for “small bread rolls” (in the plural). Panino is the singular and “panino imbottito” is the phrase used for “stuffed panino” or sandwich. So this posting should be titled, Panino Imbottito with Ham, Cheese, and Fig Jam,” but I’m not that imbottito with myself (i.e. full of myself). Or am I?

After cooking with figs last week, I had a hankering to use the fig jam I purchased awhile back at the Jacuzzi Family Vineyards wine and olive oil tasting center.

Fig jam is pretty sweet, so it’s a great counterpoint to the salty, black forest ham that I’m using in this sandwich. If you don’t live near Sonoma, you can purchase fig jam at Amazon.com. I’ve added a link to the right to make it easy to find.

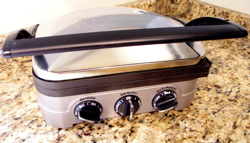
Although my husband laughed when I bought yet another cooking gadget, I use this Cuisinart Gridder Gourmet all the time.

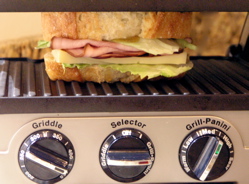
I’m going to be using my Cuisinart Griddler Gourmet which can function as an indoor grill or a panini press or open up into a griddle. You can use a frying pan right on the stove and just put a heavy lid on top of the sandwich. I do love my “griddler gourmet” though and use it a lot more than I thought I would.

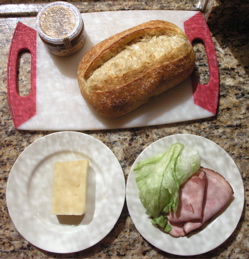
Great bread is one of the most important components of this sandwich.

For this sandwich, I purchased Black Forest Ham. In the US, that term doesn’t mean as much as it does in Europe, where Black Forest Ham is a protected designation and therefore is required to come from the Black Forest in Germany. I know that the ham I’m buying has a spicy, sharp flavor that I like. A Virginia ham, or Smithfield ham would also work well for this sandwich because of its salty and strong flavor, but a honey-cured ham might prove too sweet to pair with fig jam.

I’ve also chosen a Jarslberg Cheese. It’s a Norwegian cheese in the Swiss Emmentaler-style family of cheeses. It’s less sharp than Emmentaler, which satisfies my personal taste, while still providing that tangy counterpoint to the other flavors in the sandwich.

Ive chosen a La Brea brand French Loaf and spread a generous amount of Fig Jam on it.
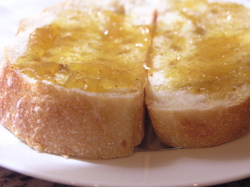
I've chosen a La Brea brand French Loaf and spread a generous amount of Fig Jam on it.

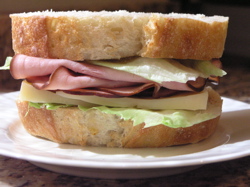
This photo shows the amount of jam I chose to use. The La Brea French loaf is nice and crunchy on the outside and soft on the inside. Most panini you find in Italian cafés are made with Ciabatta and when made properly, chefs use the whole loaf, splitting it horizontally. The loaf I chose was too big to do that, so I cut slices off of it.

The sandwich is ready to go into the grill

I added some iceberg lettuce to the sandwich because that was what I had on hand. You might choose something with a little more bite, like arugula. (I love that arugula is called Rocket in the UK).

Sandwich grilling under medium-high heat

I grilled the sandwich under medium-high heat for about 10 minutes. I really wanted the cheese to melt without burning the bread, so I watched the sandwich carefully.

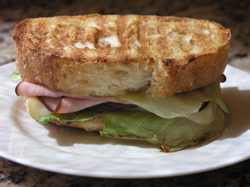
The finished sandwich

This was a thoroughly satisfying sandwich. To make it even richer, you can add butter or brush olive oil on the outside of the bread so that it browns even more as it grills. You could also use Salami rather than Ham. This version is a nice, relatively lite (I used low fat Jarlsberg cheese and there is no mayonnaise or aioli) sandwich. Buon Apetite!

Blog Widget by LinkWithin