Categories
Produce Sides Uncategorized Vegetarian

Cranberry Beans with Garlic and Leeks

Cranberry Beans
Cranberry Beans

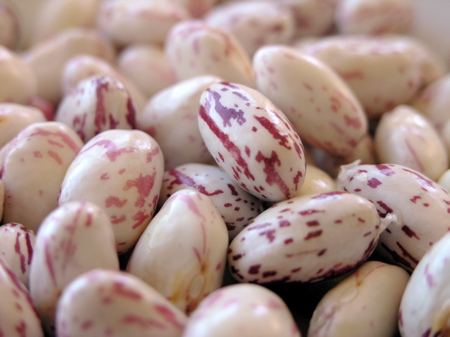
When I saw these gorgeous beans (still in the shell) at the market, I just had to buy them. I had no idea what they were or what I was going to do with them, but they were too beautiful to pass by. Turns out, their flavor is just as pleasing: nutty, rich, creamy. They’re like eating a bowl of health.

“What are they?” you ask? At the store, they were labeled “Raspberry Beans,” but my subsequent research has shown that they are more commonly called “Cranberry Beans.” They are related to the Italian ‘borlotti’ bean. The best explanation of the origin and history of the Cranberry Bean can be found over at The Culinary Addict. He explains how the Cranberry Bean was first cultivated by the Aztecs and the Incas thousands of years ago. It’s believed to have been crossed with the white bean to create today’s larger, kidney-shaped Cranberry Bean. It was brought to Italy in the 1500’s and has thrived there ever since. Check out The Culinary Addict’s photos of the beans still in their shell.
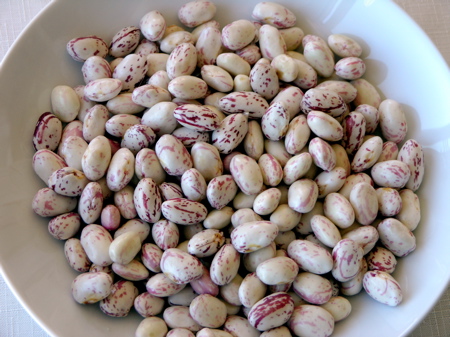
Cranberry Beans Just Shelled

Unfortunately, the beautiful marbled color does fade with cooking, but the flavor more than makes up for the lost colors. I decided to cook mine in a garlicky, low-fat broth. This would be great served with lamb shanks or osso bucco, but I’ll be honest. I ate mine without any accompaniment.

Cranberry Beans with Garlic and Leeks
Serves 2

Ingredients

2 cups shelled, fresh Cranberry Beans
1 Tbsp extra-virgin olive oil
1 large leek, minced
3 garlic cloves, minced
2 cups, 99% fat-free chicken broth
1 Tbsp butter
1 tsp salt
1 bay leaf
1/2 tsp lemon zest
1 Tbsp chives, chopped finely
1 clove garlic, minced
pepper to taste

Method

1. Bring 6 cups of salted water to boil. Add beans and simmer for 20 minutes. Remove from heat, drain, and rinse with cold water to stop the cooking. Set aside.

2. Heat olive oil in heavy-bottom medium sauce pan. Add leeks and sautée gently until starting to soften, about 2 minutes. Add garlic and sautée for 1 minute. Add cooked beans and stir to coat. Add broth, butter and salt and bring to a gentle simmer. Add bay leaf and let cook uncovered for 20 minutes, stirring as needed. Add additional chicken stock to keep beans moist, if necessary.

3. While beans are cooking, mix grated lemon zest, chives and minced garlic in a small bowl. Add this mixture to the beans near the very end of the cooking time. Remove bay leaf, add fresh ground pepper to taste and enjoy.
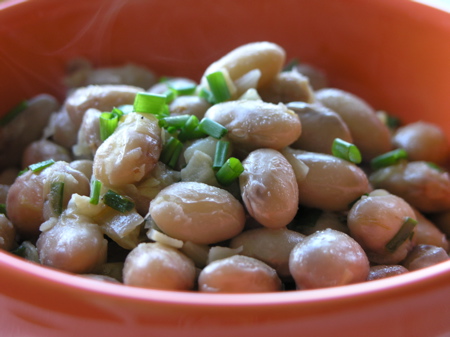
Cranberry Beans in Garlic Sauce
Cranberry Beans with Garlic and Leeks
Categories
Fish & Shellfish Uncategorized

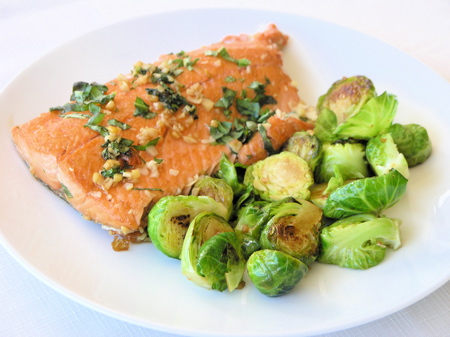
Garlic Ginger Basil Salmon

Garlic Ginger Basil Salmon from Foodwishes

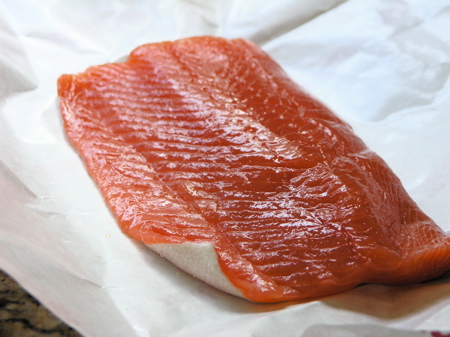
I’ve been happily eating lighter dishes of late and last night, I even bought fish at the grocery store: wild caught Coho salmon for $14.99/lb. I searched StreamingGourmet for a salmon recipe and decided to use Chef John’s Garlic, Ginger, Basil Salmon video recipe. Chef John has the most comprehensive collection of video recipes on the web. Catch them on StreamingGourmet, but for complete recipes and the entire collection, please visit Foodwishes.blogspot.com. Chef John’s complete Garlic Ginger Basil Salmon blog post is here.

Wild Coho Salmon
Wild Coho Salmon

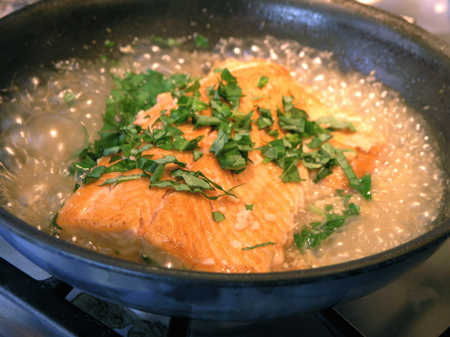
The recipe is super easy. In short, you brown the salmon in some olive oil for about 4 minutes (depending on the thickness). Then after you flip it, pour in a prepared sauce that has minced garlic, minced ginger, brown sugar, vinegar, chili sauce and water. It bubbles up and starts to evaporate. Sprinkle on the basil, and then as the sauce cooks down, it thickens just as the fish is ready. I enjoyed sautéed Brussels sprouts with mine. I spooned some of the sauce over the Brussels sprouts while they were cooking too.

Sauce cooking down
Sauce cooking down

Categories
Appetizers Salads Uncategorized Vegetarian

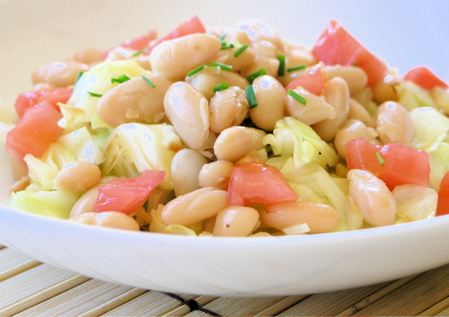
Warm Cabbage and Cannellini Bean Salad

Cabbage and Cannellini Bean Warm Salad

Recently, I decided it was time to reign in my appetite and focus on eating healthier, leaner, fresher food. I’ll be honest. I even signed up for the web-based version of Weight Watchers. As a lifetime member, I know the program, but paying a monthly fee again and tracking foods using the webtools have helped me shift my cooking energy in the right direction. I think the WW approach actually helps one adopt habits that are in line with what Mark Bittman and Michael Pollan advocate. In the first sentence of Food Matters: A Guide to Conscious Eating with More Than 75 Recipes, Bittman poses the question, “Could improved health for people and planet be as simple as eating fewer animals, less junk food and super-refined carbohydrates?” and in the first sentence of In Defense of Food: An Eater’s Manifesto, Pollan writes simply, “Eat food. Not too much. Mostly plants.” Either of these statements could be licensed by Weight Watchers as taglines, and so I’m using the WW framework and tools to help me do what Pollan and Bittman advise.

With that in mind, I returned from the market today with bags full of produce and set about making a low-point, satisfying lunch quickly. I like vegetables best when they are sautéed slightly – still crunchy, but the raw edge taken off. And most of the time, something warm just feels more filling. So for this dish, I did what is my favorite preparation of cabbage – chopped it and sautéed it in a little olive oil with salt and pepper. I topped the cabbage with a preparation of garlic and cannellini beans that had also been warmed and then garnished the dish with a few heirloom tomato chunks and chives. It was so easy and quick (and pretty cheap too), it just might become a staple.

Warm Cabbage and Cannellini Bean “Salad”
Serves 2

1/2 Tbsp olive oil
1/2 medium onion, chopped
1/2 head of green cabbage, chopped into 1/2 inch pieces
salt and pepper to taste
1 tsp of olive oil
2 cloves garlic, chopped finely
1 15 oz can of cannellini beans, drained
1/4 cup 99% fat free chicken broth
1 Bay leaf
1/2 tomato, chopped into small cubes
chopped chives to garnish

Method

1. Heat oil in large, heavy bottomed frying pan or wok over medium-high heat. Add onion and sautée until softened, about 3 minutes. Add cabbage and toss. Continue to sautée gently for about 8 minutes In the meantime, heat oil in a small saucepan. Add garlic and sautée gently for 1 minute. Add beans and stir thoroughly. Add chicken broth and Bay leaf and bring to a near boiling simmer. Allow to simmer until cabbage is ready.

2. Spoon cabbage onto plate. Top with beans and sprinkle with chives. Add tomatoes, and season with salt and pepper. Enjoy immediately.

Tools used today available at Amazon:

Categories
Panini Poultry Sandwiches

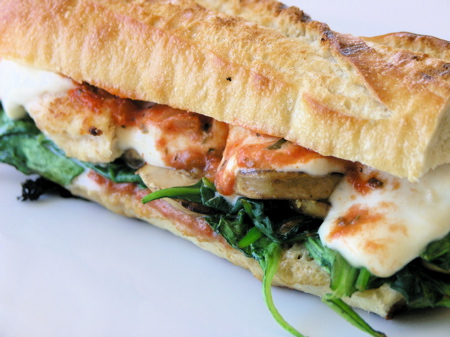
Chicken Parmesan Panini

Chicken Parmesan Panini

For dinner last night, I made baked chicken breasts coated with bread crumbs and grated Parmesan cheese. Since I had leftovers today, I decided to fire up my panini grill. I had fresh mozarella, spinach and mushrooms all on hand, so I figured I’d convert the leftover chicken into a Chicken-Parmesan sandwich.

First, here’s how to make the chicken breasts. This is an easy, family-friendly, relatively healthy dish:

Parmesan and Breadcrumb Crusted Chicken Breasts
Serves 4

Ingredients

4 skinless, boneless chicken breasts
1/4 cup milk
8 Tbsp of bread crumbs
8 Tbsp grated Parmesan cheese
1 tsp salt
1/2 tsp pepper

Method

Preheat oven to 375˚F. Spray small baking pan with non-stick cooking spray. Pour milk onto a plate or into a dredging pan. Mix bread crumbs, cheese, salt and pepper and pour onto a plate or into a dredging pan (or use a zip lock bag). Dip a chicken in the milk, then dredge in bread crumb mixture and dust off excess. Place breasts in pan and bake for 25 minutes, (flipping halfway through) or until golden brown and opaque all the way through.

To make the Panini:

Ingredients

French baguette
1 tsp olive oil
1/2 cup sliced raw mushrooms
pinch of garlic pepper
1/4 cup Tomato-basil sauce from a jar
A smattering of raw baby spinach leaves
1 chicken breast prepared as above, cut into pieces that fit on your bread
Thick slices of fresh mozarella (I used 3 – 4 oz)

Method

1. Preheat panini press to medium high heat. Heat olive oil is small sautée pan over medium-high heat. Add mushrooms. Mushrooms should never enter a pan quietly. There should be a sizzle. Sautée until liquid is released and mushrooms are starting to brown, about 5 minutes. Remove from heat and set aside.

2. To assemble the panini: Slice bread in half and smear tomato sauce on both halves of the bread. Add a layer of spinach to the bottom. Then lay chicken breast on top of the spinach, the mushrooms on top of the chicken and the mozzarella on top of that. Top with other slice of bread and put sandwich in the panini press. Adjust the temperature so as not to burn the bread while you are heating the sandwich enough for the mozarella to melt. Because the sandwich was so thick, it took 15 minutes for the cheese to melt adequately.

Tools I used for this dish are available at Amazon.com:

Categories
Breads Breakfast/Brunch Uncategorized

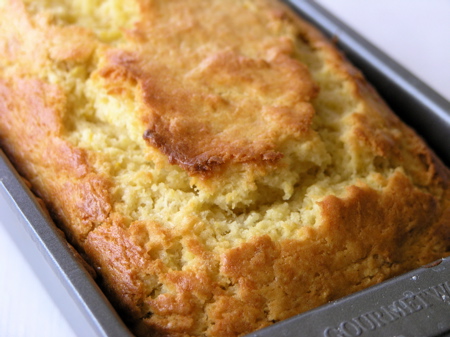
Fuzzy Navel Tea Bread

Fuzzy Navel Tea Bread

A few over-ripe bananas recently prompted me to think about making banana bread, but I also had a couple of over-ripe peaches and I thought, “I love my banana-peach-oj smoothie. Why not make a banana-peach-orange tea bread?” and Fuzzy Navel Tea Bread was born. To give it a real orange punch, I included orange zest from an entire (albeit small) orange. This bread works as well during the summer as it would as a Christmas gift. The orange zestiness of it is reminding me of Christmas. You could healthy it up a bit by reducing the sugar and substituting a portion of the all-purpose flour with whole wheat flour, but I was really going for a sweet, delicate quick bread best enjoyed with afternoon tea (or at breakfast or brunch, of course).

Fuzzy Navel Tea Bread
One loaf

Ingredients

8 Tbsp unsalted butter, room temperature (+ butter for greasing pan)
2 cups All-Purpose Flour
1 tsp salt
1 1/2 tsp baking powder
1 cup sugar
2 eggs
2 very ripe bananas
2 very ripe peaches
zest of one orange
2 Tbsp fresh orange juice

Method

1. Preheat oven to 350˚F. Use butter to grease one medium loaf bread pan and set aside.

2. Mix dry ingredients and set aside. Put peaches in a blender and pulse until well mashed. Transfer to a bowl and mash in the bananas using a potato masher or a fork. Add zest of one orange (I used a microplane zester/grater) and mix thoroughly with bananas and peaches. In a medium bowl, cream the butter. Beat in the eggs, one at a time and then beat in the fruit mixture and orange juice.

3. Gently stir the wet mixture into the dry ingredients. Don’t over mix.

4. Pour batter into loaf pan and bake for 50-60 minutes. Test with a toothpick, which should come clean when inserted.

Tools I used in this recipe can be found at Amazon.com:

Fuzzy Navel Tea Bread
Categories
Breakfast/Brunch Uncategorized Vegetarian

Broccoli, Jack & Cheddar Quiche

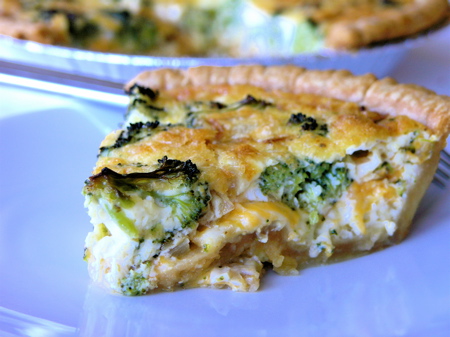
Broccoli Quiche
Broccoli Quiche

I wasn’t kidding when I said that I was adding broccoli to everything right now. I’m still working through this 5lb bag of broccoli wokly florets.

I’ve been wanting to conquer quiche for awhile. Achieving just the creamy, cheesy consistency is not trivial. Today, I feel more successful than ever. I’ve made quiche before and blogged about it, but I must admit that this recipe tops the Salmon one for smooth, rich, creamy texture. Finally!

The trick? Heavy cream, for one, and lots of it. Also, a mixture of Monterrey Jack cheese (which is supremely meltable) and cheddar. And finally, I believe putting the grated cheese in the bottom of the crust and then layering everything else on top of it, rather than mixing the cheese in with the eggs and cream, helped create this exemplary texture. See what you think.

Broccoli Quiche with Monterry Jack and Cheddar
Serves 4-6

Ingredients

1/2 cup of diced onion
1 tsp olive oil
1 generous cup of broccoli florets
3 large eggs
1 cup heavy cream
1/2 cup whole milk
pinch of freshly ground nutmeg
salt and pepper to taste
1/3 cup shredded Monterrey Jack cheese
1/3 cup shredded Cheddar Cheese
1 frozen, 9-inch deep-dish pie crust, thawed

Method

1. Pull the pie crust out of the freezer to let it thaw and preheat your oven to 400˚F.

2. Heat olive oil in a small frying pan and sautée onions gently until starting to brown, about 8 minutes.

3. Pick over the broccoli florets and trim to them to ensure that they are small enough and of uniform size. Bring a small amount of water to boil in a small saucepan and add the broccoli florets. Boil/steam for 2 minutes tops. Remove from heat, drain water and set aside.

4. Beat together the eggs, cream, milk, salt, pepper and nutmeg. Leave on counter during the rest of the preparation to allow it to come to room temperature.

5. Prick the bottom of the pie crust to prevent air bubbles from forming. Bake crust for 11-15 minutes or until golden brown. Remove from oven and allow to cool.

6. Change oven temperature to 375˚F. Spread cheeses evenly along the bottom of the pie crust. Distribute broccoli florets and cooked onions evenly over the cheese. Pour milk and egg mixture on top. Season with a bit more salt and pepper. Place on a baking sheet and bake for 35 – 40 minutes. Allow to cool a bit before serving. I actually turned off my oven a few minutes early and allowed the quiche to sit in the cooling oven for awhile, which kept it warm and cooking without overdoing it.

Looking for more broccoli recipes? Check out ComfyCook’s collection of Broccoli recipes from BSI participants around the blogosphere.

Categories
Casseroles Pizza and Pasta Sides Uncategorized Vegetarian Video How-to

Mac-n-Cheese w/ Hidden Broccoli & Cauliflower

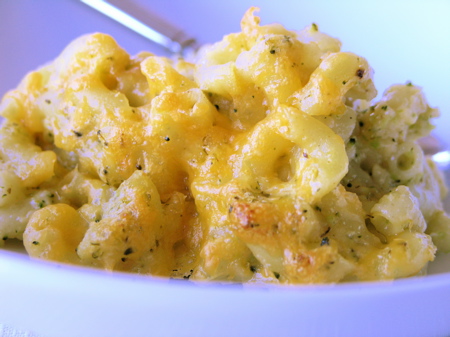
Mac-n-Cheese w/ Broccoli & Cauliflower Hidden Inside

My four-year old is a very picky eater. If he could have macaroni and cheese at every meal, he would. So I’ve taken to hiding healthy foods in the mac-n-cheese to ensure he’s getting enough nutrition. This version worked pretty well. If I were making it for myself, I would have used stronger cheeses like (you guessed it) Gruyére, and I would have added other punchy flavors like garlic or nutmeg. But I wanted this dish to go down without a fuss, so cheddar ruled the day.

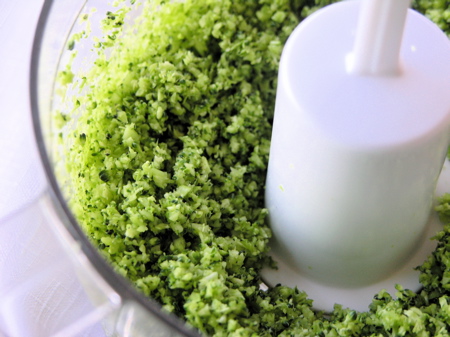
I didn’t conceal from him the fact that I was concealing healthy foods in his macaroni and cheese. In fact, I enlisted his help during the broccoli and cauliflower grinding process. He loves to push the button. We used my new Cuisinart mini chopper. It’s a snap to pull out, use, and clean up.

Cuisinart Mini Prep Plus
Available at Amazon - Click here
Iain
My son
Broccoli Chopped in the Mini Prep

Macaroni & Cheese with Broccoli and Cauliflower
Serves 4

Ingredients

1 1/2 cups broccoli florets
1 1/2 cups cauliflower florets
1 tsp olive oil
1/2 lb elbow macaroni
3 Tbsp butter
2 Tbsp flour
1 1/4 cup whole milk (or heavy cream to make it really decadent)
2 cups shredded sharp cheddar cheese (we had fun shredding ours in a vintage Mouli)
1 tsp salt
1/2 cup bread crumbs
1 Tbsp melted butter

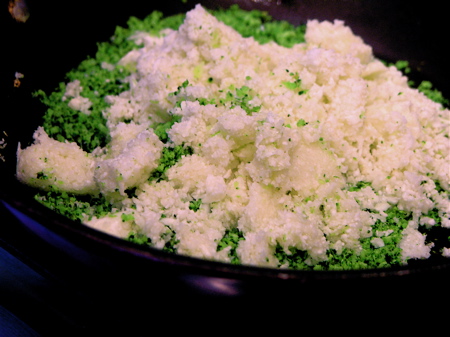
Broccoli & Cauliflower sautéeing

Method

1. Preheat oven to 350˚F. Put broccoli florets into food processor and grind into teeny weeny pieces. Remove to a bowl. Repeat with cauliflower.

2. Heat olive oil in a skillet over medium heat. Add broccoli and cauliflower and toss. Basically, we’re browning these vegetables just a little bit to enhance the nutty sweet flavors they bring to the dish. After a few minutes, turn off the heat and leave for later.

3. Bring salted water to boil in a large pot and boil the macaroni. Since you’re going to be baking this dish, you can shave off a minute from the boiling time recommended on the package.

4. In the meantime, for the roux, heat the milk in a saucepan to almost boiling. Remove from heat for later. Melt butter in a heavy-bottom saucepan. Add flour and whisk continuously. Sautée flour for 3 minutes. Don’t let it brown or it will get bitter. Add the warm milk in a steady stream and whisk continuously. Simmer gently (no boiling!) until thickened, about 2 minutes. Add shredded cheese in small batches, incorporating each batch completely. Season with salt. Add broccoli and cauliflower and stir until well combined. At this stage, you have a kind of broccoli-cheddar cream soup. You could use this sauce for lots of different things. I put it over a baked potato and it was awesome.

5. Mix bread crumbs and melted butter in a small bowl.

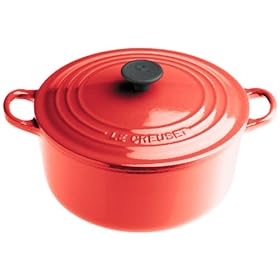
6. To assemble, pour macaroni into a baking dish that has been sprayed with non-stick cooking spray. I used this small Le Creuset dish. Stir in the sauce, coating all of the macaroni completley. Top with the buttered bread crumbs. Bake uncovered for 25 minutes or until bubbly. If topping is not already browned, you can put it under the broiler for a minute at the end.

Le Creuset. Available at Amazon

Want to see a bunch more macaroni and cheese ideas? Check out this video collection at StreamingGourmet.com:

Looking for more broccoli recipes? Check out ComfyCook’s collection of Broccoli recipes collected from BSI participants around the blogosphere.

Categories
Appetizers Fish & Shellfish Uncategorized

Garlic Shrimp

Garlic Shrimp
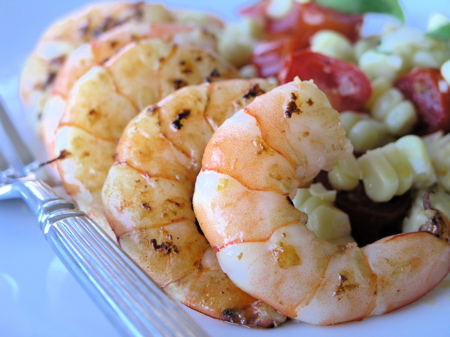
Garlic Shrimp

The other day, large shrimp were on sale at Whole Foods for only $8.99/lb. I was cooking for one that night, so I bought six and it only cost $4.50. I wasn’t sure what I was going to do with them, but when I got home, I had a craving for garlic shrimp, one of my favorite tapas dishes. Call me lazy or call me a busy Mom, but I’m often in search of shortcuts in the kitchen. For this dish, I scooped out minced garlic from a jar that I had on hand, but you can feel free to peel and mince your own fresh garlic.

Garlic Shrimp
Serves 1

Ingredients

6 large shrimp, peeled and deveined
2 Tbsp extra virgin olive oil
2 tsp minced garlic

Method

1. Heat the olive oil in small frying pan over medium to medium-high heat. (You don’t want to scorch or burn the garlic). Add the garlic and sautée for 30 seconds so that it is nice and fragrant. Add the shrimp and sautée until the bottom halves start to turn pink. Flip them over and sautée until opaque. Total sautée time for the shrimp will be about 3 minutes. Don’t overcook them or them will be rubbery or tough.

Serve immediately. I served mine with fresh corn salad this time, but they are great with other tapas dishes like Spanish tortilla, patatas bravas, or calamares fritos.

Categories
Appetizers Produce Soups and Stews Uncategorized

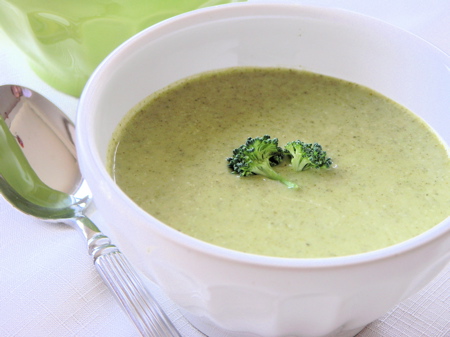
Silky Smooth Cream of Broccoli Soup

Cream of Broccoli Soup

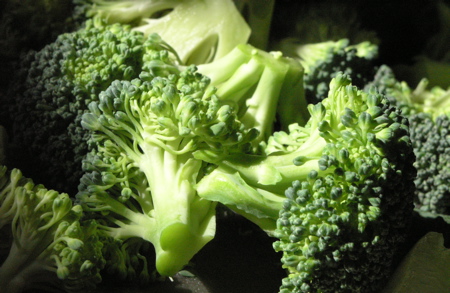
This week at the grocery store, I bought an enormous bag of broccoli florets and have since been adding broccoli to everything.

Today I decided to make a more significant dent in the bag by making cream of broccoli soup. My husband loves cream of broccoli soup and even enjoys the Campbell’s version. In the past, I’ve added Campbell’s Cream of Broccoli soup to various chicken casseroles, but we’ve both watched as the cans have disappeared completely from store shelves throughout Northern California and the Sierras.

It does still exist. But I was happy to find out today just how easy it is to make the good stuff from scratch at home.

Here are my tips and tricks for making your best cream of broccoli soup yet:

1) I use a potato to help thicken the soup. I do use heavy cream at the end, because I can’t resist the rich flavor and texture of cream, but adding the potato could have meant cutting back on the fat and using whole milk instead.

2) To boost the flavor, I sautée onion and garlic first, then add the broccoli and chicken stock and bring to a boil.

3) To make the soup really smooth (and not gritty) I use an immersion blender to liquefy the soup and then pass it through a fine strainer. Not once, but twice! I was inspired to do this by something I read in the French Laundry Cookbook
where Thomas Keller describes how liquids don’t move from one pan to another in the French Laundry kitchen without passing through a strainer. Got it? Blender. Strainer. Strainer. Done.

4) I also add spinach to boost the vibrant green color and add even more nutrients.

5) Don’t have an immersion blender yet? It’s time to get one. It simplifies soup making so much.

Broccoli
Broccoli

Silky Smooth Cream of Broccoli Soup
 
Prep time
Cook time
Total time
 
Super silky smooth cream of broccoli soup.
Author:
Recipe type: Soup
Serves: 4-6
Ingredients
  • ½ medium onion, diced
  • 3 large cloves of garlic, sliced thinly
  • 2 Tbsp butter
  • 1 medium potato, peeled and chopped into 1-inch pieces
  • 5 cups broccoli florets
  • 6 cups chicken stock
  • 1 tsp salt
  • ½ cup raw baby spinach leaves (packed)
  • ¾ cup heavy cream
  • ½ cup sour cream
Instructions
  1. Melt the butter in a large stock pot over medium heat. Add onion and garlic and sautée gently until softened and translucent - about 3 minutes.
  2. Add potato, broccoli and chicken stock and bring to a boil. Reduce heat, cover and simmer for 20 minutes. Add salt and baby spinach leaves. The heat from the soup will wilt the leaves down right away.
  3. Let the soup cool a bit before adding it in batches to a blender. Return soup to pan through a strainer. Not all of the contents will make it through the strainer. Reserve the thick parts that won't strain and put them back into the blender. Then pour back into the soup.
  4. While reheating soup gently, add cream. Add more salt and pepper to taste. Once soup is hot again (but not boiling!) whisk in sour cream and blend completely.
  5. Serve with a garnish of parsley or mini broccoli spears or a tablespoon of shredded cheddar cheese or even another dollop of sour cream. Enjoy!


Categories
Produce Salads Sides Uncategorized

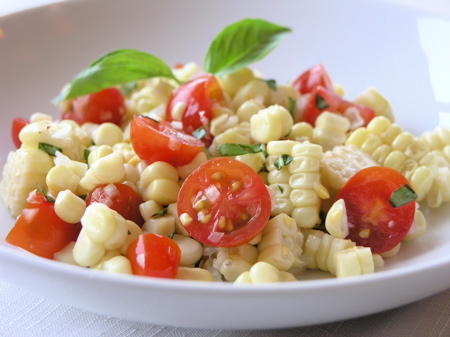
Fresh Corn Salad w/ Tomatoes & Basil

Corn Salad with Tomatoes & Basil

Since local corn is back in season, corn salad is back on the menu here at StreamingGourmet. I can’t get enough of the stuff and even my kids like it. I’ve kept my corn salad simple. I like to let the vegetables speak for themselves (i.e., there’s no oil in my recipe). The key is to keep the corn crisp by boiling it for only three minutes and promptly removing it from the water. Fresh basil is the other key ingredient here. My entire kitchen smelled great while I was putting this salad together.

Ingredients

4 ears fresh corn, shucked
1/2 pint cherry tomatoes, sliced in half
1/2 small onion, diced finely
1 Tablespoon minced fresh basil
1 teaspoon salt
A few spritzes of fresh lemon juice

Method

1. Bring a large stockpot of water to boil. Add corn and boil for 3 minutes. Remove corn from water and place on a platter to cool.

2. Dice the onion using a mandoline on the finest dice setting. On my mandoline, I put the onion in the safety holder, sliced it thinly then swiped through perpendicular to my slices.

3. Once the corn is cool, slice it off into a large bowl. Break up the slices into kernels gently, leaving some big chunks, but not too big. Add the tomatoes, onion, and basil and toss to distribute everything evenly. Add salt and lemon juice and toss again.

Served chilled or at room temperature.

Serves 4

Scroll Down for More Corn Salad Recipes
from Around the Food Blogosphere
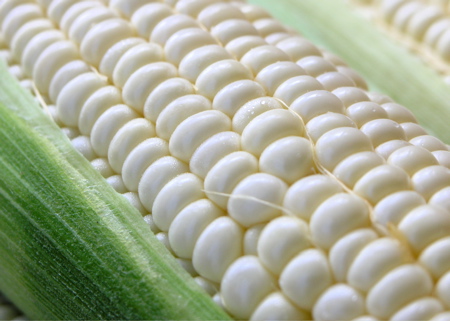
Yummy Local Corn
Yummy Local Corn
Other Great Corn Salad Recipes from Around the Food Blogosphere

1. Elise Bauer at Simply Recipes has a few great recipes. One of them is Grilled Corn Salad. It’s got a Southwest twist with cilantro, chili peppers and cumin.

2. Chuck at Sunday Night Dinner wrote a post last year called Spicy Fresh Corn Salad – A Taste of Yellow 2008 – The post was in support of the Lance Armstrong Foundation and features a simple corn salad with a spicy Thai chili pepper kick.

3. Kevin at Closet Cooking has a recipe for Avocado and Sweet Corn Salad. He’s added a creamy salsa verde dressing that looks great.

4. Chef John over at Foodwishes has produced a video Red Pepper and Corn Salad Recipe. For the recipe, visit Foodwishes. You can watch the video here.

Blog Widget by LinkWithin