Categories
Breads Breakfast/Brunch Dessert Pumpkin Uncategorized

Pumpkin Coffee Cake Wreath with Pumpkin-Spiced Cream Cheese Filling

[pinterest]

Pumpkin Coffee Cake Wreath

I have been having so much fun baking with yeast this month. Today is no exception. I decided I wanted to make a coffee cake type pastry with icing and filling that would feature fall pumpkin flavors. I grew up with Entenmann’s pastries from the grocery store, and I was looking to emulate their various Danish rings with this recipe.

I ended up constructing this wreath in two ways. One way was a traditional circle. For the other, I cut little slits all the way around before baking it, and the wring came out a little more decorative – though less tidy. Totally up to you for how to make yours, but the recipe does make 2 loaves, so play with it!
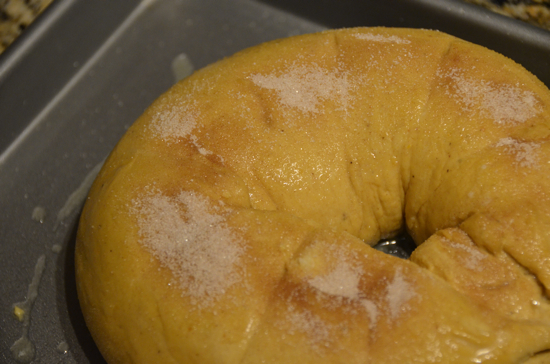
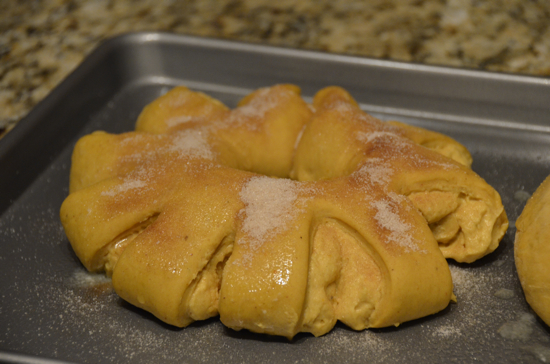
Pumpkin Wreath without Slits
Pumpkin WreathWithout Slits
Pumpkin Wreath
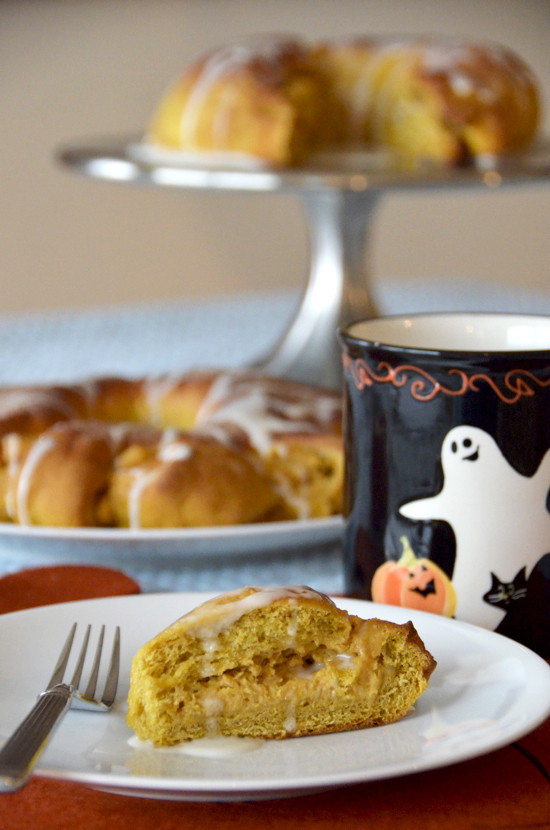
Pumpkin Wreath Sliced Open

The recipe calls for 2 rises. One for the dough and then another one once the dough is stuffed. If you want to refrigerate your dough after stuffing it, you can refrigerate it overnight, then pull it out, let it come to room temperature, rise and then bake it so it comes out of the oven warm just in time for brunch.

I kept this dish nut free because of allergy concerns, but sliced almonds or pecans are a great addition to the topping.
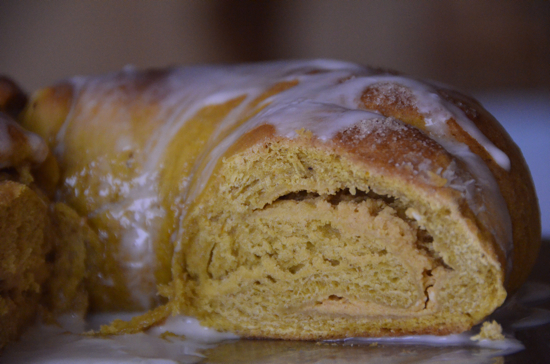
Pumpkin Cream Cheese Filling

5.0 from 2 reviews
Pumpkin Coffee Cake Wreath with Pumpkin-Spiced Cream Cheese Filling
 
Prep time
Cook time
Total time
 
Fall pumpkin flavors infuse this danish ring with yumminess
Author:
Recipe type: Dessert, Brunch Pastry
Serves: 20
Ingredients
  • 1 package dry yeast (2¼ tsp)
  • ¼ cup warm water
  • 3½ cups all-purpose flour
  • ¾ cups canned pure pumpkin
  • ½ cup milk
  • ¼ cup butter, melted
  • 1 Tbsp sugar
  • 1¼ tsp salt
  • ½ tsp ground nutmeg
  • ½ tsp ground ginger
  • 1 tsp ground cinnamon
  • ¼ tsp ground cloves
  • ---
  • 2 8oz packages cream cheese
  • ½ cup canned pure pumpkin
  • 1 cup sugar
  • 2 Tbsp butter softened
  • 1 tsp cinnamon
  • ---
  • 1 Tbsp butter, melted
  • ¼ cup sugar
  • ½ tsp cinnamon
  • ---
  • 1 cup powdered sugar
  • 1 Tbsp milk
  • ¼ tsp vanilla
Instructions
  1. Dissolve the yeast in warm water in a mug and cover with a plate. Set aside for 5 minutes. When you lift the plate, it should be foamy. If it's not foamy, it means that the yeast is no longer active and you'll have to start over with new yeast.
  2. In the bowl of a stand mixer, using the dough hook, combine 3 cups of the flour, the pumpkin, milk, melted butter, sugar, salt, nutmeg, ginger, cinnamon and cloves. Once it has taken on a crumbly texture, add the water and yeast mixture and continue mixing with the dough hook until a ball forms. Scrape the sides as necessary to ensure complete mixing. If the dough is sticky and not well-formed, add a Tbsp or so of flour and continue kneading with the dough hook. Knead for 3 minutes on medium speed, adding flour to ensure a springy, well-formed ball.
  3. Add a tsp of oil to the bowl and knead for 30 seconds. Remove bowl and cover with towel. Set in a warm place and let rise for 45 minutes to an hour until doubled.
  4. After the dough has risen, punch it down and turn it out onto a floured cutting board. Let rest for 5 minutes, then cut in half.
  5. To prepare the filling, go back to your stand mixer (wash that bowl), but this time you will use the wire whisk to beat at high speed, the cream cheese, pumpkin, sugar, butter, and cinnamon. Beat for 2 minutes until fluffy.
  6. Now roll out one ball of dough into a flat rectangle that is about 10x12 inches in size. Spread the cream cheese mixture over the dough leaving space around the edges. The cream cheese will be about ¼ inch thick. Now roll the long side of the dough up to make a tube. Bend the tube into a circle and press the ends together firmly. If you'd like to try cutting slits in the wreath, go ahead and do so. Repeat with the other ball of dough. You will have left over cream cheese mixture. It can be refrigerated for up to 3 days and used as icing on cupcakes.
  7. Transfer the rings to a cookie sheet or jelly roll pan sprayed lightly with cooking spray. Cover with a cloth and set in a warm place. Allow them to rise for 45 minutes. (Alternatively, you could cover them in plastic and refrigerate them over night before allowing them to come to room temperature and to rise the next morning)
  8. Preheat the oven to 375˚F.
  9. Using a spoon, spread melted butter over the tops of both rings. Use the back of the spoon to coat them evenly. Sprinkle cinnamon sugar on top of each ring. Bake for 30 minutes or until golden brown. Let cool on the baking sheet before transferring them to platters.
  10. Once the rings are cooled, make the icing by stirring together the sugar, milk and vanilla in a bowl with a fork or a wire whisk. If the icing is not going to hold the shape of its drizzle, add more sugar to thicken. Drizzle onto the rings and allow the icing to set for 5-10 minutes before serving.
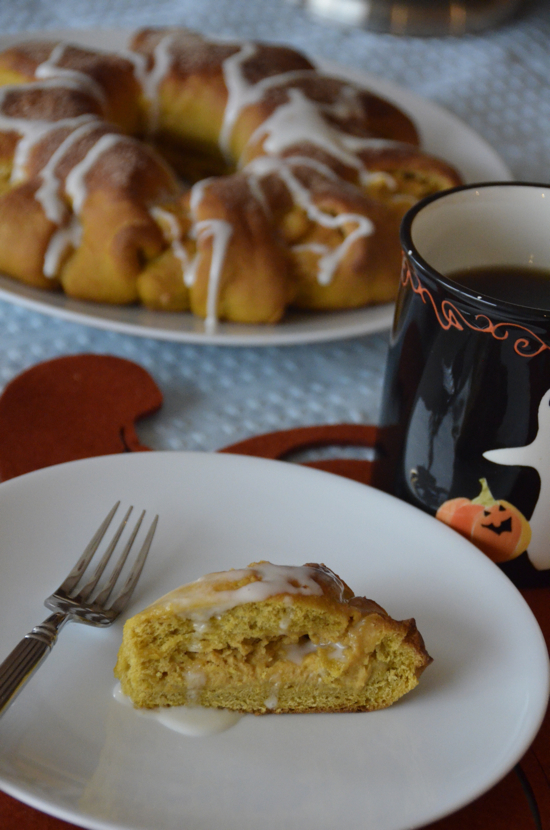
 

Pumpkin Coffee Cake
Pumpkin Coffee Cake
Categories
Breakfast/Brunch Sides

Spanish Tortilla – A Tapas Favorite

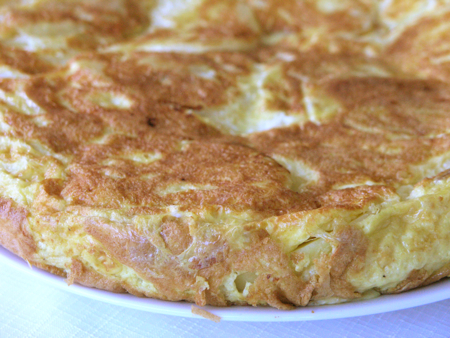
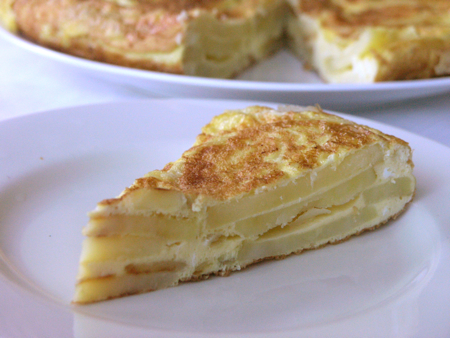
Spanish Tortilla

On a recent trip to Spain, I had the chance to sample, once again, one of my favorite Spanish dishes: Tortilla Española, or Spanish tortilla. Here in the US, we associate the word tortilla with that a round flatbread that wraps up a burrito, but in Spain, it refers to an omelette-type dish, eaten in bars, at room temperature during the early-evening snack (tapas) time. I like Spanish Tortilla any time of the day: at brunch, for an afternoon snack, or even for a simple dinner. Cooking it just right can be difficult, though, so I have spent the last few months perfecting mine and now I am ready to share it with all of you.

The Spanish Tortilla enjoys a long history. Throughout the Mediterranean and the Near-East, there are countless variations of what one might call an omelette. It is believed that the dish originated in Persia as the kookoo sabzi and then gradually moved west. In Turkey, it became the kaygana. In Italy, it evolved into the frittata. In France, it became the omelette and in Spain, it is the Tortilla Española or at times, the Tortilla de Patata.

Spanish tortilla is one of those ubiquitous national dishes that inspires strong views on how to make it perfectly and authentically. Of course, because it varies throughout Spain, there is no right answer. I like to make it with a relatively high ratio of eggs to potatoes. I also slice the potatoes thinly using a Mandoline rather than cutting them into cubes. Most recipes you’ll see for Tortilla Española will include onion, and in this version, I have used the more subtle shallot, but I like it with yellow onions as well.

Of course, the biggest question surrounding the preparation of a Spanish Tortilla is whether to flip it or broil it to finish cooking the top side. Traditionalists insist that you must do the flip: slide the tortilla onto a plate, flip it over and slide it back into the pan. But, if you have an ovenproof skillet, you can simply insert the skillet under the broiler and watch carefully while the top finishes.

All of the ingredients below are “to taste.” Do you want the potatoes to crisp up before cooking them in the eggs? Use more oil and crank up the heat for the last few minutes of potato-cooking time. Do you want a heftier dish? Reduce the number of eggs and let the potatoes dominate. Do you want to incorporate more onions into the dish? Finely chop a couple of tablespoons of onions, or shallots, or even leeks, and fry them with the potatoes. The important thing is to experiment until you’ve found your perfect tortilla and then you can have a strong opinion too.

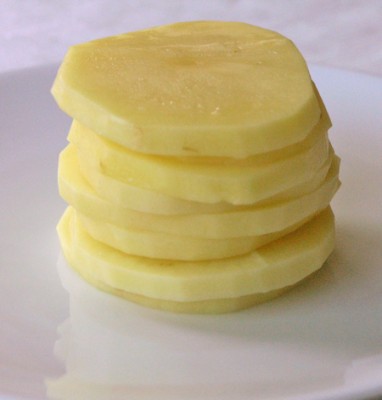
Sliced Yukon Gold Potatoes

Spanish Tortilla
Serves 8

Ingredients

2 lbs Yukon Gold potatoes (the low starch content keeps them from getting mushy)
¼ cup olive oil (more or less)
½ cup shallots, minced finely
2 tsp salt
Freshly ground pepper
10-12 eggs, beaten

Method

1. Peel potatoes and slice them thinly using a Mandoline if you have one, or a good sharp knife. Sprinkle the potatoes with half of the salt. Over a medium-high flame, heat the oil in a 12-inch sautée pan, preferably one that has sloped sides. Sautée the potatoes and shallots gently until the potatoes are just fork tender, about 25 minutes. Don’t allow them to get too brown. Be patient. It’s important that the potatoes are completely cooked. Remove from heat.

2. Beat the eggs in a large bowl. Add the potatoes and shallots and toss to coat with the eggs. Sprinkle with remaining salt. Wipe out or clean your sautée pan. Add a little bit more oil and heat the pan until very hot. Pour in the egg and potato mixture and let set for about 1-2 minutes. The high heat will help create a layer of cooked egg that will make it easy for the tortilla to slide out of the pan. Once the edges have set, reduce the heat to medium-low and let the mixture cook for 8-12 minutes.

3. When the tortilla is ready to be cooked on the other side, it will be firm on the bottom and still a little runny on top. Slide the pan under a pre-heated broiler and cook until the top has set and just started to brown, about 3 minutes, checking often. If you would like to try the flip instead, invert a plate into the pan, flip it over and then slide the tortilla back into the pan. It’s not as hard as it sounds as long as you have created that cooked egg layer and your pan is not too heavy. Let it cook on the second side for about 3-5 minutes. Then flip back out onto a plate for serving.

4. Once the tortilla has been removed to a serving plate, allow it to cool to room temperature, as it is traditionally served that way. It’s a great dish for parties. To add it to a buffet table, cut it into squares and insert a toothpick to make it easy for guests to enjoy. Yours will look just like the Spanish Tortilla in a tapas bar in Madrid.

Spanish Tortilla
Categories
Breakfast/Brunch Sauces Uncategorized

Strawberry Coulis Infused Pancakes

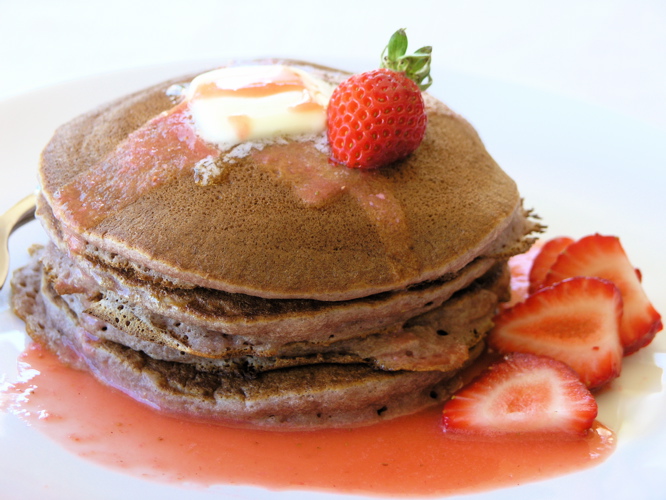
Strawberry Coulis Infused Pancakes
Strawberry Coulis Infused Pancakes (Dairy Free)

These might look like buckwheat pancakes, but the color comes from the strawberry coulis that is in the batter, not from buckwheat flour.

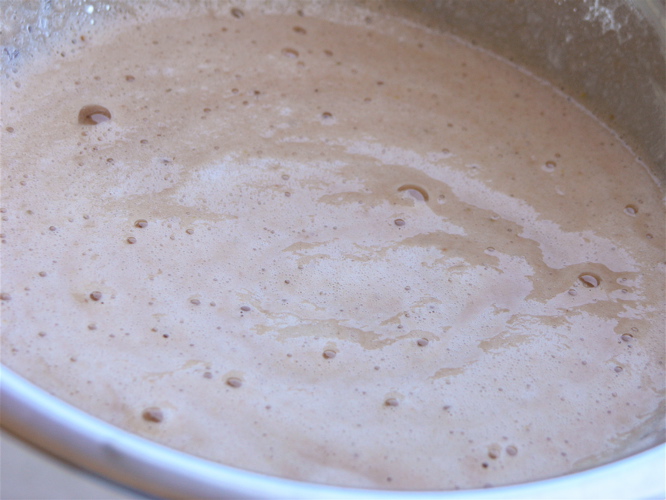
With strawberries still in season and on sale here in California, I couldn’t resist trying something new and a little decadent with them. I’ve been thinking about putting the strawberry goodness right into the pancake rather than just spreading jam or syrup on top. The result? A bright, light pancake with lots of flavor. The strawberry coulis replaces the milk which makes for an interesting twist. Also, instead of baking powder, this version uses the acid from the orange juice mixed with baking soda to get the fluffy rise needed for a good pancake. Also, in this rendition, the eggs are separated. The whites get whipped up into a wet froth and folded into the batter at the end. This helps make the batter smooth and shapely as it goes into the pan and gives a light, bubbly texture to the finished pancake.

Batter with the egg whites folded in

Strawberry-Coulis Infused Pancakes
Serves 2

Strawberry Coulis

7 large strawberries (CA large), sliced in half
Juice of one small orange
1 tsp orange zest (optional) – gives pancake a little bite
2 Tbsp confectioner’s (powdered) sugar

Purée all ingredients in a blender and push through a sieve (to remove the strawberry seeds). This makes almost one cup of coulis – enough to put coulis in the pancakes and pour some on top. Set aside 1/2 cup for the recipe and chill the rest.

Pancakes

1/2 cup strawberry coulis (see above)
2 eggs, separated
1/2 cup all-purpose flour
1 tsp salt
1 1/2 tsp baking soda

Method

1. Start heating your pan under medium heat. Having the pan fully and evenly heated helps make even the first pancake come out just right. Beat the egg yolks with the strawberry coulis and set aside. Mix all of the dry ingredients.

2. Beat the egg whites rapidly with a whisk until the are stiff, but not so stiff that they would stay in the bowl if you inverted it. It takes about 2 minutes of serious whisking.

3. Stir together the dry ingredients and the coulis/egg mixture until completely combined, but not overly mixed. Fold in the egg whites. Again, don’t over mix. You just want to get the egg whites incorporated.

4. Drop a dollop of butter into the pan and allow it to melt, but not brown. Drop one ladle full of batter into the pan. Allow to cook until edges appear less shiny and bubbles appear on the surface of the pancake. Flip and cook for another 2 minutes or so. Transfer to a warm plate. If not eating immediately, keep in an oven heated to 250˚F. Garnish with fresh strawberries and serve with additional strawberry coulis.

CA strawberries are in season

Categories
Breads Breakfast/Brunch Uncategorized

Fuzzy Navel Tea Bread

Fuzzy Navel Tea Bread

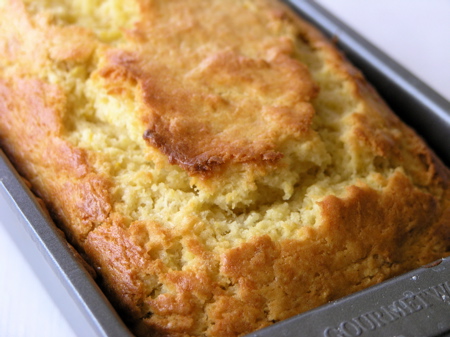
A few over-ripe bananas recently prompted me to think about making banana bread, but I also had a couple of over-ripe peaches and I thought, “I love my banana-peach-oj smoothie. Why not make a banana-peach-orange tea bread?” and Fuzzy Navel Tea Bread was born. To give it a real orange punch, I included orange zest from an entire (albeit small) orange. This bread works as well during the summer as it would as a Christmas gift. The orange zestiness of it is reminding me of Christmas. You could healthy it up a bit by reducing the sugar and substituting a portion of the all-purpose flour with whole wheat flour, but I was really going for a sweet, delicate quick bread best enjoyed with afternoon tea (or at breakfast or brunch, of course).

Fuzzy Navel Tea Bread
One loaf

Ingredients

8 Tbsp unsalted butter, room temperature (+ butter for greasing pan)
2 cups All-Purpose Flour
1 tsp salt
1 1/2 tsp baking powder
1 cup sugar
2 eggs
2 very ripe bananas
2 very ripe peaches
zest of one orange
2 Tbsp fresh orange juice

Method

1. Preheat oven to 350˚F. Use butter to grease one medium loaf bread pan and set aside.

2. Mix dry ingredients and set aside. Put peaches in a blender and pulse until well mashed. Transfer to a bowl and mash in the bananas using a potato masher or a fork. Add zest of one orange (I used a microplane zester/grater) and mix thoroughly with bananas and peaches. In a medium bowl, cream the butter. Beat in the eggs, one at a time and then beat in the fruit mixture and orange juice.

3. Gently stir the wet mixture into the dry ingredients. Don’t over mix.

4. Pour batter into loaf pan and bake for 50-60 minutes. Test with a toothpick, which should come clean when inserted.

Tools I used in this recipe can be found at Amazon.com:

Fuzzy Navel Tea Bread
Categories
Breakfast/Brunch Uncategorized

My Mother’s Day Wish

That someone will make this dish for me on Sunday morning:

Categories
Breakfast/Brunch Uncategorized

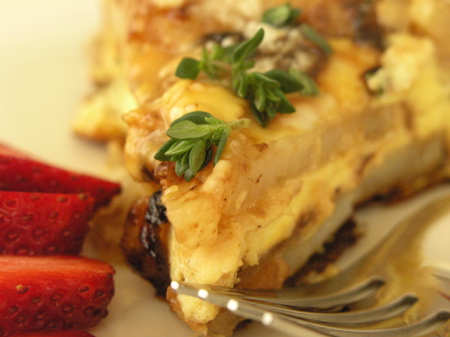
Frittata with Gruyère and Thyme

Frittata
Frittata

While working out at the gym a couple of weeks ago, I caught an episode of Tyler Florence’s show on the Food Network, Tyler’s Ultimate. He did an ultimate Saturday breakfast with a blood orange mimosa, a home-made granola/yogurt parfait and a frittata with smoked ham and Gruyère cheese. Check out his recipes on the Food Network website: Tyler’s Ultimate: Episode TU0413H.

I’ve been tinkering with my frittata recipe for years and after watching his interpretation of the dish, I decided to give mine one last go and share the results with you. So much for my 45 minutes on the treadmill.

I first fell in love with the frittata on a trip to Spain, where it is called a Spanish tortilla. I was confused at first because I thought a tortilla was that flour thing you stuffed your burrito into, but it turns out that the word tortilla is derived from the word torta, which means “round cake”. A Spanish tortilla is typically a round omelette made with eggs, sautéed potatoes and onions. It is served at room temperature in cafés or Tapas bars. I was startled when it was served lukewarm, but that’s the tradition. Here in the States, we tend to like our frittatas hot out of the oven or off of the stove, but in Spanish Tapas bars, the frittata sits on the counter all day long waiting for the next customer.

My goal with this frittata is to make sure that the potatoes have just the right texture. They need to be fully cooked, but not overly cooked and it helps if they aren’t too starchy. You don’t want them to go “mush” when you cut through the frittata with your fork. For all of these reasons, I choose the waxy Charlotte potato. Another variety that works well is the Maris Peer. (Want to know everything there is to know about potato varieties? Visit the Potato Council website. The trick is to sautée the onions first and add the potatoes until both are fully cooked. Then you’re ready to cook the eggs with the potatoes.

Blog Widget by LinkWithin