Categories
Breakfast/Brunch Dessert Pumpkin

Pumpkin Spice Bundt Cake With Peekaboo Cream Cheese Filling

[pinterest]

Pumpkin Spice Bundt Cake with Cream Cheese

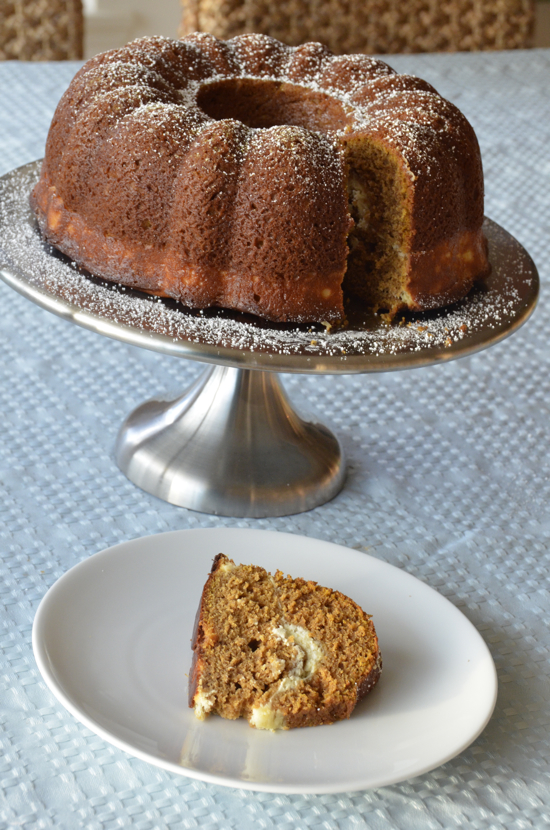
Now that it almost October, I’m starting to go pumpkin crazy again. This month’s issue of Fine Cooking features Holiday Pumpkin Desserts on the cover, and I was inspired by a Bundt cake featured inside. I adapted this recipe from that one, pumping up the spice a bit and making other little tweaks. The result is a moist flavorful pumpkin cake that was a hit at the church coffee hour this morning. Bundt cakes are so rewarding because they always come out looking great and aren’t that difficult to pull off. Powdered sugar is the perfect finish and a lot easier than frosting!

The filling includes crystallized ginger mixed in with the cream cheese and sour cream. Don’t skip it. It makes it have real zing. To finely chop it, I just dumped it in this MiniPrep:

And to grind the nutmeg, I used a microplane grater, like this one:
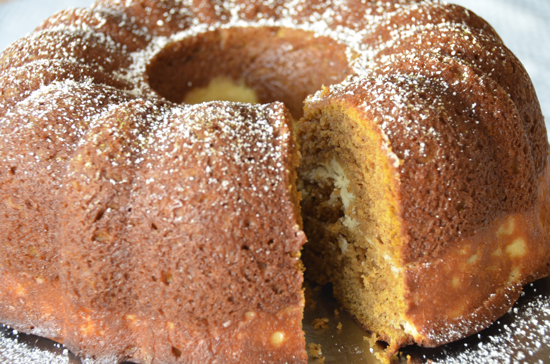
Pumpkin Spice Bundt Cake with Cream Cheese


Pumpkin Spice Bundt Cake With Peekaboo Cream Cheese Filling
 
Prep time
Cook time
Total time
 
Pumpkin Spice Bundt Cake with Cream Cheese
Author:
Recipe type: Dessert
Serves: 12
Ingredients
  • 12 oz. cream cheese, softened (1.5 packages of Philadelphia)
  • ½ cup sour cream
  • ½ cup granulated sugar
  • ½ tsp. ground ginger
  • ¼ tsp. salt
  • 2 large eggs
  • 1 tsp. pure vanilla extract
  • ½ cup finely chopped crystallized ginger (I used a Cuisinart Mini Prep to chop mine)
  • 2¼ cups unbleached all-purpose flour
  • 2 tsp. salt
  • 2 tsp. baking powder
  • 1 tsp. baking soda
  • 1 Tbsp. ground ginger
  • 1 Tbsp. ground cinnamon
  • ½ tsp. freshl ground nutmeg (I use a microplane grater)
  • ½ tsp. ground cloves
  • 1 15-oz. can pure pumpkin purée
  • 1½ cups granulated sugar
  • ¾ cup vegetable oil
  • 4 large eggs
  • 2 tsp. pure vanilla extract
  • Confectioners’ sugar, for dusting
Instructions
  1. For the cream cheese filling:
  2. In a stand mixer beat the cream cheese, sour cream, sugar, ginger, and salt on medium speed until well combined.
  3. Add each egg, one at a time, beating after each addition until mixed thoroughly.
  4. Chop the crystallized ginger in a Cuisinart MiniPrep. It will glom together because it's sticky, but don't worry. Once added to the cream cheese mixture, it will distribute.
  5. Add the vanilla and the crystallized ginger to the cream cheese mixture and blend. Transfer to a bowl and set aside.
  6. For the cake:
  7. Preheat the oven to 350°F. Spray a Bundt pan generously with nonstick cooking spray.
  8. In a separate bowl, mix the flour, salt, baking powder, baking soda, ginger, cinnamon, nutmeg, and cloves.
  9. In the bowl of the stand mixer, blend the pumpkin, sugar, oil, eggs, and vanilla until smooth.
  10. Add the ⅓ of the dry ingredients, and whisk until well blended. Then add another third and blend and repeat.
  11. Fill the prepared Bundt pan with about half of the cake batter.
  12. Stir the filling to distribute the chopped ginger.
  13. Create a trough in the batter with the back of a large spoon and then try to pour the cream cheese filling into the trough. Don't worry if it spills over.
  14. Spoon the remaining batter on top and spread to evenly over the top.
  15. Bake until a sharp knife inserted to the bottom comes out clean, about 50 to 60 minutes.
  16. Cool on a rack for 10 to 15 minutes and then invert onto a serving plate and remove the cake pan.
  17. Cool completely.
  18. You can refrigerate the plastic-wrap covered cake for up to 2 days.
  19. When ready to serve, dust the cake with confectioners’ sugar.
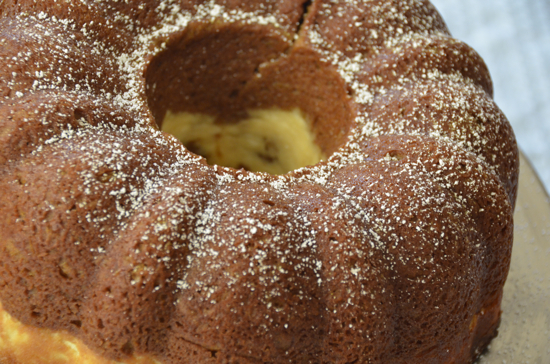
Pumpkin Spice Bundt Cake with Cream Cheese Filling
Categories
Breads Pizza and Pasta Uncategorized

Homemade Rye Pizza Dough

[pinterest]

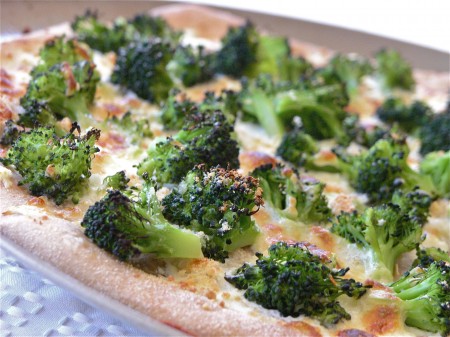
Broccoli White Pizza

My kids (8 and 5) absolutely adore pizza. Not broccoli pizza. But pizza with cheese, a little red sauce (not too much) and shredded grilled chicken. This pizza dough works like a charm. The rye flour gives it a rich, nutty flavor that I absolutely love. Using the Reinhart method of slow rising in the fridge and minimal kneading means I can make it in the morning while we’re all getting ready for the day, have rise in the fridge while we’re at work and school and then voila: it’s ready to go when we return home.

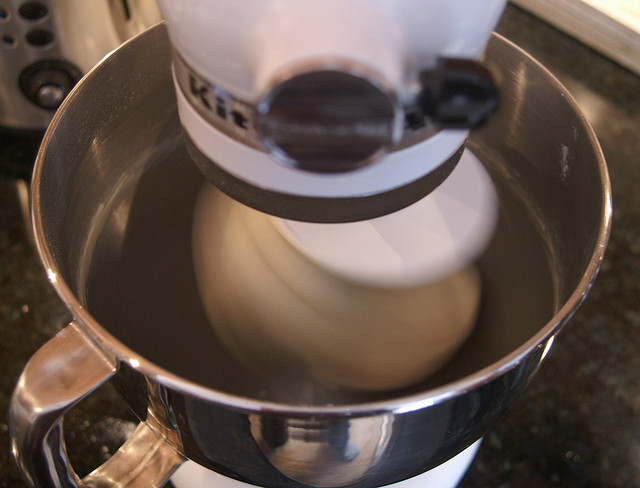
The trick to making it easy to prepare during the morning rush? A KitchenAid Artisan Series 5-Quart Mixer:

The dough does need to sit out for an hour after being refrigerated, but if you pop it out of the fridge as soon as you walk in the door, it’s about ready to go when the oven is preheated and the fixin’s are ready.

pizza dough in stand mixer
Pizza Dough in stand mixer

Photo by reivax


5.0 from 1 reviews
Homemade Rye Pizza Dough
 
Prep time
Cook time
Total time
 
Dark Rye deepens the flavor of this pizza crust. Sweet and nutty, this dough satisfies adults and children alike!
Author:
Recipe type: Bread
Cuisine: Italian
Serves: 6
Ingredients
  • 2 cups dark rye flour
  • 2 cups Animo Caputo "00" flour
  • 1 Tbsp honey
  • 2 tsp salt
  • 1 tsp instant yeast
  • 2 Tbsp olive oil
  • 1¾ - 2 cups of warm water
Instructions
  1. Combine all ingredients with the mixing paddles of your stand-up mixer. Allow to rest for 5 minutes.
  2. Swap in dough-hook and need on a medium setting for 5 minutes. The dough will still be rather sticky.
  3. Separate dough into two pieces and place each in an oiled freezer bag. Place the bags in the refrigerator (or in the freezer if you don't intend to use them with 48 hours). When you are ready to use the dough, remove it from the refrigerator at least 1 hour before it's time to bake it. The dough needs to come to room temperature (in the bag so that it doesn't dry out).
  4. Roll the dough out into a large circle on a pizza pan that has been sprayed with a little nonstick cooking spray. Bake in an oven that has been preheated to 450˚F for about 5 minutes. Then add the sauce and toppings and bake for an additional 10 minutes or so.


Categories
Breads Dessert Pumpkin Uncategorized

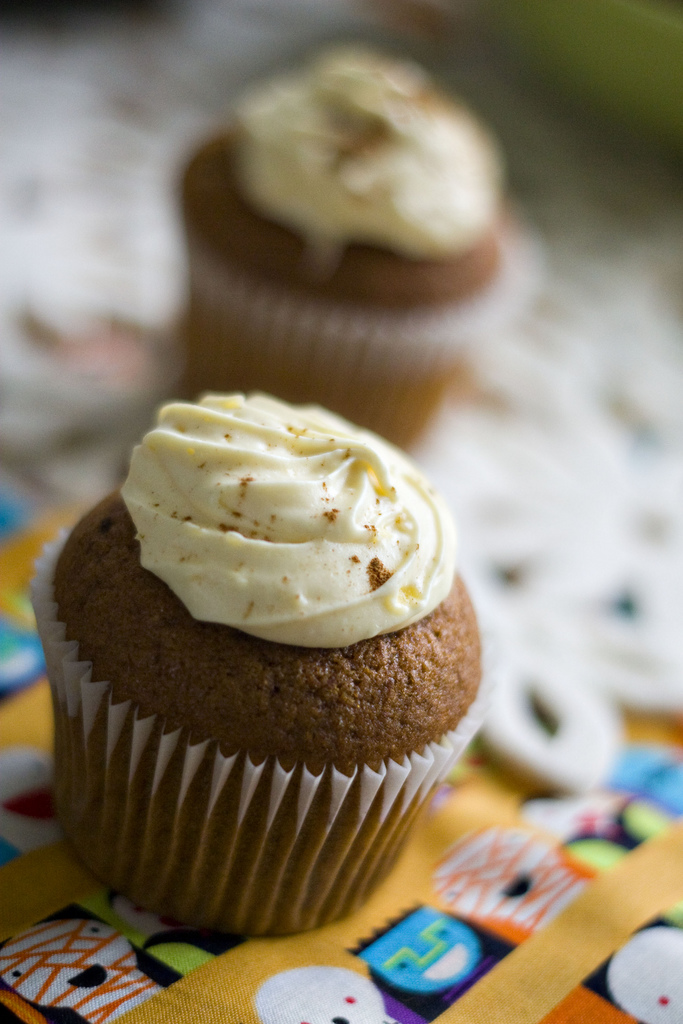
Spiced Pumpkin Cupcakes with Cinnamon Cream Cheese Frosting

[pinterest]

Pumpkin Spice Cupcake
Pumpkin Spice Cupcake (photo by Shimelle Laine)

Fall is my favorite time of year and these cupcakes are just what I need to get in the mood. The shadows are lengthening and out here in San Francisco, the air is more humid than usual and it’s warmer. When I lived on the East Coast, the arrival of Fall was all about feeling a cold nip in the air. Here in San Francisco where the summers are freezing, it’s quite the opposite. The weather heats up as the leaves are turning brown.

Spiced Pumpkin Cupcakes with Cinnamon Cream Cheese Frosting
 
Prep time
Cook time
Total time
 
Perfect for a Halloween Party
Author:
Recipe type: Dessert
Cuisine: American
Serves: 24
Ingredients
  • 1 stick unsalted butter, softened
  • 1 cup dark brown sugar, packed firmly
  • ⅓ cup granulated sugar
  • 2 large eggs
  • 1½ tsp vanilla extract
  • 2 cups all-purpose flour
  • 2 tsp baking powder
  • ½ tsp baking soda
  • 2 tsp ground cinnamon
  • 1 tsp ground ginger
  • ½ tsp ground nutmeg
  • ¼ tsp ground cloves
  • pinch of salt
  • ½ cup milk
  • 1½ cups pure pumpkin puree
  • For the frosting:
  • 1 package cream cheese
  • 1½ sticks (12 Tbsp) unsalted butter
  • ⅔ cup light brown sugar
  • 2 tsp vanilla
  • 2 tsp cinnamon, plus extra for garnish
Instructions
  1. Preheat the oven to 350˚F. Line cupcake tray (24) with paper liners.
  2. In a standing mixer, cream the butter, granulated sugar and brown sugar on high speed until fluffy.
  3. Add eggs and vanilla and mix at a medium speed until well blended.
  4. In a separate bowl, mix the dry ingredients. Add about a third of the dry ingredients to wet, alternating with the milk, until all are incorporated. Add pumpkin puree and mix well.
  5. Fill cupcakes two-thirds full and bake for 18 – 22 minutes, or until a toothpick comes out clean.
  6. Remove from oven and let stand for a couple of minutes. Then remove from muffin tin and let cool completely.
  7. To make the frosting:
  8. Let the cream cheese and butter soften before creaming them together on high speed with a mixer. Cream in the sugar, vanilla and cinnamon until smooth and light. Chill in the fridge overnight (or at least for a few hours) to let it set.
  9. Spread on cupcakes and garnish with a pinch of cinnamon.


Categories
Casseroles Lamb Soups and Stews

Lamb Shank Redemption – In the Spirit of Jamie Oliver’s Classic Dishes

Slow Cooker Lamb Shanks

Last weekend, I decided that my own back-to-school supply should be a new slow-cooker. I had a crock pot already, but I needed something that was larger and more programmable. So I purchased an All-Clad Slow Cooker similar to the one pictured here (and available at Amazon.com). I actually bought the one just larger than this one and it’s huge. I wanted to be able to make entire roasts in it.

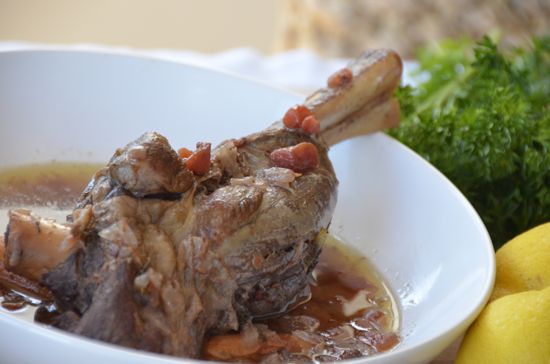
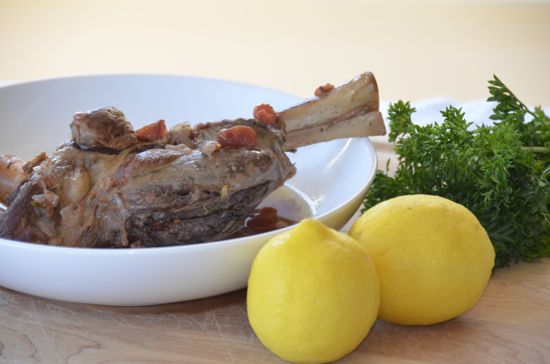
Today, I am making one of my favorite slow-cooked dishes: braised lamb shanks. Lamb shanks, with marrow filled bones, and a layer of fat, are perfectly suited for slow-cooking. I think it might be impossible to overcook a lamb shank. The long cooking time simply works to make it extremely tender and falling off the bone.

This version of braised lamb shank is inspired by ossobucco recipes. It includes wine, tomatoes and is finished with a gremolata. Gremolata is a bright, flavorful mixture of lemon zest, parsley and minced fresh garlic. Adding this mixture at the end brightens up the long-cooked dish.

The best thing about the All Clad Slow Cooker is that the insert is stove ready, so you can brown food before setting it to cook for the rest of the day. This is a key step when making braised lamb shanks. I browned these shanks in batches, then added olive oil and onion, sautéeing the onion a bit before replacing the insert to the slow cooker for the rest of the cooking time.

Lamb Shanks
Braised Lamb Shanks
Lamb Shank Redemption - Slow Cooker Braised Lamb Shanks
 
Prep time
Cook time
Total time
 
Similar to ossobucco, these lamb shanks are melt in your mouth
Author:
Recipe type: Stew
Serves: 4
Ingredients
  • 3 large lamb shanks or 4 medium ones
  • 2 Tbsp olive oil
  • 1 large, sweet onion, diced
  • 2 cloves crushed garlic (I used Trader Joe's frozen crushed garlic)
  • 2 cups mini carrots
  • 2 Bay Leaves
  • 2 large sprigs of fresh rosemary
  • Salt and pepper to taste
  • 1 cup red wine
  • ½ 14.5 oz can diced tomatoes
  • Zest of one lemon
  • ⅓ cup chopped parsley
  • 2-3 cloves garlic, minced
Instructions
  1. Heat the slow-cooker insert over medium high heat (or use a skillet or dutch oven). Add lamb shanks, one or two at a time, and brown on all sides. Remove from pan and brown in batches to avoid over crowding.
  2. Remove shanks and add olive oil. Add diced onion and garlic. Toss to coat. Let sautée until wilted and starting to brown. Add shanks back in and return insert to the slow cooker.
  3. Add carrots, Bay Leaves, rosemary, salt, pepper, and wine and toss to combine. Add tomatoes and toss. Cover and cook on low heat for 8 hours or high heat for 4 hours.
  4. Serve over mashed potatoes, or noodles, or even rice. Garnish with the gremolata.
  5. To make the gremolata, simply mix together the lemon zest, chopped parsley and minced garlic.

So, why the image from the movie, you ask? Well, it’s just a pun I thought of a long time ago and always wanted to build a recipe around. What are your favorite movie title pun memes?
Lamb Shank Redemption

And finally today, this video of Jamie Oliver’s Britain features the tastes of York, which means of course, Yorkshire pudding. There’s also an interesting lamb shank recipe in this video, which draws more heavily on Moroccan flavors. He uses fresh mint instead of fresh parsley and even makes a mint oil to garnish his lamb shanks.

The other great tip he imparts is to use an immersion blender to blend the sauce leftover in the slow cooker once everything is finished cooking. Blend it and then thicken it by simmering it down over the stove. Perfection.

Categories
Dessert Produce

Plum Upside-Down Cake

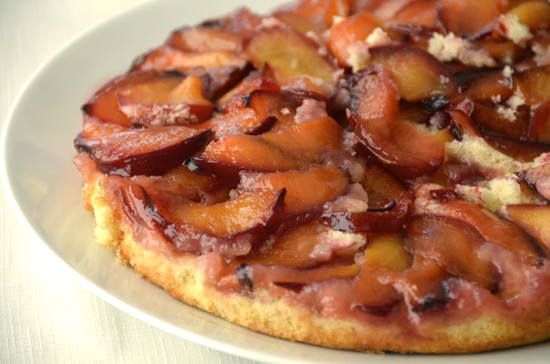
Plum Upside-Down Cake

[pinterest]

As summer draws to a close, it’s time to pause one last time and acknowledge the plum. All summer long, they have been a staple in my weekly CSA box and I have been thinking I must make an upside-down cake.

This one is particularly easy. I made it before work this morning while also packing lunches and preparing breakfast for my two kids. Slice the fruit and mix the batter. That was about it.

The great news is the cake come out light and fluffy and the plums work their own magic so the end result is delicious.  I’ve added twice the normal amount of vanilla in this recipe which made the flavor of the cake really pop.

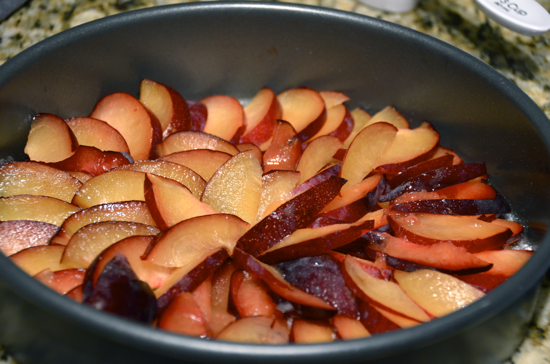
Arrange slices in a circle
Plum Upside-Down Cake
 
Prep time
Cook time
Total time
 
Easy and quick to make, the presentation is elegant enough for guest.
Author:
Recipe type: Dessert
Cuisine: American
Serves: 8-10
Ingredients
  • 7 Tablespoons butter, divided
  • ⅔ cup sugar, divided
  • 4 plums, thinly sliced - choose plums that are not overly ripe
  • 1 egg
  • 1 cup flour
  • ¼ teaspoon salt
  • 1 tsp baking powder
  • ½ cup milk
  • 2 teaspoons vanilla extract
Instructions
  1. Preheat the oven to 350˚F.
  2. Place one tablespoon of butter in a circular pie pan and melt in the oven for a couple of minutes.
  3. Meanwhile, cream the butter with the remaining sugar. Add the egg and beat until smooth.
  4. Remove the pan from the oven and sprinkle ⅓ cup of sugar evenly around the bottom.
  5. Arrange the plum slices in neat, concentric circles on top of the butter/sugar.
  6. In a separate bowl, mix together the flour, salt, and baking powder.
  7. Add the dry ingredients to the cream mixture in batches, alternating with the milk until mixed thoroughly.
  8. Add in the vanilla and mix until batter is smooth. If the batter is too thick, mix in another tablespoon of milk.
  9. Spread the batter evenly on top of the plums, working it all the way out to the edge of the pan.
  10. Bake for 25-30 minutes or until golden brown. A knife inserted in the cake should come out clean.
  11. Remove from the oven and invert onto a plate immediately.
  12. Serve warm.
Categories
Dessert

Nut-Free Classic Carrot Cake with Cream Cheese Icing

Carrot Cake
Carrot Cake

[pinterest]

I can’t believe I haven’t already made carrot cake a million times, since I love to make Zucchini Bread, and of course, am always making Pumpkin Bread, but this is the fist time I’ve done a post about Carrot Cake. I like my carrot cake without raisins or nuts, so some will say that this is a stripped down version of carrot cake, but the flavor was great and it was moist too, so I’m sticking with this version.

I took a shortcut with the carrots and used a bag of shredded carrots I bought at the grocery store. I did pop the shredded carrots into my Cuisinart Mini Prep to make them even smaller, but it was super easy to start with the carrots already shredded.

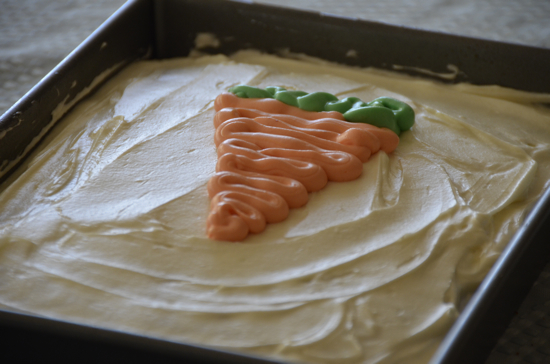
To make the carrot with icing, I set a side two different reserves. One I added red and yellow food coloring to make orange and the other one, I added green. I put these into two sandwich bags and cut a little corner off. I squeezed the orange icing out back and forth to make a snaky carrot shape and then repeated for the green part.

Nut-free Carrot Cake
 
Prep time
Cook time
Total time
 
No nuts. No raisins. This is a cakey carroty carrot cake.
Author:
Recipe type: Dessert
Serves: 20
Ingredients
  • 1½ cups vegetable oil
  • 2 cups granulated sugar
  • 4 eggs
  • 2 Tbsp Pumpkin Pie spice
  • 1 tsp salt
  • 2 tsp baking soda
  • 2 cups All-Purpose Flour
  • 3 cups finely grated carrots
  • For the icing:
  • ½ cup butter, softened
  • (1) 8-ounce package cream cheese, softened
  • ¼ tsp salt
  • 2 tsp vanilla
  • 2½ cups confectioners' sugar
  • Additional milk as necessary
Instructions
  1. Preheat the oven to 350°F. Spray a 9" x 13" pan with cooking spray (or two 9-inch round layer pans) .
  2. Beat the eggs into the oil and then beat in the sugar, salt, and spices. Mix the flour with the baking soda, and stir in. Add the carrots and mix until just blended. Pour into the prepared pan(s).
  3. Bake the cake(s) for 35 to 40 minutes, or until an inserted knife comes out clean. Allow to cool completely before frosting.
  4. For the frosting:
  5. Beat the butter and cream cheese together until smooth.
  6. Add the salt and vanilla and beat in with the sugar.
  7. Add a teaspoon of milk if the frosting is too stiff to spread; add additional sugar if it's too thin.


Categories
Fish & Shellfish News

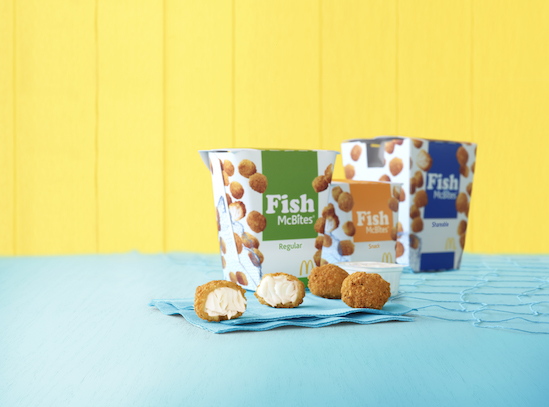
McDonald’s is Back on my Radar Screen with Fish McBites

Fish McBites for a limited time only

I’ve been off McDonald’s for awhile, trying to erase the sins of the holiday season by following the plan put forth in Tim Ferris’ book, The 4-Hour Body. It’s all about rapid fat loss and it’s been working pretty well, so I’m not eager to mess with it, but the beauty of the program is that once each week, you are required, that’s right, required, to binge. One must do so carefully, but still.

So this Saturday, I’m planning to head over to a Bay Area McDonald’s and try a new, limited-time product they launched this week called Fish McBites. I’m a sucker for restaurant history, so I thought it was cool when I learned that this year, McDonald’s celebrates the 50th anniversary of the Filet-O-Fish sandwich. That makes it a perfect time to launch a new fish product, but in 2013, we must be careful about sustainability and McDonald’s is on it with this one. Fish McBites contain wild-caught Alaska Pollock that is responsibly sourced from Marine Stewardship Council (MSC) certified sustainable fisheries. That makes McDonald’s the first fast food chain in the U.S. to offer MSC certified sustainable fish on its menu all year long (the same MSC certified Pollock is in the File O’ Fish sandwich too).

Fish McBites are only available until the end of March. They timed the launch to coincide with Lent, a period of time in the Christian calendar when people often decide to give up things, like red meat.

And Fish McBite’s aren’t only available in grown-up portions. For the first time ever, the limited-time Fish McBites Happy Meal brings a fish entrée option to the iconic Happy Meal.

Fish McBites Happy Meals with 1 percent low-fat white milk, 100 percent apple juice or fat-free chocolate milk, meet new nutrition criteria in the Council of Better Business Bureaus’ Children’s Food and Beverage Advertising Initiative.

This isn’t the first time I’ve gone out on a limb to promote McDonald’s. See my post from last year called, 10 Reasons I Take My Kids to McDonald’s (Seriously).

For more information about Fish McBites, nutrition information, or Greater Bay Area McDonald’s commitment to the community and sustainability, visit https://twitter.com/McD_BayArea or http://bit.ly/McDonaldsBayArea.


Categories
Dessert

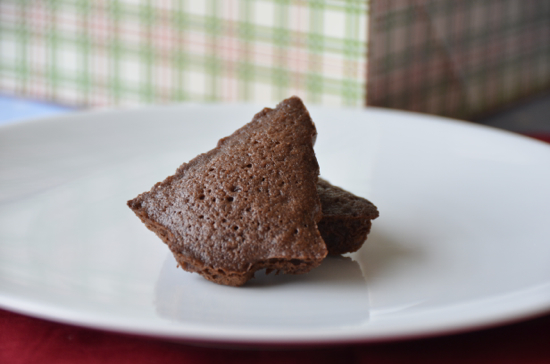
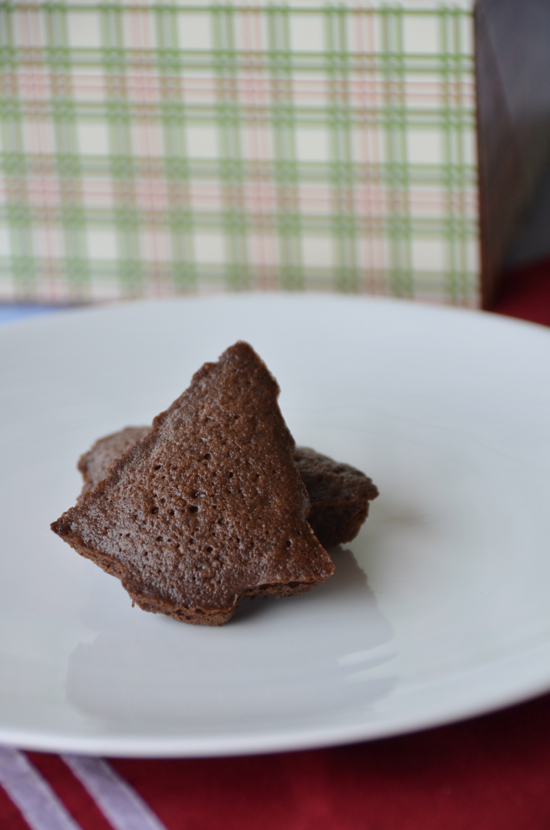
Chocolate Madeleines

Chocolate Madeleines

[pinterest]

I’ve had a cookie pan similar to the one pictured below for a couple of years and used it only a few times. You can purchase it from Amazon by clicking on it. Today, I thought, what if I try to make madeleines in these molds? They’re about the same size as a madeleine pan. Since it’s Christmas, I’m in the mood for chocolate, so how about chocolate madeleines? I have combined several madeleine recipe sources to create this version. These are relatively simple and quick and make a great holiday gift.

Chocolate Madeleines
 
Prep time
Cook time
Total time
 
Chocolate madeleines made in a holiday baking mold.
Author:
Recipe type: Dessert
Serves: 12
Ingredients
  • 2 eggs
  • ⅓ cup superfine sugar
  • ⅓ cup all-purpose flour
  • 2 tsp baking powder
  • 2 Tbsp cocoa powder
  • ½ stick butter, melted
Instructions
  1. Preheat the oven to 350˚F. Spray molds thoroughl with cooking spray
  2. Whisk the eggs and sugar together in a bowl.
  3. Add flour, baking powder, cocoa and melted butter and mix gently to combine.
  4. Spoon the mixture into the molds until ⅔ full.
  5. Bake for 10 minutes or until Madeleines are set.


Chocolate Madeleines
Categories
Dessert Uncategorized

Nestle® Toll House® Chocolate Chip Cookies for Christmas


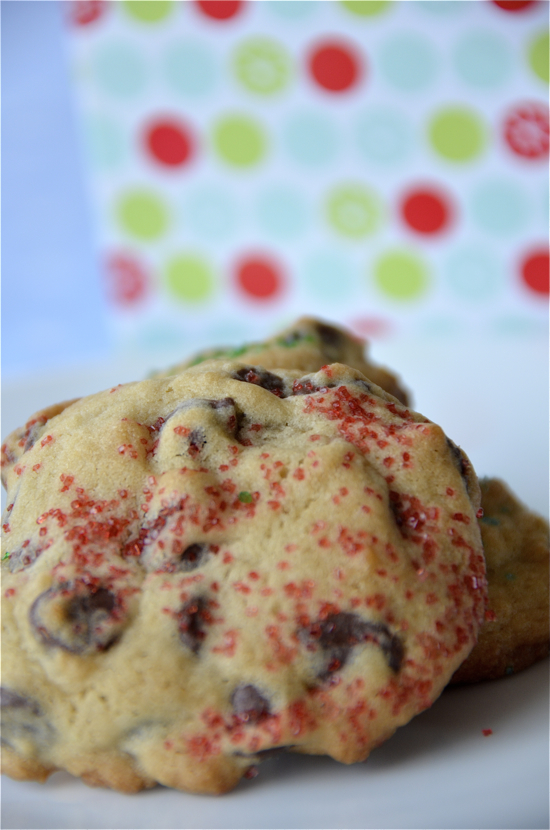
Chocolate Chip Cookies
Nestle Toll House Cookies

[pinterest]

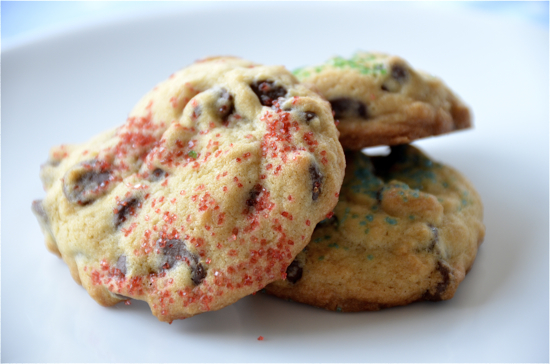
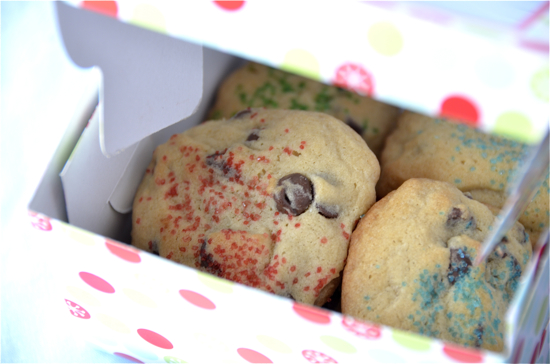
I’ve been making Nestle® Toll House® Cookies for Christmas for 35 years. I’m almost 42, so you do the math. We always sprinkled colored sugar on top. There is no way I know how to improve on the Toll House recipe, except perhaps to add an extra dash of the vanilla extract. And of course, the quality of the chips matters. You can step up to Ghirardelli, or dare I say, Sharffen Berger, but when it comes down to it, Nestlé Semi Sweet Baking Chips really do the trick, and I bought a HUGE bag of them at Costco at the beginning of December, so we’re sticking to the old favorite.

What’s your favorite Christmas Cookie?

Nestlé Toll House Cookies

Nestle® Toll House® Chocolate Chip Cookies for Christmas
 
Prep time
Cook time
Total time
 
I always make mine without nuts, but you could add 1 cup chopped nuts to this recipe.
Author:
Recipe type: Dessert
Serves: 25
Ingredients
  • 2¼ cups all-purpose flour
  • 1 teaspoon baking soda
  • 1 teaspoon salt
  • 1 cup (2 sticks) butter, softened
  • ¾ cup granulated sugar
  • ¾ cup packed brown sugar
  • 1 teaspoon vanilla extract
  • 2 large eggs
  • 2 cups (12-oz. pkg.) NESTLÉ® TOLL HOUSE® Semi-Sweet Chocolate Morsels
Instructions
  1. PREHEAT oven to 375° F.
  2. COMBINE flour, baking soda and salt in small bowl. Beat butter, granulated sugar, brown sugar and vanilla extract in large mixer bowl until creamy. Add eggs, one at a time, beating well after each addition. Gradually beat in flour mixture. Stir in morsels and nuts. Drop by rounded tablespoon onto ungreased baking sheets.
  3. BAKE for 9 to 11 minutes or until golden brown. Cool on baking sheets for 2 minutes; remove to wire racks to cool completely.


Chocolate Chip Cookies Ready for Bake Sale
Categories
Dessert

Classic Christmas Sugar Cookies

Sugar Cookies
Sugar Cookies

[pinterest]

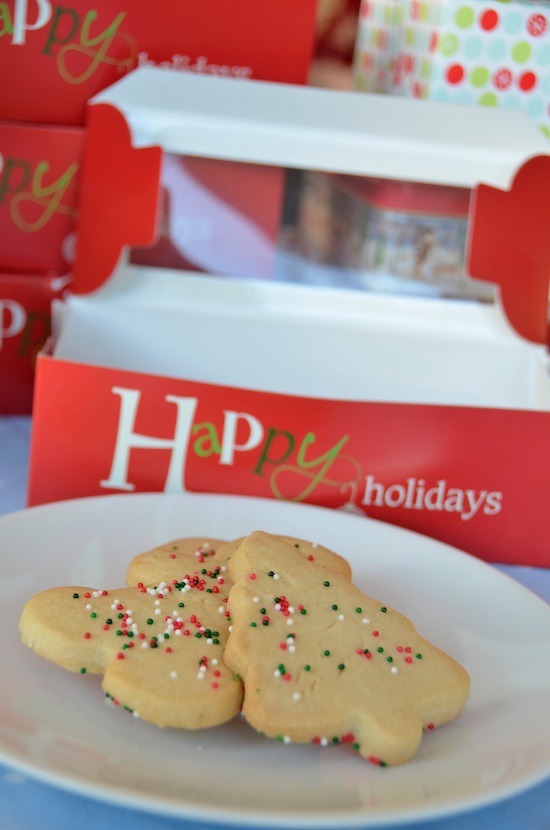
I baked these for the church bake sale and they were tender and rich. At first, I thought the dough was difficult to handle, but once I got it chilled enough, it was much easier to cut the shapes and transfer them to the baking sheet.

If you don’t have cream of tartar on hand, you can substitute baking powder. Baking powder is simply two parts cream of tartar with one part baking soda. It won’t be perfect, but you could use 1 tsp of baking powder instead of the baking soda and cream of tartar requirement.

Classic Christmas Sugar Cookies
 
Prep time
Cook time
Total time
 
Author:
Recipe type: Dessert
Serves: 24
Ingredients
  • 1 stick butter, at room temperature
  • ½ cup canola oil
  • ½ cup sugar
  • ½ cup confectioner's sugar
  • 1 egg
  • 1½ tsp pure vanilla extra
  • 2½ cups all purpose flour
  • ½ tsp baking soda
  • ½ tsp cream of tartar
  • ½ tsp salt
  • Sprinkles or caster sugar
Instructions
  1. In the bowl of a standup mixer, beat the butter, oil, and two sugars until well blended and fluffy. Mix in the egg and vanilla. Add flour, baking soda, cream of tartar, and salt and mix it in. Form the dough into a large ball. It will be quite soft. You may need to add additional flour, but don't overdo it. Just chill it for an hour first and then check it.
  2. Preheat the oven to 350˚F. Divide the dough into 2 large balls. On a floured board, roll out the dough until it is about ⅛" thick. Using cookie cutters, cut the dough into shapes and transfer them, using a spatula to help, to a non-stick cookie sheet. Scatter sprinkles on top. Bake for about 12-15 minutes or until starting to turn golden brown. Remove from oven and allow to cool for a couple of minutes before carefully transferring them to rack for further cooling.
Sugar Cookies
Sugar Cookies
Blog Widget by LinkWithin