Day 8 of 31 days of pumpkin brings us to the pumpkin muffin: a true classic. This was the perfect recipe for me today because this week, it is my responsibility to bring the daily afternoon snack to my son’s kindergarten class. I can’t wait to drop these off tomorrow. Since they’re not iced and there aren’t any chocolate chips in them (although, chocolate chips would probably be great in these), I don’t feel too guilty when it comes to the children’s health meter. I hope they can’t tell!
The recipe worked just as I’d hoped. They are fluffy and moist and not overly sweet.
Day 7 of 31 days of pumpkin brings us into the drinks category. I have a confession. Before today, I had never had a latte. But people go nuts over the Starbucks Pumpkin Spice Latte, so I knew that I would be including a pumpkin latte recipe in my 31 days of pumpkin extravaganza. I’m so glad I did. This drink was dreamy and I plan to make it again and again and again.
There are other Pumpkin Spice lattes out there on the internet, like the one from TheKitchn, but my version jacks up the pumpkin content and is generous with the sugar too. Also, technically, one might not be able to call the drink I’ve made a latte, because in place of espresso, I’ve used a generous shot of strongly brewed, French pressed coffee. The flavor is so perfectly to my liking that I hesitate to monkey with it at all.
Inspired by the Starbucks Pumpkin Spice Latte, I make it at home.
Author: StreamingGourmet
Recipe type: Drink
Serves: 2
Ingredients
2 cups whole milk
5 Tbsp canned pure pumpkin
5 Tbsp granulated sugar
½ tsp cinnamon
⅛ tsp freshly ground nutmeg
⅛ tsp ground cloves
1 Tbsp vanilla extract
1 shot of strong coffee
½ cup heavy whipping cream (optional)
Instructions
Start boiling water to make the French press coffee. Meanwhile, gently heat the milk in a small saucepan. Be careful not to scald the milk or bring it to a boil. Whisk in pumpkin and mix thoroughly. Stir in sugar and blend until dissolved. Add spices and blend. Add vanilla and stir. Keep milk on the heat as long as it is not starting to boil or scald.
Make the coffee in the French press, stronger than usual.
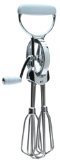
Use a hand-held egg beater (or an immersion blender if you have one) to froth up the warm milk mixture.
Use a whisk, or an egg beater, or a hand held mixer to whip the cream.
Pour about ¼ cup of coffee into a tall mug. Pour the milk mixture on top until the cup is nearly full. Add a large dollop of whipped cream and grate a little bit of nutmeg on top. This recipe makes two tall cups.
Day 6 of 31 days of pumpkin brings us to the perfect Halloween-morning breakfast: pumpkin pancakes. These are true pancakes from scratch, complete with whipped egg whites folded into the batter at the end for extra smooth, fluffy pancakes. This past summer, I used the same method when creating strawberry-coulis infused pancakes. What will we infuse into our pancakes this winter, I wonder?
The spices in this recipe include cinnamon, cloves and nutmeg. I’m loving my microplane grater this month. I use it everyday to grate the nutmeg in each of these recipes. Other spices you could swap in are ginger, mace, and allspice. Just keep the quantities low. A little of these goes a long way.
I purchased the Halloween pancakes molds at Williams-Sonoma this week. I used to have an older set, but I gave it to a friend last year. I also have the Christmas set as well as a “Things that Go” set that my son adores. I have to say, Williams-Sonoma must have made significant design improvements recently because these new molds are easier to use than any of the other sets I have. In the past, I’ve cursed these molds because despite all my best efforts, the batter inevitably stuck to the mold and the whole thing fell apart when I tried to get it out.
Strategies for getting a perfectly shaped pancake include:
1) Spray the molds generously with non-stick spray
2) Heat both the pan and the mold thoroughly before adding batter
3) Don’t overfill the mold
4) Pick up the molds gingerly when ready to flip
These new molds are great. They really don’t stick to the batter at all the way they used to. Now, the mold lifts right off without bringing any of the pancake with it. It looks like William-Sonoma re-engineered the nonstick surface. Also, the shapes are slightly different. There aren’t as many nooks and crannies as the older ones, so that may also help with easy removal. I’m just happy not to be spewing curse words in the kitchen anymore while preparing this special breakfast for my angelic children waiting patiently nearby.
Fold in the stiff egg whites
Pumpkin Pancakes Serves 2 people (makes 6 shapes)
2/3 cup all-purpose flour
1.5 Tbsp sugar
1 tsp baking powder
1/4 tsp cinnamon
1/4 tsp cloves
1/8 tsp freshly grated nutmeg
1/2 tsp salt
2/3 cup whole milk
1/3 cup canned pure pumpkin
2 large eggs, separated
2 Tbsp butter, melted
1/2 tsp vanilla extract
Method
1. Preheat griddle on medium heat. (Don’t add any fat to the griddle yet. Just let it sit there heating up).
2. In a large bowl, mix dry ingredients. In a medium bowl, whisk together the milk, pumpkin and egg yolks. Melt the butter in a small ramekin in the microwave for about 45 seconds. Mix the vanilla in with the eggs to help cool it down a little. You may have to wait a minute or two. You don’t want to cook the eggs. Add the butter/vanilla mixture in a slow, steady stream, whisking constantly.
3. Add the wet mixture to the dry and mix thoroughly. The batter will be thick. You’re going to add the egg whites next. Using an electric handheld mixer, or a crank one like that pictured here, beat the egg whites until they are stiff, but not too dry. Fold them into the batter gently.
4. Using a ladle (to control the amount of batter you use each time), pour batter into the mold, moving your hand around as you do so to spread the batter around all the little areas. Only fill the mold up about halfway. It will rise during cooking. Once the edges become firm, you are ready to gently lift the mold out of the pan. Check for places where the batter could be sticking to the mold and gently push it away with a butter knife. Once you’ve removed the mold, you can flip the pancake like normal. Let cook for another 2 minutes or so.
It’s day 5 of 31 days of pumpkin, and I’m excited to share this recipe for pumpkin biscuits with you. I grew up on the Eastern Shore of MD where sweet potato biscuits were popular, so this seemed like a natural next step. I was tempted to let the pumpkin stand on its own in this recipe, but in the end, I couldn’t resist adding just a hint of the traditional spices we’ve all come to expect with pumpkin flavor. I showed restraint though in both quantity and array, so that there is just a hint of the pumpkin pie rather than the full effect.
In this version, I dropped the biscuits in spoonfuls onto a “greased” (nonstick cooking sprayed) sheet, rather than rolling out the dough and cutting the circles. I just don’t have the patience for such things, although I readily admit that rolled biscuits are much more beautiful. Maybe next time.
Drop biscuits
Spiced Pumpkin Drop Biscuits Makes 12 large biscuits
Ingredients
2 cups all purpose flour
2 tsp salt
3 tsp baking powder
1 tsp baking soda
1/4 tsp cinnamon
1/8 tsp allspice
pinch nutmeg
5 Tbsp cold butter
1 cup canned pumpkin
1/2 – 3/4 cup plain yogurt
Method
1. Preheat oven to 450˚F. Mix together the dry ingredients in a medium bowl. Cut the butter into tablespoon slices and then cut the butter into the flour mixture. Blend thoroughly.
2. With a spoon, stir the pumpkin purée into the dry ingredients. Add enough yogurt so that a ball of dough forms. Do so by adding a couple of tablespoons at a time. Knead the ball of dough 8-10 times until everything is thoroughly mixed together.
3. Spray cookie sheet with nonstick cooking spray. Drop large spoonfuls of dough onto cookie sheet. There should be about a dozen spoonfuls altogether. Bake for 12-15 minutes or until tops are just turning golden brown.
Day 4 of 31 days of pumpkin and we arrive at a Bundt cake. I’m psyched because I actually bought this bundt cake pan today at Mollie Stones in Sausalito. It’s nonstick, so I really wasn’t worried when it came time to invert the cake onto a plate. And then I had so much fun sifting the powdered sugar on top. Can you tell I’ve been waiting a long time to make a Bundt cake?
Day 3 of 31 days of pumpkin brings us to a savory recipe.
The secret to this pumpkin soup isn’t the sage (that’s in the title after all). It’s the fact that the onions are caramelized first. Caramelizing onions takes a bit of time (about 30 minutes, in fact), but it’s well worth it to bring out the sweet, nutty flavor hidden inside. The trick to caramelizing onions is to keep the temperature very low while they are sautéeing. Caramel is created when sugar undergoes controlled pyrolysis – the chemical decomposition that happens when organic stuff gets hot. If it gets too hot, then it gets charred. Char creates the familiar grill marks on a perfectly grilled steak. We’re not charring the onions, we’re trying to decompose the sugars in such a controlled way that they turn into caramel and that takes controlled temperature for a long time.
Day 2 of 31 days of pumpkin and we come to a custardy pumpkin crème brulée with a hint of cardamom. I love making desserts that come in individual servings. Maybe that’s because I hate sharing. This way, everyone gets his own ramekin and no one has to fight over who gets the bigger piece.
Since starting this project, I’ve learned something about sugar: there’s more than one kind. Of course, I always knew there was brown sugar, and dark brown sugar, but I haven’t really gone beyond that sort of basic knowledge of sugar. This week, I discovered demerera sugar and I use it in this recipe.
Grilled Peaches with Toasted Almonds and Vanilla Ice Cream
I know, it’s late in the season to do a post about peaches, but I swear, local peaches are still on sale here at Paradise Market, so I didn’t hesitate when the dinner party menu I was using from the Williams-Sonoma Dinner Parties book included this Grilled Peaches dish for dessert. Once again, I adapted the recipe and made it my own.
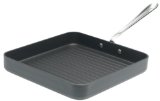
The method I used for each step of this recipe differed greatly from the one outlined in the Dinner Parties book, because I’m lazy and I like to keep the cleanup as simple as possible. Therefore, instead of using the oven and a cookie sheet to toast the almonds, I just toasted them in a sautée pan and rather than using my gas grill outside to grill the peaches, once again, I whipped out my All-clad non-stick grill pan. During the party, I had just grilled the Halibut, so I actually had to wash the pan between the main course and the dessert course before I could fire it back up, but because it’s a non-stick pan, washing it was a breeze and it was ready for another round of action in no time.
I have to say, the guests at the party went unexpectedly wild about this dessert. None of us were prepared for the peaches to cook all the way through in such a short amount of time, so we all took our first bite a bit tenatively. The peaches only grill for about 6-7 minutes, but they come out soft, warm and sweet – all they way through. Guests also commented enthusiastically about the contrast among textures with the crunch of the almonds, the creamy chill of the ice cream and the warm, soft texture of the peaches. A splash of Balsamic Vinegar lent tang and flavor. One guest, Steve, likes to make a Balsamic reduction for grilled fruit, because then it’s an amazingly sweet addition. See the links to other blogs at the bottom of this post to find out more about how to do that. For me, the Balsamic vinegar was a last minute thought, and I was just glad to have splashed it in.
Brush the peach halves with olive oil for grilling
Heat a 10-inch skillet over medium-high heat. Add almonds and toast, watching carefully so they don't burn. If the pan has truly had time to heat up, it takes about 2 minutes on the first side and then 1 minute after flipping them. Set almonds aside.
Brush both sides of each peach half lightly with extra virgin olive oil. Place peach halves in the pan, round side down and grill for about 3 minutes. Check one to see if grill marks have appeared. Turn them over and grill on the other side until grill marks appear, about 4 more minutes.
If peaches are large, place one half on each plate. For medium sized peaches, you could plate with two halves. Sprinkle with almonds and add a scoop of vanilla ice cream.
In my most recent post, I wrote about hosting a dinner party on Sunday night and using an entire menu from the Williams-Sonoma Dinner Parties book. In this installment, I bring you Fig & Gorgonzola Crostini with a Honey Drizzle. I changed the recipe slightly, so the one you see here is my own, but I was inspired by the Gorgonzola Bruschetta with Figs recipe in the book.
This hors d’oeuvre was particularly convenient because I could toast the baguette slices ahead of time, chop the figs ahead of time and assemble the crostini before the guests arrived. I felt very little stress.
Recently I decided to host a dinner party on Sunday night, hoping to stretch out the weekend a bit and squelch the Sunday night blues. It totally worked.
For inspiration, I turned to a book that has been sitting on my shelf for a couple of months: Williams-Sonoma Dinner Parties: Inspired Recipes and Party Ideas for Entertaining. I even found a menu that I wanted to cook from start to finish. I’m glad I decided to go all the way because it turned out to be the kind of menu that allows the cook/host to have fun at her own party, but it didn’t include a pot roast or a casserole. Au contraire. This menu was light, healthy, elegant AND easy. The main course was a Halibut fillet with herbed butter and that was served with this light, end-of-summer, orzo salad.
What I liked best about serving this salad with the fish is that it could be prepared ahead of time and served at room temperature, so I didn’t have to worry about making it at the last minute or reheating it at just the right time. Stay tuned for more recipes from this Sunday Night Dinner Party.
1 box (1 lb) of orzo
dash of salt for boiling water
1 Tbsp olive oil to coat orzo when finished cooking (to keep from sticking)
1 1/2 lbs Heirloom Tomatoes, chopped into 1/2 inch cubes (choose a variety of colors)
1/2 cup fresh basil leaves, chopped
2 Tbsp extra virgin olive oil
1 teaspoon white wine vinegar
1/2 teaspoon Dijon mustard
1/2 teaspoon salt
1 teaspoon freshly ground pepper
Method
1. Boil the orzo according to package instructions for an Al Dente texture, about 9 minutes. Drain pasta into a large bowl and toss with olive oil. Once the pasta cools a bit, you can cover it with plastic wrap and refrigerate it until its ready to mix in with the rest of the ingredients (up to several hours ahead of time).
2. Chop tomatoes and the basil and mix together in a large bowl.
3. In a small jar, mix the olive oil, white wine vinegar, mustard, salt and pepper. Close lid and shake until emulsified.
Final preparation: About 1 hour before the party, gently fold the orzo, tomato/basil and vinaigrette together and spoon into a serving bowl. Cover with a paper towel while salad reaches room temperature. Toss again before serving and garnish with fresh Basil leaves.