Categories
Appetizers Breads Uncategorized Vegetarian

Rosemary Focaccia

Rosemary Focaccia

I am totally into this focaccia. This recipe has been tested and tested. Use fresh rosemary. Don’t hold back on the oil and salt and eat it while it’s still warm.

Rosemary Focaccia

Ingredients
1/2 cup high quality extra-virgin olive oil
2-4 whole cloves garlic, cracked
2 sprigs of rosemary
1 (1/4-ounce) package rapid rise dry yeast
4 cups unbleached all-purpose flour plus additional for kneading
2 tsp table salt
2 tablespoons chopped fresh rosemary
1 teaspoon coarse sea salt

Method

For the garlic-rosemary infused olive oil:

1. Heat 1/2 cup of olive oil, the rosemary sprigs and garlic cloves in a small saucepan over medium-low heat. Heat until just starting to bubble, remove from heat and allow to sit and cool for at least 30 minutes or longer.

For the focaccia:

1. Stir together 1 2/3 cups lukewarm water and yeast in bowl of mixer. Add 4 cups flour, 1/4 cup of the rosemary-garlic infused oil, and the table salt and beat with the paddle attachment at medium speed until a dough forms. Replace paddle with dough hook and knead dough at high speed until soft, smooth, and sticky, 3 to 4 minutes.

2. Turn dough out onto a lightly floured surface. Knead in 1 – 2 more tablespoons of flour for about a minute then transfer to an oiled bowl and turn to coat it with the oil. Let rise, covered with plastic wrap, at warm room temperature, until doubled in bulk, 1 to 1 1/2 hours.

3. Press dough evenly into a generously oiled 15 x 10 inch baking pan. Let dough rise, covered with a kitchen towel, until doubled in bulk, about 1 hour.

4. Preheat oven to 500°F. Stir together rosemary and remaining 3 tablespoons oil. With a fork, make shallow pin pricks all over the dough, then brush with rosemary oil. Sprinkle sea salt over the focaccia. Bake at 500˚F for 5 minutes and then reduce to 475˚F for another 15 minutes or until golden brown.

5. Remove from oven and invert onto a rack and flip over. Eat immediately, if possible.

giggle
Categories
Breakfast/Brunch Drinks Produce Vegetarian

Peach Smoothie

Peach Smoothie
Peach Smoothie

At our house, we go through phases where we make smoothies every morning. When bananas start to turn brown, we throw them in the freezer, so we can use them in a smoothie later. We have an entire shelf in the freezer devoted to frozen fruit. There are the bananas we’ve rescued, bags of frozen fruit, and even bags of frozen spinach. There are strawberries, blueberries, raspberries, and… peaches.

Of all of the smoothies we make, this one is my favorite.

Peach Smoothie
Serves One

Ingredients

1/2 banana
1/2 container peach yogurt
1/2 10 oz bag of frozen peaches
1/2 cup orange juice

Method

Put all of the ingredients in a blender and blend until smooth. Serve immediately.

Peach Smoothie
Categories
Sides Soups and Stews Uncategorized Vegetarian Video How-to

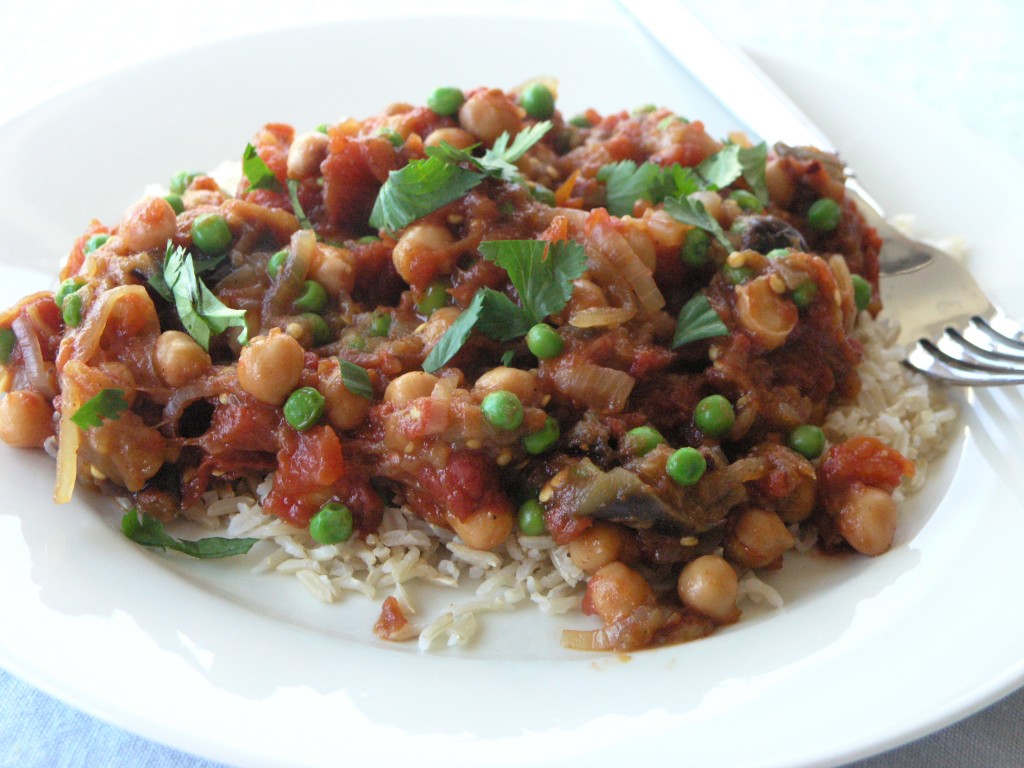
Chana Masala

Chana Masala

You say Garbanzo Bean, I say Chickpea, but in India, it is “Chana.”

Chana Masala is one of the most popular Indian dishes. Since it’s vegan and spicy, it falls into the category of “dishes my husband likes.” I hope you enjoy it too.

Chana Masala
Serves 4-6

Ingredients

1 1/2 tablespoons vegetable oil
1 whole cardamom pod
1 whole cinnamon stick
1 whole Bay Leaf
A few whole cloves
1 tsp whole cumin seeds
2 medium onions, diced
2 cloves garlic, minced
2 teaspoons grated fresh ginger
1 teaspoon ground turmeric
1 15-ounce can of diced tomatoes
chopped green chilis
1 teaspoon garam masala
1/4 tsp chili powder
1/2 tsp ground coriander
1/4 tsp turmeric
1/2 tsp cumin powder
2 (15-ounce) cans chickpeas, rinsed and drained
Salt to taste
Squeezes of lemon juice
Fresh cilantro to garnish

Method

1. Heat oil in a large skillet. Add whole spices (cadamom pod, cinnamon stick, Bay Leaf, whole cloves, cumin seeds) to the pan and sautée for 2 minutes over medium-high heat. Add onion and sautée until softened and browned, about 8 minutes. Add garlic, ginger and turmeric. Stir to combine. Sautée for a minute or two.

2. Add the canned tomatoes and green chilis. Simmer until thickened slightly, about 3 minutes. While tomatoes are simmering, mix together the garam masala powder, chili powder, ground coriander, turmeric, and cumin powder. Add this mixture to the simmering tomatoes and stir to combine.

3. Add the chickpeas. If the dish is getting dry, add up to 2/3 cup of water. Simmer uncovered for 5-10 minutes or until chickpeas are soft, but not mushy. Season with salt.

4. Fish out the Bay Leaf and cinnamon stick. Serve over rice. Squeeze lemon on top and garnish with lots of fresh cilantro.

Here is a version of Chana Masala demonstrated by ShowMeTheCurry. Their version involves using tea bags to enhance flavor and color. Cool!

Categories
Panini Produce Sandwiches Vegetarian

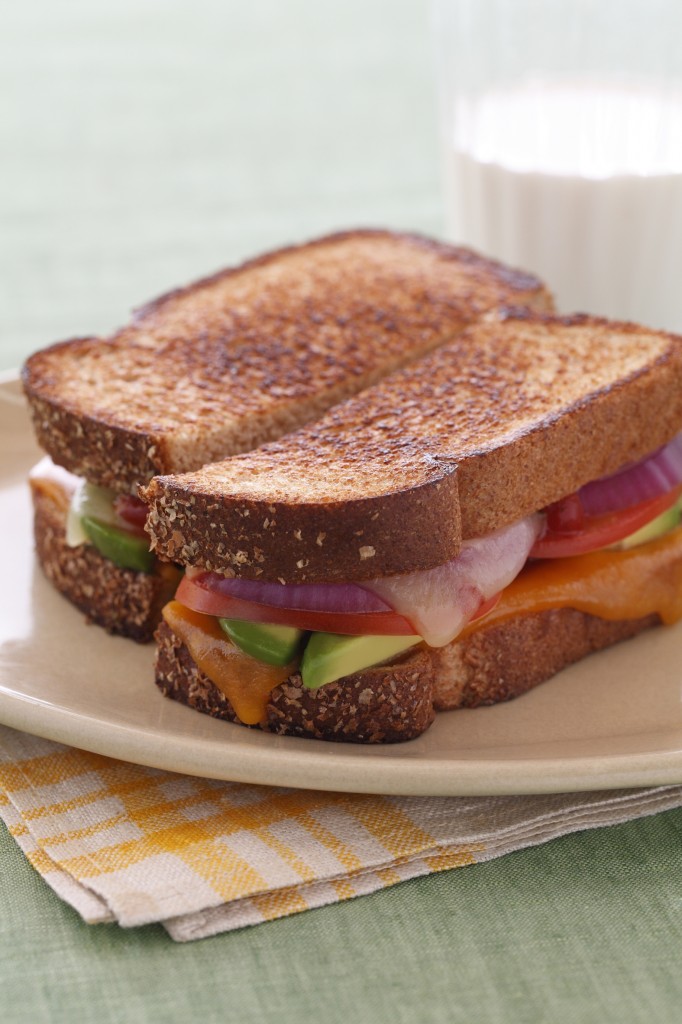
Axell Family California Avocado Grilled Cheese Sandwich

Randy Axelles Grilled California Avocado Sandwich

Did you know that 90% of the nation’s avocados are hand-grown by farmers in California? Many of the California avocado groves are multi-generational and family operated. Randy Axell is one of those growers. As a third generation avocado grower, Axell and his wife, Joanna, have raised their family on 40 acres of land in Santa Paula, Calif. called Rancho Rodoro. It is named from a combination of Axell’s parents’ names, Ross and Dorothy. Axell feels privileged to have grown up on a farm and to have provided the same opportunity to his children.

CA Avocado Grower, Randy Axelle

“I love being able to spend every day on a farm and in the groves. It’s very satisfying to be able to grow something from a tiny seed to a full tree,” explains Axell when asked about his favorite part of being a California avocado grower.

Randy’s passion for growing California avocados is clear in the quality of his trees and the fruit he harvests each season. His farm is operated to the standards of Good Agricultural Practices (GAP) certification, a program that requires Randy to document everything he does on the farm as well as implement the best possible management practices to aid in preventing food safety issues. He sees these practices as a natural thing to do, to focus on food safety and sell the perfect piece of fruit.

To view videos of Randy Axell sharing his stories of growing California avocados, visit his page at the California Avocado Commission website.

Axell Family California Avocado Grilled Cheese Sandwich

Recipe created by California avocado grower Randy Axell for the California Avocado Commission, used by permission.

Serves: 4

Prep Time: 5 minutes; Cook Time: 5 minutes

Ingredients

4 slices cheddar cheese
8 slices whole wheat or honey wheat bread
1 ripe, fresh California avocado, peeled, seeded and sliced
1 medium tomato, sliced
4 slices red onion
Chili sauce, to taste
4 slices pepper jack cheese
Olive oil cooking spray

Instructions

On each sandwich, place a slice of cheddar cheese, a layer of avocado, tomato, and onion slices. Add chili sauce to taste. Top with pepper jack cheese, and finish with remaining bread slices.
Heat a large skillet over medium heat. Spray skillet with olive oil cooking spray. Place sandwiches in skillet and cook until bread is browned. Turn and cook until cheese has melted. Serve immediately.

Nutrition Information Per Serving: Calories 350; Total Fat 18 g (Sat 6 g, Trans 0 g, Poly 1.5 g, Mono 6 g); Cholesterol 25 mg; Sodium 610 mg; Total Carbohydrates 33 g; Dietary Fiber 7 g; Protein 19 g;

Categories
Drinks Uncategorized

Meyer Lemon Black & Green Iced Tea

Iced Tea
Meyer Lemon Black & Green Iced Tea

Today is the first in a series of Maryland (my homestate) oriented posts. Maryland summers are full of just-picked corn on the cob, Blue crab feasts, Thrasher’s French Fries, and pitchers of iced tea. My mother used to make 2 quarts of iced tea with a few Lipton’s tea bags, a cup of sugar, and a couple of lemons. She would let the tea and lemons steep for a really long time. Like most of the afternoon. It was awesome and there was never enough. I didn’t think I would taste tea that good again, but two things happened. I moved to California and my tastes changed a bit (a whole cup of white sugar? Ouch.) and my friend Paige brought over a batch of her iced tea. It’s iced tea heaven all over again.

There are three secrets that comprise the genius of this tea.
1) The black & Green combo
2)The honey and
3)The Meyer lemons.

In Marin County, where Paige and I live, it’s as if Meyer Lemons grow on trees. Well, not as if; they do. Lots of them. People are often trying to unload them because there are so many. We are so lucky. Eureka lemons are the bright yellow lemons you usually find in the grocery store. Meyer lemons are darker on the outside and are nearly orange on the inside. In fact, Meyer lemons aren’t truly lemons. They are believed to be a cross between lemons and either oranges or mandarins. They are less acidic than Eureka lemons and have earthy, herbal undertones. They are a great match for the Green Tea in this mixture. If you can’t find Meyer lemons (since they are usually only available in specialty stores from later winter to early Spring), you can substitute a mixture of two regular lemons and one small orange.

Iced Tea
Meyer Lemon Iced Tea with Mint Sprigs

Meyer Lemon Black & Green Iced Tea
Makes 2 quarts

Ingredients
4 Black Tea Bags (I like Earl Grey)
4 Green Tea Bags
1/4 cup honey or more to taste
2-3 Meyer Lemons, sliced thinly and seeded
Mint springs to garnish

Method

For the Green Tea
Heat one quart of water to boiling in a medium saucepan. Remove from heat and allow to cool for a couple of minutes. Green Tea is best steeped at about 180˚F and remember, water boils at 212˚F. Add 4 Green Tea bags to the pot and allow it to steep for 1-3 minutes. Remove tea bags and allow Green Tea to continue to cool.

For the Black Tea
Heat one quart of water to boiling in a medium saucepan. Remove from heat. Add 4 black teabags to the saucepan and allow it to steep for about 5 minutes. Remove tea bags and allow black to continue to cool.

The mix
While both teas are still a bit warm, pour them into a glass pitcher. Add honey and stir to dissolve and mix. Add half of the lemon slices, reserving the other lemon slices for garnish.

To serve
Fill glasses with ice, add the tea and garnish with lemon slices and mint sprigs (optional).

Categories
Appetizers Fish & Shellfish Produce Uncategorized

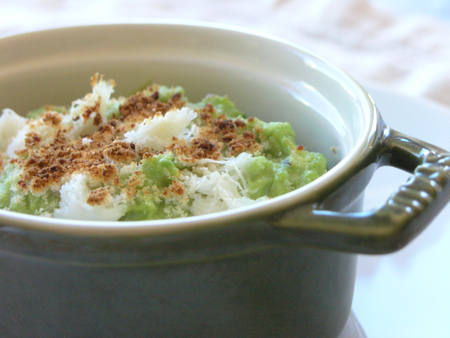
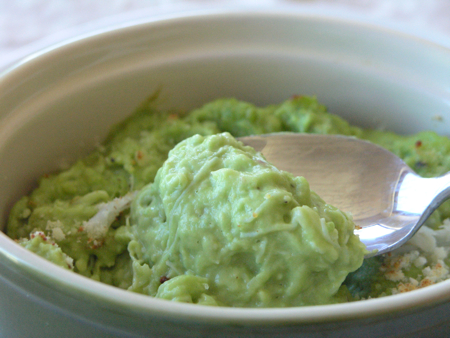
Avocado-Crab Gratinée

Avocado Crab Gratinée

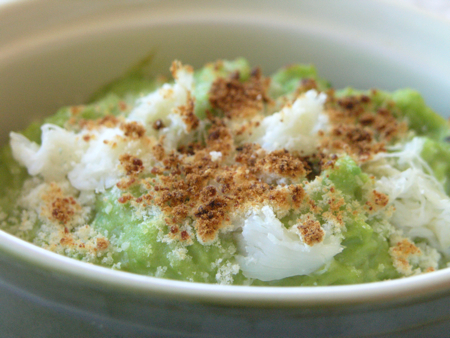
A few weeks after the amazing California Avocado Commission dinner at One Market, I flew to the south of Spain for a family wedding. We stayed at a small inn about 45 minutes west of Malaga called Hotel Rural La Paloma. Owned and operated by an Italian couple, Philippo and Elena took amazing care of us.

Hotel Rural La Paloma, Spain

The menu at the inn’s restaurant was a great mix of Spanish and Italian-influenced dishes. They were incredibly accommodating as well. My husband is a vegan, and they were happy to prepare separate, off-the-menu dishes for him. While I am moving towards a vegan diet, I took the opportunity to taste a few dishes on the menu that contained dairy and seafood. One of my favorites was “Aguacate relleno de pulpa de cangrejo gratinado,” or “Puréed avocado stuffed with crab au gratin.” We’ll call it Avocado-Crab Gratinée.

Hotel Rural La Paloma

I couldn’t wait to come home and try to prepare the dish myself. Elena was nice enough to share the recipe with me and both avocados and dungeness crabs happen to be in season right now. This dish is so easy to prepare, you could easily whip it up for weeknight treat for two.

Avocado Crab Gratinée
Avocado-Crab Gratinée
 
Prep time
Cook time
Total time
 
Avocado, crab and cheese. Yum.
Author:
Recipe type: Appetiser
Serves: 2
Ingredients
  • 1 ripe California Grown Avocado
  • Salt and pepper to taste
  • 3 Tbsp heavy whipping cream
  • 2 oz lump crabmeat
  • 2 Tbsp grated Parmesan cheese
Instructions
  1. Preheat the broiler. Cut the avocado in half. Discard the pit, but reserve the skins. Empty the flesh into a microwave-safe bowl. Mash it with a fork it and add salt and pepper, combining well. Add the heavy cream and the crabmeat and mix well with a fork. If the mixture is too thick, add additional heavy cream.
  2. Warm the mixture in the microwave for 1 minute. Add the grated Parmesan cheese to the mixture and stir it in completely. Spoon the mixture either back into the two empty avocado halves or into one or two small oven-safe dishes. Sprinkle additional Parmesan cheese on top.
  3. Bake under the broiler for a couple of minutes until the cheese has browned slightly. Serve immediately.
Avocado Crab Gratinée

Categories
Appetizers Vegetarian

Marinated Olives with Fennel – The Start to a Wonderful (Vegan?! Gluten-Free?!) Dinner Party

Marinated Olives with Fennel

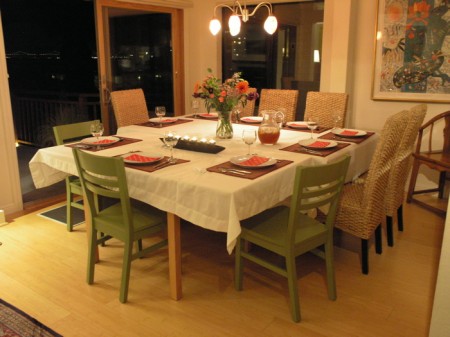
This weekend, I hosted a birthday dinner for my husband, but this year was different from all the rest. The entire menu was vegan and gluten-free. Several of the guests are vegetarian and a few are gluten intolerant. In addition, many of them are trying to avoid dairy, so I decided to just take the menu all the way. I knew that I would need help to make it an elegant, flavorful dinner with these restrictions in place. I am a newly-minted vegetarian chef, so I turned to my friend and amazing gourmet blogger/writer/instructor/video-maker, Viviane Bauquet-Farre, author of the blog food and style. Viviane and I met when I featured on her cooking videos on StreamingGourmet.com. Her videos are as beautifully made as her fine cuisine.

Viviane creates innovative, seasonal dishes that are flavorful, deceptively simple, and… as it turns out, vegetarian (not vegan or gluten-free necessarily). I read her blog and watched her videos for about six months before I even realized that they were all meatless. I knew she was the person to call for help with my menu.

Sure enough, we were able to come up with an elegant five-course dinner free of bones, cheese, cream or wheat. Eager to know what the menu was? You’re in luck, but you’ll have to check back. All five courses will be revealed over the next five days.

Vegan, gluten-free dinner about to begin

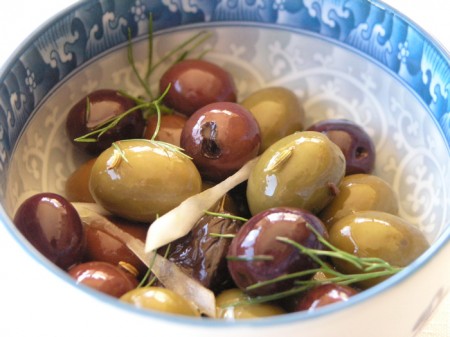
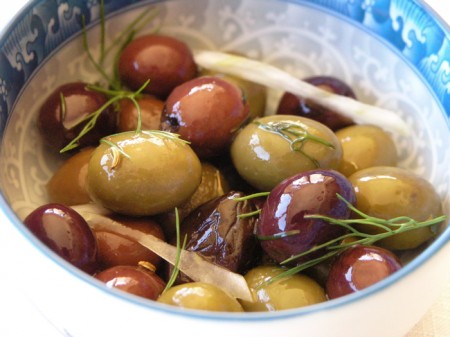
Today’s post is a bit of a teaser. These marinated olives were among the hors d’oeuvres on the table during the cocktail hour, but there are five courses yet remaining. The olives were devoured, but I have a confession to make. I don’t eat olives. I don’t think an entire olive has ever passed my lips. So I can’t vouch for them myself. And because I don’t eat olives, it didn’t occur to me to put a little bowl out to collect all the pits. It also didn’t occur to me to put out little toothpicks with which to pick up the olives. You can learn from my mistake and use a dish like this one (available at Amazon.com).

But this recipe is that good, because despite my lack of proper accoutrements, guests wolfed down these olives with their bare fingers and left the pits wherever they could hide them.

Marinated Olives with Fennel

Marinated Olives with Fennel
By Viviane Bauquet Farre of food and style
Reprinted with permission

makes 2 cups

1/2 small fennel bulb
1 tablespoon coarsely chopped fennel greens
1/4 teaspoon red pepper flakes
1/4 teaspoon fennel seeds
2 strips lemon zest – (use vegetable hand-peeler) and cut in 1/16” julienne strips
1/2 cup extra virgin olive oil
1 1/4 lb mixed olives

Step 1: Trim and cut fennel bulb in half. Using a vegetable hand-peeler, shave 12 strips from the bulb and put in a large bowl. Place the balance of ingredients in the same bowl. Mix well and transfer to a Tupperware container.

Step 2: Let marinate at room temperature for 1 hour before serving.
Cook’s note: Refrigerate up to 1 month. Bring to room temperature before serving.

Categories
Breakfast/Brunch Panini Sandwiches Uncategorized

Scrambled Egg Grilled Cheese with Leeks

Scrambled Egg Grilled Cheese with Leeks

To help celebrate Grilled Cheese Month and to join in Panini Happy’s Grilled Cheese Pageant and because I just had a craving for a dish like this, I decided to make an indulgent, grilled cheese sandwich filled with scrambled eggs.

Categories
Produce Sides Vegetarian

Jamie Oliver’s Roasted Root Vegetables

[pinterest]

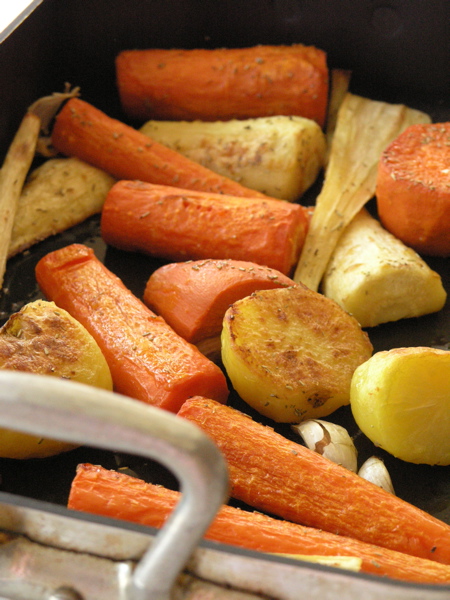
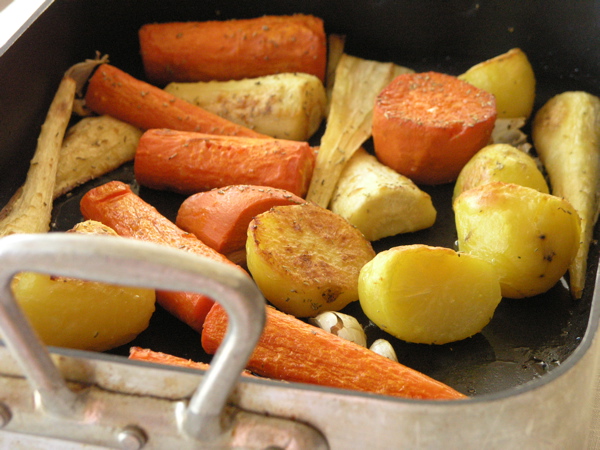
Roasted parsnips, potatoes and carrots

I’ve been working on perfecting roasted root vegetables for awhile. Getting them to come out of the oven crispy on the outside and creamy on the inside is no small feat. Should you parboil first? How hot should the oven be? I’ve gone back and forth about the parboiling question. For years, I’ve been too lazy to bother and I thought that I was getting by just fine. That all changed the other day, when I followed the recipe in Jamie Oliver’s latest book, Jamie’s Food Revolution: Rediscover How to Cook Simple, Delicious, Affordable Meals. He got me to parboil again and I don’t think I will ever go back.

Click on the book to see more:

The other revelation? Heat the olive oil, along with the smashed garlic cloves and rosemary in the roasting pan first, on the stove top. Then toss the vegetables in the heated, flavored oil to coat (before roasting in a 400˚F oven). The vegetables roast evenly, and the flavor diffuses throughout.

See the nice browning on the potatoes? That comes as a result of scuffing up the potatoes while draining them in the colander. Scuffing the potatoes increases the surface area exposed to the warm air, shortening the time for moisture to evaporate the starches (sugars) to caramelize and turn brown.

And of course, don’t break the cardinal rule: make sure the vegetables are not overcrowded. Overcrowding in the roasting pan leads to “steaming” which produces limp, soggy vegetables that can’t brown. Make sure there is only one layer of vegetables and adequate space between them.

Jamie Oliver's Roasted Root Vegetables
 
Prep time
Cook time
Total time
 
Hearty roasted root vegetables perfect for Thanksgiving and throughout the autumn and winter months.
Author:
Recipe type: Side dish
Cuisine: British
Serves: 4-6
Ingredients
  • 2 medium Idaho potatoes
  • 6 parsnips
  • 6 carrots
  • 1 bulb of garlic
  • 3 sprigs of fresh rosemary
  • sea salt and freshly ground black pepper
  • olive oil
Instructions
  1. Preheat your oven to 400°F
  2. Peel the vegetables and halve any larger ones lengthways. Break the garlic bulb into cloves, leaving them unpeeled, and bash them slightly with the palm of your hand. Strip off the rosemary leaves from the stalks.
  3. Put the potatoes and carrots into a large pan – you may need to use two – of salted, boiling water on a high heat and bring back to the boil. Allow to boil for 5 minutes, then add the parsnips and cook for another 4 minutes. Drain in a colander and allow to steam dry. Take out the carrots and parsnips and put to one side. Fluff up the potatoes in the colander by shaking it around a little – it’s important to ‘chuff them up’ like this if you want them to have all those lovely crispy bits when they’re cooked
  4. Put a large roasting pan over medium heat and either add 2 Tbsp of olive oil. Add the garlic and rosemary leaves. Put the vegetables into the tray with a good pinch of salt and pepper and stir them around to coat. Spread them out evenly into one layer – this is important, as you want them to roast, not steam as they will if you have them all on top of each other.
  5. Put the baking dish in the preheated oven and cook, stirring the vegetables occasionally, until they are tender and golden brown, about 45 minutes.

Roasted carrots, parsnips, and potatoes
Categories
Breads Soups and Stews Uncategorized Vegetarian

Zesty Vegetarian Chili with Cornbread Topping

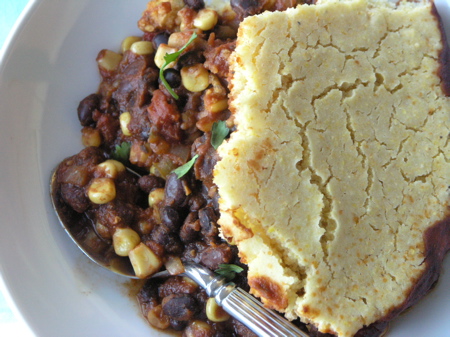
Vegetarian Chili with Cornbread Topping

I usually avoid vegetarian chili because I fear that it won’t be flavorful enough, but my husband has really laid off meat lately, and he likes his food to have a lot of kick, so I set about making a chili that would stand up to both of our flavor requirements and not include any ground meat. Sure enough, this chili delivers. In addition to chili powder, I’ve added a couple of dried red chilis (seeds and all) which manages to kick it up a notch. The other trick is to add all of the dried spices to the pot while there is hot oil in there to bring out all of the trapped flavors. While you are cooking, you should experience all of the fragrances. Adding dried spices to heated oil makes them truly fragrant.

The other trick to this dish is to make it in a pot that can transfer from stove to oven, like this Le Creuset Enameled Cast Iron 5 Quart Oval French Ovens. After you’ve prepared the chili on the stove, you will bake it with the cornbread batter on top for about 30 minutes.

Blog Widget by LinkWithin