Categories
Produce Rice and other Grains Uncategorized Vegetarian

Saffron-and-White-Wine-Braised Spring Vegetables

    Saffron & White Wine Braised Spring Vegetables

    It’s day five of my blogging event: “How to host an elegant, flavorful, vegan, gluten-free dinner party” in which I feature recipes created by the wonderful Viviane Bauquet Farre of food and style. My husband and several of his friends have transitioned to a vegetarian diet and several of them are also avoiding dairy and gluten, so when I decided to celebrate G’s birthday with a dinner party, I knew I needed to turn to my friend Viviane who features such refined recipes which also happen to be meat free. Today’s installment is the fourth of that five-course meal – the main course, in fact. For dessert, you’ll just have to check back tomorrow.

    For this course, I got to experiment with fresh vegetables from the farmer’s market I’ve been dying to use, like English peas and fava beans. If you’re going to choose between the two, English peas are way easier to prepare. You just have to pop the peas out of the pod and they’re ready to go. Fava beans, on the other hand, require several steps. The beans within the pods are coated with a little jacket that needs to be removed as well. For this recipe, I actually prepared both and it took all day. Luckily, I was able to stream three episodes of This American Life while I shucked, blanched and peeled.
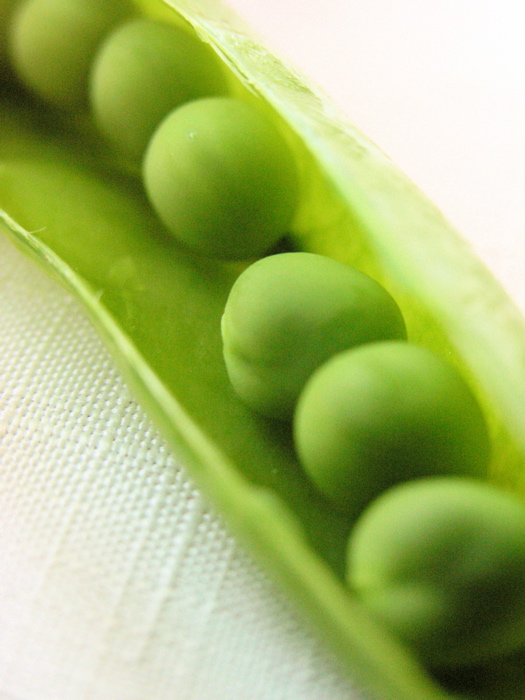
    Fresh Peas

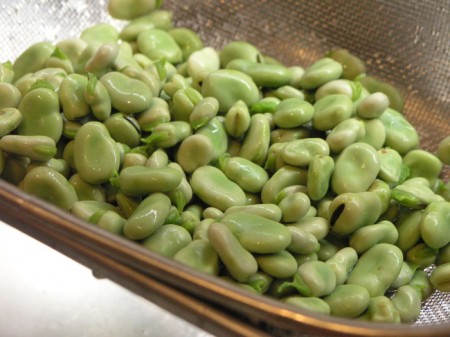
    I prepared the fava beans by following the first part of a recipe by LocalLemons. First I had to remove the beans from their pods. Rinse them. Blanch them for 30 seconds and then pull off the outer layer from each bean. The inner bean is bright green and more fragile. After 3 hours of work, I forgot to photograph the bright green inner beans, but you can see what they look like over at the LocalLemons post. Here’s what they look like during step one and two.
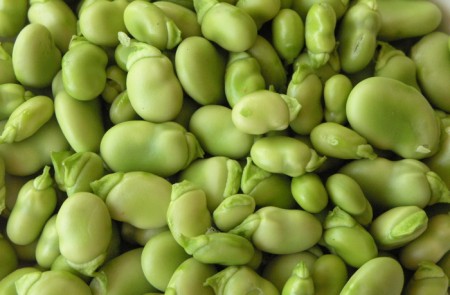
    Fava Beans removed from the pod
    Fava Beans after blanching

    This dish is truly scrumptious. It is lighter than risotto because there is no butter and no Parmesan cheese, but the saffron, wine and garlic more than make up for flavor. I would make this dish again in a minute and look forward to varying the vegetables depending on what’s in season.
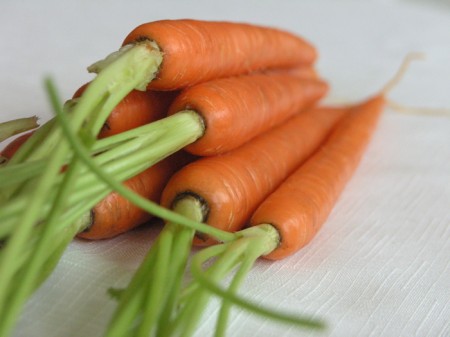
    Young Carrots

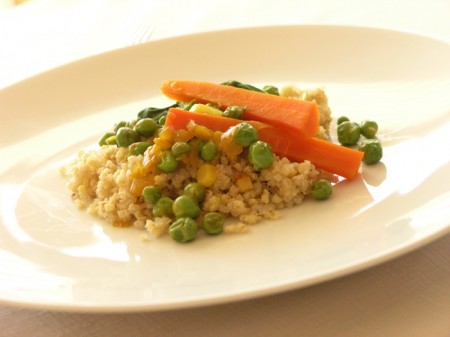
    Saffron and White Wine Braised Spring Vegetables
    Adapted from a recipe by Viviane Bauquet Farre, with permission
    Served over Quinoa-Millet Pilaf (version also included below)

    serves 4

    For the vegetables
    1/4 cup extra virgin olive oil
    2 large shallots – skinned, quartered and finely sliced
    1 teaspoon saffron threads – gently pounded in a mortar to a coarse powder
    1 1/2 cups dry white wine
    2 garlic cloves – skinned and finely chopped
    2 medium, young carrots – peeled and cut in 1/8″ x 1″ sticks
    4 oz shelled fresh English peas
    8 oz asparagus – stalk ends snapped off and spears cut on the diagonal in 1″ pieces
    1/2 teaspoon sea salt
    freshly ground black pepper to taste
    A handful of fresh baby arugula

    For the quinoa-millet pilaf
    1 Tbsp extra virgin olive oil
    1-2 shallots, diced finely
    1 clove of garlic, peeled and bashed
    ½ cup millet
    ½ cup quinoa (rinsed well)
    2 ½ cups vegetable stock
    Sea salt to taste (about 1/2 tsp)
    About a cup of shelled fava beans

    Method

    1. To get the quinoa-millet pilaf started, put the quinoa in a fine-mesh strainer and place a bowl underneath. Rinse with cold water while rubbing the quinoa between your fingers. The water will become cloudy. Drain, and repeat this process with fresh water two more times. Strain excess water and set aside. Heat the olive oil in a saucepan over medium heat. Add the shallots and sauté for about 4 minutes, or until soft. Add the garlic and sautée for another minute. Now we are going to toast the grains so that they have a rich, nutty flavor. Add the millet, and sauté for 5 minutes, stirring frequently. Now add the quinoa and sauté for 2 to 3 minutes more. Again, stirring frequently to coat the grains with the olive oil, shallots and garlic. Add the vegetable stock and salt and bring to a boil. Reduce heat, simmer, covered for about 30 minutes, or until the water is absorbed. Fluff before serving

    2. Now that the quinoa-millet is cooking, it’s time to do the vegetables. Heat the olive oil in a wide, heavy-bottomed skillet over medium-high heat. Add the shallots and sauté for 1 to 2 minutes until they have softened. Add the wine, saffron, and garlic. Bring to a full boil and then reduce heat to between medium and medium-low. Cover the pan and simmer for 5 minutes. Add the carrots, toss well, cover the pan and simmer for 10 minutes. During my dinner party, I actually paused the dish here while we were eating and the carrots steeped in the saffron-wine-garlic sauce (with no heat) for about 20 minutes. This had the delightful effect of infusing them with intense saffron flavor. You could try it that way.

    3. Add the peas and asparagus, toss well, cover the pan and continue to simmer for 5 minutes until the asparagus are tender but still a bit crunchy. Uncover the pan. Raise heat to high, add the salt, black pepper to taste and the arugula. Toss until the arugula has wilted, about 30 seconds to 1 minute. Immediately remove from heat.

    4. To serve, spoon the pilaf into shallow bowls. Top with the braised vegetables. Drizzle with the pan juices. Garnish with a drizzle of olive oil. Serve immediately.

    Optional fava bean addition:
    Sautée the fava beans over medium high heat in a separate sautée pan, with some olive oil and pepper for about 3 minutes. Serve as a garnish on top.
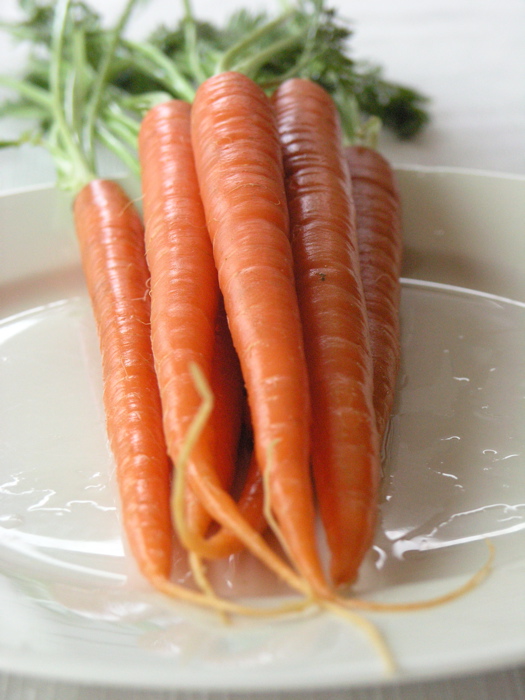
    Young Carrots
      Categories
      Appetizers Produce Salads Uncategorized Vegetarian Video How-to

      Roasted Asparagus w/ Grapefruit and Lemon Oil

        Asparagus with Grapefruit and Lemon Oil

        It’s day four of my blogging event: “How to host an elegant, flavorful, vegan, gluten-free dinner party” in which I feature recipes created by the wonderful Viviane Bauquet Farre of food and style. My husband and several of his friends have transitioned to a vegetarian diet and several of them are also avoiding dairy and gluten, so when I decided to celebrate G’s birthday with a dinner party, I knew I needed to turn to my friend Viviane who features such refined recipes which also happen to be meat free. Today’s installment is the third of that five-course meal. For the next course, you’ll just have to check back tomorrow.

        So far in this dinner, we’ve enjoyed cucumber and avocado ceviche, and slurped down an artichoke soup with truffles on top. Now we’re ready for a scrumptious early Spring salad, so Viviane’s Roasted Asparagus with Grapefruit is just the thing. Here’s what I learned by making this recipe: It is soooo easy to make and it is easy to prepare ahead of time, when it was time for this course, I could truly relax. All I had to do was plate everything and drizzle it with oil.
        Roasted Asparagus

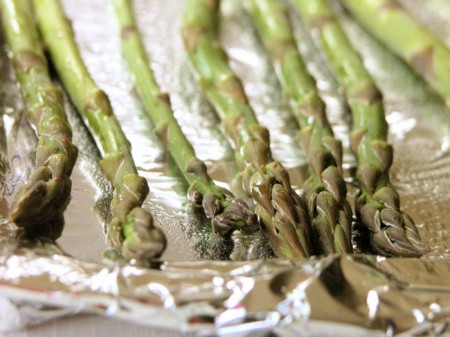
        The other revelation I had while making this recipe is just how easy it is to roast asparagus. Brush the spears with a little olive oil, pop them into an oven preheated to 500˚F and 7-10 minutes later you’ve got roasted asparagus. No careful chopping, no peeling, no long wait. It’s like fast food. Well, sort of.

        Brush with olive oil, then roast

        Watch Viviane’s video for more tips on roasting asparagus and to watch her demonstrate how to prepare grapefruit slices with no pith or membrane in sight. Again, now that I’ve done it once, I want to do it this way all the time. My kids love eating citrus in our house now because I prepare for them this way now.

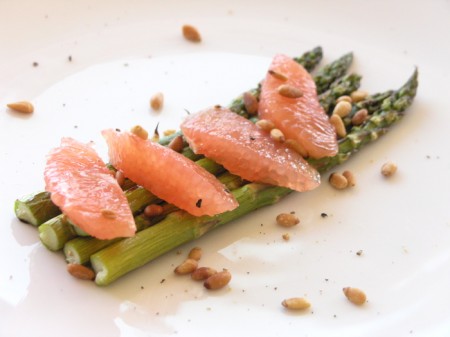
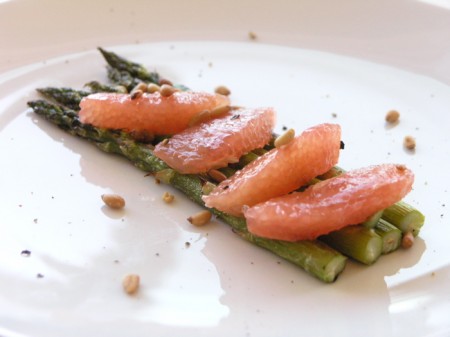
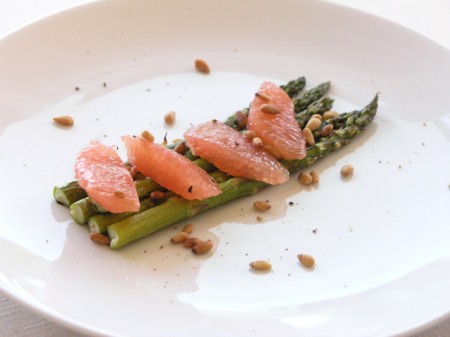
        Roasted asparagus with pink grapefruit and lemon oil
        Adapted from the recipe by Viviane Bauquet Farre of food and style, with permission.
        See her original recipe here.
        serves 4

        1 large Texas Rio Star grapefruit
        1 1/4 lbs asparagus spears – washed and stem snapped
        2 tablespoons extra virgin olive oil
        1/4 teaspoon sea salt or to taste
        2 tablespoons pine nuts
        4 teaspoons lemon infused oil as garnish
        A bit of lemon zest for garnish
        freshly ground black pepper to taste

        1 large jellyroll pan

        Method

        1. Peel the grapefruit down to the flesh, Quarter lengthwise and remove the thin membrane around each slice, being careful not to break them. Transfer to a bowl and set aside.

        2. If your pine nuts are raw, preheat the oven to 425˚F. Place the pinenuts on a baking sheet and roast for about 2 minutes, but watch carefully through the window to make sure they don’t burn. Set aside.

        3. Increase oven temperature to 500°F. Move rack to the top of the oven. Spread the asparagus on a jellyroll pan. Brush with the olive oil and sprinkle with the salt. Bake for 7 to 10 minutes (depending on their size) until the tips begin to brown. Remove from pan and let cool for 10 minutes.

        4. Place a bundle of asparagus in the center of each plate. Top with 3-4 grapefruit slices and sprinkle with the pine nuts. Drizzle with the lemon oil and finish with a bit of fresh lemon zest and freshly ground black pepper to taste. Serve immediately.

        Roasted Asparagus with Grapefruit
          Categories
          Appetizers Produce Salads Uncategorized Vegetarian

          Cucumber and Avocado Ceviche

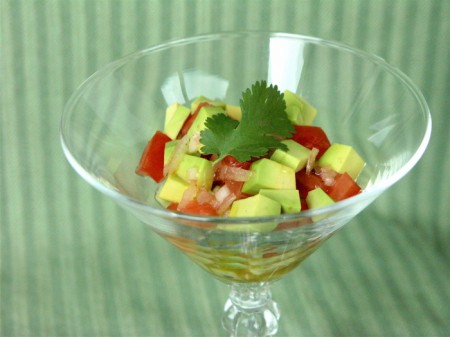
            Avocado and Cucumber Ceviche

            It’s day two of my blogging event: “How to host an elegant, flavorful, vegan, gluten-free dinner party” for which I feature recipes created by the lovely and talented Viviane Bauquet Farre of food and style. This recipe was the first course of the dining extravaganza that was my husband’s birthday dinner this past weekend. This kicked off a wonderful five course meal. For course number two, you will have to check back tomorrow.

            Avocado and Cucumber Ceviche

            Normally, when one thinks of ceviche, one thinks of raw seafood that has been cured in a citrus marinade. Well, this is a vegetarian version of ceviche. It’s an incredibly light dish, perfect for spring and summer gatherings and it is surprisingly easy to make. I prepped all of the vegetables ahead of time except for the avocado. I waited until just before I assembled the dish to cut the avocado. Drizzling it with a lime-based marinade helps keep it from browning, but it’s important for the avocado to be fresh.

            The tabasco sauce in the marinade does give it a little kick. If your guests like spice, you can heat up it even more by adding another 1/4 tsp. For me, it was just perfect.

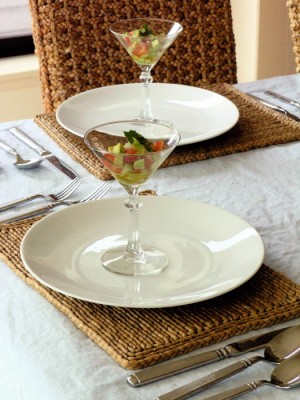
            I remembered having traditional ceviche served in a martini glass at a restaurant in San Francisco and I wanted to recreate that effect here, but you could just as easily serve it in a shallow bowl or on a salad plate.

            First Course of the Dinner


            Cucumber and Avocado Ceviche

            by Viviane Bauquet-Farre of food and style
            serves 6

            For the dressing
            1 small shallot – skinned and finely chopped
            1 1/2 tablespoons fresh lime juice
            1/2 teaspoon Tabasco
            3 tablespoons extra virgin olive oil
            sea salt and freshly ground pepper to taste

            For the ceviche
            1/2 of a (seedless) English cucumber, peeled and diced
            2 medium tomatoes – seeded and cut in 1/8″ cubes
            1/2 ripe but not-too-soft avocado – pit removed, skinned and cut into small cubes
            Cilantro sprigs as garnish

            Method

            1. To make the dressing, place all ingredients except the olive oil in a small bowl and toss. Gradually whisk in the olive oil, beating continuously to create an emulsion. Set aside.

            2. Toss a large spoonful of cucumber into a martini glass or shallow bowl. Place a spoonful of tomato cubes on top of the cucumber and a spoonful of avocado cubes on top of that. Drizzle with dressing and toss a bit to coat. Garnish with a sprig of fresh cilantro. Serve immediately.

            Cook’s note: This recipe can also be served as a side salad. Instead of serving it in individual small plates, serve it in a large platter.

            Avocado and Cucumber Ceviche
              Categories
              Produce Sides Vegetarian

              Jamie Oliver’s Roasted Root Vegetables

                [pinterest]

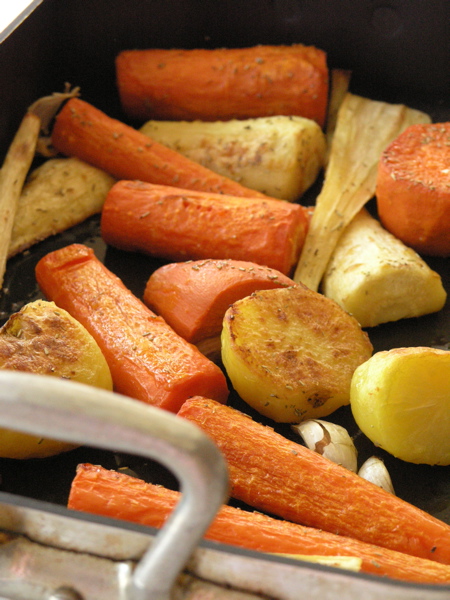
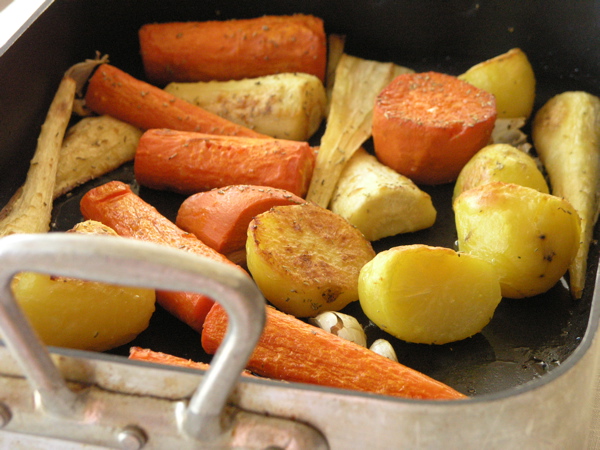
                Roasted parsnips, potatoes and carrots

                I’ve been working on perfecting roasted root vegetables for awhile. Getting them to come out of the oven crispy on the outside and creamy on the inside is no small feat. Should you parboil first? How hot should the oven be? I’ve gone back and forth about the parboiling question. For years, I’ve been too lazy to bother and I thought that I was getting by just fine. That all changed the other day, when I followed the recipe in Jamie Oliver’s latest book, Jamie’s Food Revolution: Rediscover How to Cook Simple, Delicious, Affordable Meals. He got me to parboil again and I don’t think I will ever go back.

                Click on the book to see more:

                The other revelation? Heat the olive oil, along with the smashed garlic cloves and rosemary in the roasting pan first, on the stove top. Then toss the vegetables in the heated, flavored oil to coat (before roasting in a 400˚F oven). The vegetables roast evenly, and the flavor diffuses throughout.

                See the nice browning on the potatoes? That comes as a result of scuffing up the potatoes while draining them in the colander. Scuffing the potatoes increases the surface area exposed to the warm air, shortening the time for moisture to evaporate the starches (sugars) to caramelize and turn brown.

                And of course, don’t break the cardinal rule: make sure the vegetables are not overcrowded. Overcrowding in the roasting pan leads to “steaming” which produces limp, soggy vegetables that can’t brown. Make sure there is only one layer of vegetables and adequate space between them.

                Jamie Oliver's Roasted Root Vegetables
                 
                Prep time
                Cook time
                Total time
                 
                Hearty roasted root vegetables perfect for Thanksgiving and throughout the autumn and winter months.
                Author:
                Recipe type: Side dish
                Cuisine: British
                Serves: 4-6
                Ingredients
                • 2 medium Idaho potatoes
                • 6 parsnips
                • 6 carrots
                • 1 bulb of garlic
                • 3 sprigs of fresh rosemary
                • sea salt and freshly ground black pepper
                • olive oil
                Instructions
                1. Preheat your oven to 400°F
                2. Peel the vegetables and halve any larger ones lengthways. Break the garlic bulb into cloves, leaving them unpeeled, and bash them slightly with the palm of your hand. Strip off the rosemary leaves from the stalks.
                3. Put the potatoes and carrots into a large pan – you may need to use two – of salted, boiling water on a high heat and bring back to the boil. Allow to boil for 5 minutes, then add the parsnips and cook for another 4 minutes. Drain in a colander and allow to steam dry. Take out the carrots and parsnips and put to one side. Fluff up the potatoes in the colander by shaking it around a little – it’s important to ‘chuff them up’ like this if you want them to have all those lovely crispy bits when they’re cooked
                4. Put a large roasting pan over medium heat and either add 2 Tbsp of olive oil. Add the garlic and rosemary leaves. Put the vegetables into the tray with a good pinch of salt and pepper and stir them around to coat. Spread them out evenly into one layer – this is important, as you want them to roast, not steam as they will if you have them all on top of each other.
                5. Put the baking dish in the preheated oven and cook, stirring the vegetables occasionally, until they are tender and golden brown, about 45 minutes.

                Roasted carrots, parsnips, and potatoes

                  Categories
                  Produce Sides Uncategorized Vegetarian

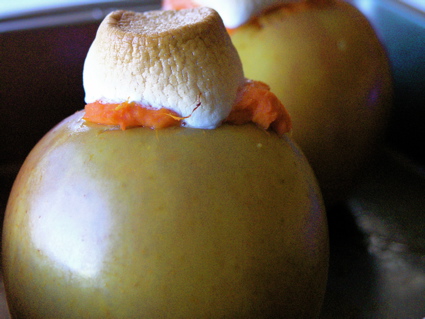
                  Sweet Potato-Stuffed Apples

                    Sweet Potato-Stuffed Apples
                    Sweet Potato-Stuffed Apples

                    Day 2 of 14 Days of StreamingApple and I’ve found another amazing recipe in this out-of-print cookbook I’ve got that was published by the Culinary Institute of America in 1999. It’s called Cooking Secrets of the CIA and used copies are available on Amazon. You may remember that during 31 Days of Pumpkin, I cooked a Pumpkin Mascarpone Cheesecake from this book. Well a quick scan for apples yielded this whimsical recipe.

                      Categories
                      Dessert Produce Uncategorized Vegetarian

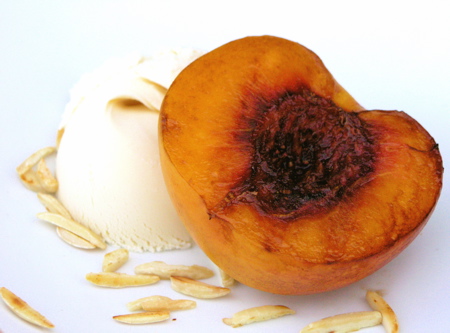
                      Grilled Peaches with Toasted Almonds

                        Grilled Peaches with Toasted Almonds and Vanilla Ice Cream
                        Grilled Peaches with Toasted Almonds and Vanilla Ice Cream

                        I know, it’s late in the season to do a post about peaches, but I swear, local peaches are still on sale here at Paradise Market, so I didn’t hesitate when the dinner party menu I was using from the Williams-Sonoma Dinner Parties book included this Grilled Peaches dish for dessert. Once again, I adapted the recipe and made it my own.

                        The method I used for each step of this recipe differed greatly from the one outlined in the Dinner Parties book, because I’m lazy and I like to keep the cleanup as simple as possible. Therefore, instead of using the oven and a cookie sheet to toast the almonds, I just toasted them in a sautée pan and rather than using my gas grill outside to grill the peaches, once again, I whipped out my All-clad non-stick grill pan. During the party, I had just grilled the Halibut, so I actually had to wash the pan between the main course and the dessert course before I could fire it back up, but because it’s a non-stick pan, washing it was a breeze and it was ready for another round of action in no time.

                        I have to say, the guests at the party went unexpectedly wild about this dessert. None of us were prepared for the peaches to cook all the way through in such a short amount of time, so we all took our first bite a bit tenatively. The peaches only grill for about 6-7 minutes, but they come out soft, warm and sweet – all they way through. Guests also commented enthusiastically about the contrast among textures with the crunch of the almonds, the creamy chill of the ice cream and the warm, soft texture of the peaches. A splash of Balsamic Vinegar lent tang and flavor. One guest, Steve, likes to make a Balsamic reduction for grilled fruit, because then it’s an amazingly sweet addition. See the links to other blogs at the bottom of this post to find out more about how to do that. For me, the Balsamic vinegar was a last minute thought, and I was just glad to have splashed it in.

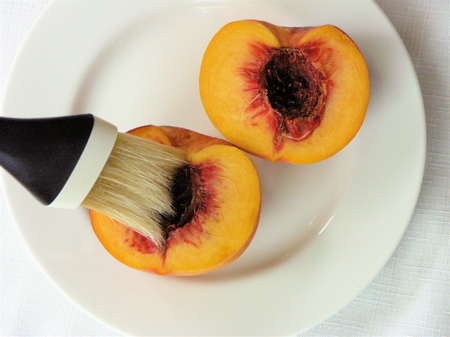
                        Brush the peach halves with olive oil for grilling
                        Brush the peach halves with olive oil for grilling

                        Grilled Peaches with Toasted Almonds
                         
                        The perfect ending to a summer dinner party.
                        Author:
                        Recipe type: Dessert
                        Cuisine: American
                        Serves: 6
                        Ingredients
                        • ½ cup slivered almonds
                        • 3 large, ripe, yellow peaches, halved and pitted
                        • Extra virgin olive oil for brushing on peaches
                        • Vanilla ice cream
                        Instructions
                        1. Heat a 10-inch skillet over medium-high heat. Add almonds and toast, watching carefully so they don't burn. If the pan has truly had time to heat up, it takes about 2 minutes on the first side and then 1 minute after flipping them. Set almonds aside.
                        2. Brush both sides of each peach half lightly with extra virgin olive oil. Place peach halves in the pan, round side down and grill for about 3 minutes. Check one to see if grill marks have appeared. Turn them over and grill on the other side until grill marks appear, about 4 more minutes.
                        3. If peaches are large, place one half on each plate. For medium sized peaches, you could plate with two halves. Sprinkle with almonds and add a scoop of vanilla ice cream.

                        Grilled Peaches recipes from around the Food Blogosphere

                        Grilled White Peaches Recipe w/honey balsamic glaze & homemade Crème Fraîche from White On Rice Couple

                        Grilled Peaches & Cream from bell’alimento

                        Grilled Peaches with Mascarpone and Balsamic Syrup from Closet Cooking

                          Categories
                          Produce Sides Uncategorized Vegetarian

                          Cranberry Beans with Garlic and Leeks

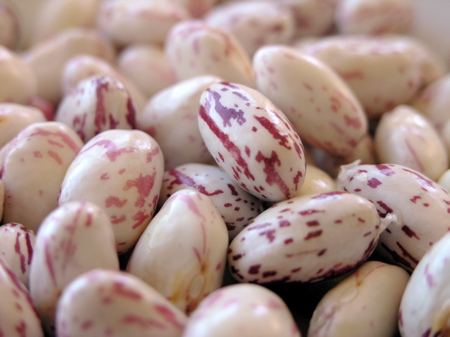
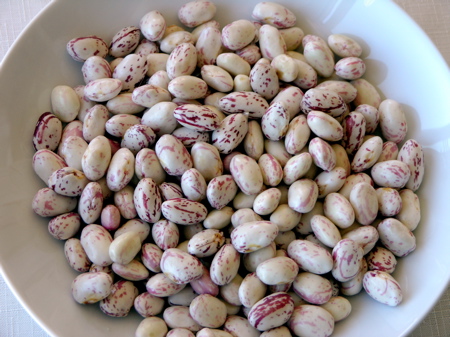
                            Cranberry Beans
                            Cranberry Beans

                            When I saw these gorgeous beans (still in the shell) at the market, I just had to buy them. I had no idea what they were or what I was going to do with them, but they were too beautiful to pass by. Turns out, their flavor is just as pleasing: nutty, rich, creamy. They’re like eating a bowl of health.

                            “What are they?” you ask? At the store, they were labeled “Raspberry Beans,” but my subsequent research has shown that they are more commonly called “Cranberry Beans.” They are related to the Italian ‘borlotti’ bean. The best explanation of the origin and history of the Cranberry Bean can be found over at The Culinary Addict. He explains how the Cranberry Bean was first cultivated by the Aztecs and the Incas thousands of years ago. It’s believed to have been crossed with the white bean to create today’s larger, kidney-shaped Cranberry Bean. It was brought to Italy in the 1500’s and has thrived there ever since. Check out The Culinary Addict’s photos of the beans still in their shell.

                            Cranberry Beans Just Shelled
                            Cranberry Beans Just Shelled

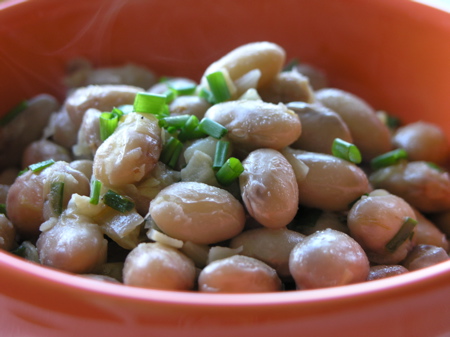
                            Unfortunately, the beautiful marbled color does fade with cooking, but the flavor more than makes up for the lost colors. I decided to cook mine in a garlicky, low-fat broth. This would be great served with lamb shanks or osso bucco, but I’ll be honest. I ate mine without any accompaniment.

                            Cranberry Beans with Garlic and Leeks
                            Serves 2

                            Ingredients

                            2 cups shelled, fresh Cranberry Beans
                            1 Tbsp extra-virgin olive oil
                            1 large leek, minced
                            3 garlic cloves, minced
                            2 cups, 99% fat-free chicken broth
                            1 Tbsp butter
                            1 tsp salt
                            1 bay leaf
                            1/2 tsp lemon zest
                            1 Tbsp chives, chopped finely
                            1 clove garlic, minced
                            pepper to taste

                            Method

                            1. Bring 6 cups of salted water to boil. Add beans and simmer for 20 minutes. Remove from heat, drain, and rinse with cold water to stop the cooking. Set aside.

                            2. Heat olive oil in heavy-bottom medium sauce pan. Add leeks and sautée gently until starting to soften, about 2 minutes. Add garlic and sautée for 1 minute. Add cooked beans and stir to coat. Add broth, butter and salt and bring to a gentle simmer. Add bay leaf and let cook uncovered for 20 minutes, stirring as needed. Add additional chicken stock to keep beans moist, if necessary.

                            3. While beans are cooking, mix grated lemon zest, chives and minced garlic in a small bowl. Add this mixture to the beans near the very end of the cooking time. Remove bay leaf, add fresh ground pepper to taste and enjoy.

                            Cranberry Beans in Garlic Sauce
                            Cranberry Beans with Garlic and Leeks

                              Categories
                              Appetizers Produce Soups and Stews Uncategorized

                              Silky Smooth Cream of Broccoli Soup

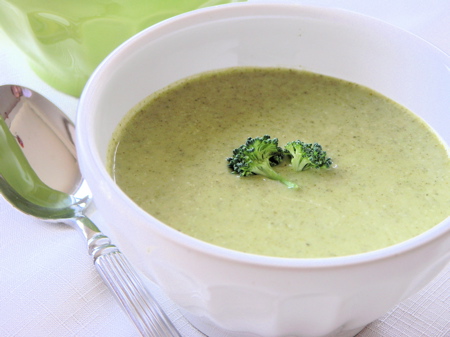
                                Cream of Broccoli Soup
                                Cream of Broccoli Soup

                                This week at the grocery store, I bought an enormous bag of broccoli florets and have since been adding broccoli to everything.

                                Today I decided to make a more significant dent in the bag by making cream of broccoli soup. My husband loves cream of broccoli soup and even enjoys the Campbell’s version. In the past, I’ve added Campbell’s Cream of Broccoli soup to various chicken casseroles, but we’ve both watched as the cans have disappeared completely from store shelves throughout Northern California and the Sierras.

                                It does still exist. But I was happy to find out today just how easy it is to make the good stuff from scratch at home.

                                Here are my tips and tricks for making your best cream of broccoli soup yet:

                                1) I use a potato to help thicken the soup. I do use heavy cream at the end, because I can’t resist the rich flavor and texture of cream, but adding the potato could have meant cutting back on the fat and using whole milk instead.

                                2) To boost the flavor, I sautée onion and garlic first, then add the broccoli and chicken stock and bring to a boil.

                                3) To make the soup really smooth (and not gritty) I use an immersion blender to liquefy the soup and then pass it through a fine strainer. Not once, but twice! I was inspired to do this by something I read in the French Laundry Cookbook
                                where Thomas Keller describes how liquids don’t move from one pan to another in the French Laundry kitchen without passing through a strainer. Got it? Blender. Strainer. Strainer. Done.

                                4) I also add spinach to boost the vibrant green color and add even more nutrients.

                                5) Don’t have an immersion blender yet? It’s time to get one. It simplifies soup making so much.

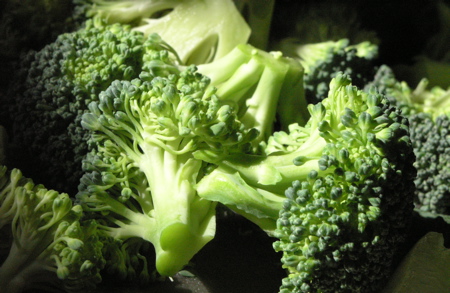
                                Broccoli
                                Broccoli

                                Silky Smooth Cream of Broccoli Soup
                                 
                                Prep time
                                Cook time
                                Total time
                                 
                                Super silky smooth cream of broccoli soup.
                                Author:
                                Recipe type: Soup
                                Serves: 4-6
                                Ingredients
                                • ½ medium onion, diced
                                • 3 large cloves of garlic, sliced thinly
                                • 2 Tbsp butter
                                • 1 medium potato, peeled and chopped into 1-inch pieces
                                • 5 cups broccoli florets
                                • 6 cups chicken stock
                                • 1 tsp salt
                                • ½ cup raw baby spinach leaves (packed)
                                • ¾ cup heavy cream
                                • ½ cup sour cream
                                Instructions
                                1. Melt the butter in a large stock pot over medium heat. Add onion and garlic and sautée gently until softened and translucent - about 3 minutes.
                                2. Add potato, broccoli and chicken stock and bring to a boil. Reduce heat, cover and simmer for 20 minutes. Add salt and baby spinach leaves. The heat from the soup will wilt the leaves down right away.
                                3. Let the soup cool a bit before adding it in batches to a blender. Return soup to pan through a strainer. Not all of the contents will make it through the strainer. Reserve the thick parts that won't strain and put them back into the blender. Then pour back into the soup.
                                4. While reheating soup gently, add cream. Add more salt and pepper to taste. Once soup is hot again (but not boiling!) whisk in sour cream and blend completely.
                                5. Serve with a garnish of parsley or mini broccoli spears or a tablespoon of shredded cheddar cheese or even another dollop of sour cream. Enjoy!


                                  Categories
                                  Produce Salads Sides Uncategorized

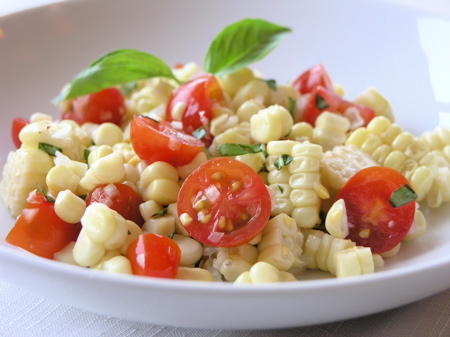
                                  Fresh Corn Salad w/ Tomatoes & Basil

                                    Corn Salad with Tomatoes & Basil
                                    Corn Salad with Tomatoes & Basil

                                    Since local corn is back in season, corn salad is back on the menu here at StreamingGourmet. I can’t get enough of the stuff and even my kids like it. I’ve kept my corn salad simple. I like to let the vegetables speak for themselves (i.e., there’s no oil in my recipe). The key is to keep the corn crisp by boiling it for only three minutes and promptly removing it from the water. Fresh basil is the other key ingredient here. My entire kitchen smelled great while I was putting this salad together.

                                    Ingredients

                                    4 ears fresh corn, shucked
                                    1/2 pint cherry tomatoes, sliced in half
                                    1/2 small onion, diced finely
                                    1 Tablespoon minced fresh basil
                                    1 teaspoon salt
                                    A few spritzes of fresh lemon juice

                                    Method

                                    1. Bring a large stockpot of water to boil. Add corn and boil for 3 minutes. Remove corn from water and place on a platter to cool.

                                    2. Dice the onion using a mandoline on the finest dice setting. On my mandoline, I put the onion in the safety holder, sliced it thinly then swiped through perpendicular to my slices.

                                    3. Once the corn is cool, slice it off into a large bowl. Break up the slices into kernels gently, leaving some big chunks, but not too big. Add the tomatoes, onion, and basil and toss to distribute everything evenly. Add salt and lemon juice and toss again.

                                    Served chilled or at room temperature.

                                    Serves 4

                                    Scroll Down for More Corn Salad Recipes
                                    from Around the Food Blogosphere

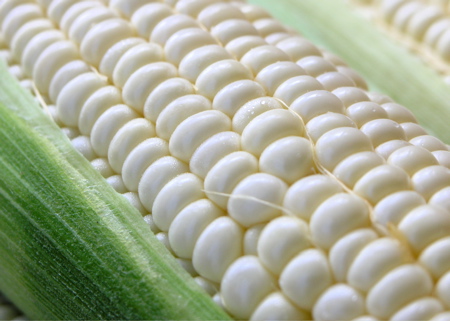
                                    Yummy Local Corn
                                    Yummy Local Corn

                                    Other Great Corn Salad Recipes from Around the Food Blogosphere

                                    1. Elise Bauer at Simply Recipes has a few great recipes. One of them is Grilled Corn Salad. It’s got a Southwest twist with cilantro, chili peppers and cumin.

                                    2. Chuck at Sunday Night Dinner wrote a post last year called Spicy Fresh Corn Salad – A Taste of Yellow 2008 – The post was in support of the Lance Armstrong Foundation and features a simple corn salad with a spicy Thai chili pepper kick.

                                    3. Kevin at Closet Cooking has a recipe for Avocado and Sweet Corn Salad. He’s added a creamy salsa verde dressing that looks great.

                                    4. Chef John over at Foodwishes has produced a video Red Pepper and Corn Salad Recipe. For the recipe, visit Foodwishes. You can watch the video here.

                                      Categories
                                      Produce Sides Uncategorized Video How-to

                                      Tyler Florence’s Creamed Spinach

                                        I discovered this video a few days after posting my version of Creamed Spinach. There are some similarities. We both use fresh nutmeg. We both add cheese. He adds Parmesan. I add Gruyère. I made a roux first. He thickened his cream by cooking it down. The revelation I want to try next time? Chopping the raw spinach before adding it to the cream. What are your secrets?


                                        Blog Widget by LinkWithin