Categories
Appetizers Vegetarian

Marinated Olives with Fennel – The Start to a Wonderful (Vegan?! Gluten-Free?!) Dinner Party

    Marinated Olives with Fennel

    This weekend, I hosted a birthday dinner for my husband, but this year was different from all the rest. The entire menu was vegan and gluten-free. Several of the guests are vegetarian and a few are gluten intolerant. In addition, many of them are trying to avoid dairy, so I decided to just take the menu all the way. I knew that I would need help to make it an elegant, flavorful dinner with these restrictions in place. I am a newly-minted vegetarian chef, so I turned to my friend and amazing gourmet blogger/writer/instructor/video-maker, Viviane Bauquet-Farre, author of the blog food and style. Viviane and I met when I featured on her cooking videos on StreamingGourmet.com. Her videos are as beautifully made as her fine cuisine.

    Viviane creates innovative, seasonal dishes that are flavorful, deceptively simple, and… as it turns out, vegetarian (not vegan or gluten-free necessarily). I read her blog and watched her videos for about six months before I even realized that they were all meatless. I knew she was the person to call for help with my menu.

    Sure enough, we were able to come up with an elegant five-course dinner free of bones, cheese, cream or wheat. Eager to know what the menu was? You’re in luck, but you’ll have to check back. All five courses will be revealed over the next five days.

    Vegan, gluten-free dinner about to begin

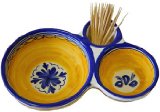
    Today’s post is a bit of a teaser. These marinated olives were among the hors d’oeuvres on the table during the cocktail hour, but there are five courses yet remaining. The olives were devoured, but I have a confession to make. I don’t eat olives. I don’t think an entire olive has ever passed my lips. So I can’t vouch for them myself. And because I don’t eat olives, it didn’t occur to me to put a little bowl out to collect all the pits. It also didn’t occur to me to put out little toothpicks with which to pick up the olives. You can learn from my mistake and use a dish like this one (available at Amazon.com).

    But this recipe is that good, because despite my lack of proper accoutrements, guests wolfed down these olives with their bare fingers and left the pits wherever they could hide them.

    Marinated Olives with Fennel

    Marinated Olives with Fennel
    By Viviane Bauquet Farre of food and style
    Reprinted with permission

    makes 2 cups

    1/2 small fennel bulb
    1 tablespoon coarsely chopped fennel greens
    1/4 teaspoon red pepper flakes
    1/4 teaspoon fennel seeds
    2 strips lemon zest – (use vegetable hand-peeler) and cut in 1/16” julienne strips
    1/2 cup extra virgin olive oil
    1 1/4 lb mixed olives

    Step 1: Trim and cut fennel bulb in half. Using a vegetable hand-peeler, shave 12 strips from the bulb and put in a large bowl. Place the balance of ingredients in the same bowl. Mix well and transfer to a Tupperware container.

    Step 2: Let marinate at room temperature for 1 hour before serving.
    Cook’s note: Refrigerate up to 1 month. Bring to room temperature before serving.

      Categories
      Appetizers Salads Sauces Uncategorized Vegetarian

      Tarragon-Mustard Vinaigrette

        Tarragon-Mustard Vinaigrette
        Butter Lettuce with Tarragon-Mustard Vinaigrette

        The other day, I had lunch at The Left Bank in Larkspur, CA, and I had this lovely butter lettuce salad with a tarragon-mustard vinaigrette. The plate came with an entire head of butter lettuce and the vinaigrette was so smooth, I simply had to try to recreate it at home.

        I was lucky today because by chance, I already had shallots and fresh tarragon in the fridge and I remembered to pick up a head of butter lettuce on my way home from dropping off the kids at school. Lunch, here I come.

        When standing in front of my bottles of olive oil and vinegar, however, I thought, “I bet Michael Ruhlman’s book, Ratio: The Simple Codes Behind the Craft of Everyday Cooking has something to say about this.” Sure enough, a quick Google search yielded a guest post he wrote over at Elise Bauer’s Simply Recipes. In that post, he actually provides three different vinaigrette recipes. I chose to make the tarragon-mustard vinaigrette because I hoped it would match what I had at The Left Bank.

        It almost did – definitely close enough for lunch at home. Just make sure to use the highest quality ingredients you can find and whip it up with full gusto.

        Tarragon-Mustard Vinaigrette
        adapted from Michael Ruhlman’s recipe

        2 Tbsp sherry vinegar
        1 Tbsp minced shallot
        Salt and pepper to taste
        2 teaspoons Dijon mustard
        6 Tbsp olive oil
        1 Tbsp minced fresh tarragon

        In a tall bowl, combine the vinegar, shallot, salt, pepper, and mustard. Give it a stir with a whisk or fork to soften the shallot then drizzle the oil in while whisking continuously to form an emulsion. Wait to stir in the tarragon just before serving.

        For more information about Michael Ruhlman and his amazing work on ratios, check out his iPhone app and watch this video that explains it.

          Categories
          Appetizers Pumpkin Uncategorized

          Ruth Reichl’s Cheesy Bread in a Pumpkin

            Roast Pumpkin with Cheesy Bread Inside
            Roast Pumpkin with Cheesy Bread Inside

            Day 25 of 31 days of pumpkin and we return to the fondue concept and get it right, with a little help from Ruth Reichl, God Bless her. She was interviewed by Terry Gross for Fresh Air on NPR on October 14, 2009. I was deep into this pumpkin project and in the kitchen, in fact, when I heard Ruth Reichl start to describe this mouth-watering concoction. I immediately added it to the cue and now the day has finally come when I get to taste it and share my version of her recipe with you.

            If you want to hear the exact moment that Ruth describes this dish in her interview, advance to 9:13 when you click on the NPR audio link.

            She describes a recipe that appears in her new book, Gourmet Today: More than 1000 All-New Recipes for the Contemporary Kitchen and that recipe is reprinted on the Gourmet website. In my adaptation, I cut the recipe in half, used solely Gruyère, and used half-and-half instead of heavy cream as per Ruth Reichl’s description.

              Categories
              Appetizers Uncategorized

              Cheese Fondue in a Pumpkin

                Pumpkin Fondue
                Pumpkin Fondue

                Day 19 of 31 days of pumpkin and it’s time for more cheese. This time, let’s just have it straight up, shall we?

                I’ll be honest. I had never made fondue before and this time was not exactly a 5 star success. But if you avoid my mistakes, yours will come out perfectly. The flavor of this fondue was great, but the consistency was not quite creamy enough. Can you tell in the photo? So, I’m going to spend time in this post explaining what can go wrong when making a fondue and how to avoid it.

                Are you with me?

                My tagline is “We risk disaster, so you don’t have to,” for a reason.

                  Categories
                  Appetizers Basics Pumpkin Uncategorized Video How-to

                  Spicy Roasted Pumpkin Seeds

                    Spicy Roasted Pumpkin Seeds
                    Spicy Roasted Pumpkin Seeds

                    Day 16 of 31 days of pumpkin and we arrive at the roasted pumpkin seed. I love how seasonal these are. I mean, on what other day of the year do you roast your own pumpkin seeds but on about October 29? This year, I’ve decided to coat my pumpkin seeds with savory spices, but believe me, pumpkin seeds are divine when roasted with just a little bit of olive oil and a LOT of salt.

                    Getting the seeds out of the pumpkin wasn’t as hard as I thought it was going to be. If you paw through them while you rinse them, the remaining pieces of pulp come right off.

                    Rinsing the Seeds
                    Rinsing the Seeds
                      Categories
                      Appetizers Pumpkin Soups and Stews Uncategorized Video How-to

                      Pumpkin-Sage Soup

                        Pumpkin-Sage Soup
                        Pumpkin-Sage Soup

                        Day 3 of 31 days of pumpkin brings us to a savory recipe.

                        The secret to this pumpkin soup isn’t the sage (that’s in the title after all). It’s the fact that the onions are caramelized first. Caramelizing onions takes a bit of time (about 30 minutes, in fact), but it’s well worth it to bring out the sweet, nutty flavor hidden inside. The trick to caramelizing onions is to keep the temperature very low while they are sautéeing. Caramel is created when sugar undergoes controlled pyrolysis – the chemical decomposition that happens when organic stuff gets hot. If it gets too hot, then it gets charred. Char creates the familiar grill marks on a perfectly grilled steak. We’re not charring the onions, we’re trying to decompose the sugars in such a controlled way that they turn into caramel and that takes controlled temperature for a long time.

                        Elise Bauer, from Simply Recipes, created a stop-motion movie to show onions caramelizing. Her post about how to caramelize onions is here.

                          Categories
                          Appetizers Uncategorized Vegetarian

                          Fig & Gorgonzola Crostini with a Honey Drizzle

                            Fig & Gorgonzola Crostini with Honey Drizzle
                            Fig & Gorgonzola Crostini with Honey Drizzle

                            In my most recent post, I wrote about hosting a dinner party on Sunday night and using an entire menu from the Williams-Sonoma Dinner Parties book. In this installment, I bring you Fig & Gorgonzola Crostini with a Honey Drizzle. I changed the recipe slightly, so the one you see here is my own, but I was inspired by the Gorgonzola Bruschetta with Figs recipe in the book.

                            This hors d’oeuvre was particularly convenient because I could toast the baguette slices ahead of time, chop the figs ahead of time and assemble the crostini before the guests arrived. I felt very little stress.

                              Categories
                              Appetizers Salads Uncategorized Vegetarian

                              Warm Cabbage and Cannellini Bean Salad

                                Cabbage and Cannellini Bean Warm Salad
                                Cabbage and Cannellini Bean Warm Salad

                                Recently, I decided it was time to reign in my appetite and focus on eating healthier, leaner, fresher food. I’ll be honest. I even signed up for the web-based version of Weight Watchers. As a lifetime member, I know the program, but paying a monthly fee again and tracking foods using the webtools have helped me shift my cooking energy in the right direction. I think the WW approach actually helps one adopt habits that are in line with what Mark Bittman and Michael Pollan advocate. In the first sentence of Food Matters: A Guide to Conscious Eating with More Than 75 Recipes, Bittman poses the question, “Could improved health for people and planet be as simple as eating fewer animals, less junk food and super-refined carbohydrates?” and in the first sentence of In Defense of Food: An Eater’s Manifesto, Pollan writes simply, “Eat food. Not too much. Mostly plants.” Either of these statements could be licensed by Weight Watchers as taglines, and so I’m using the WW framework and tools to help me do what Pollan and Bittman advise.

                                With that in mind, I returned from the market today with bags full of produce and set about making a low-point, satisfying lunch quickly. I like vegetables best when they are sautéed slightly – still crunchy, but the raw edge taken off. And most of the time, something warm just feels more filling. So for this dish, I did what is my favorite preparation of cabbage – chopped it and sautéed it in a little olive oil with salt and pepper. I topped the cabbage with a preparation of garlic and cannellini beans that had also been warmed and then garnished the dish with a few heirloom tomato chunks and chives. It was so easy and quick (and pretty cheap too), it just might become a staple.

                                Warm Cabbage and Cannellini Bean “Salad”
                                Serves 2

                                1/2 Tbsp olive oil
                                1/2 medium onion, chopped
                                1/2 head of green cabbage, chopped into 1/2 inch pieces
                                salt and pepper to taste
                                1 tsp of olive oil
                                2 cloves garlic, chopped finely
                                1 15 oz can of cannellini beans, drained
                                1/4 cup 99% fat free chicken broth
                                1 Bay leaf
                                1/2 tomato, chopped into small cubes
                                chopped chives to garnish

                                Method

                                1. Heat oil in large, heavy bottomed frying pan or wok over medium-high heat. Add onion and sautée until softened, about 3 minutes. Add cabbage and toss. Continue to sautée gently for about 8 minutes In the meantime, heat oil in a small saucepan. Add garlic and sautée gently for 1 minute. Add beans and stir thoroughly. Add chicken broth and Bay leaf and bring to a near boiling simmer. Allow to simmer until cabbage is ready.

                                2. Spoon cabbage onto plate. Top with beans and sprinkle with chives. Add tomatoes, and season with salt and pepper. Enjoy immediately.

                                Tools used today available at Amazon:

                                  Categories
                                  Appetizers Fish & Shellfish Uncategorized

                                  Garlic Shrimp

                                    Garlic Shrimp
                                    Garlic Shrimp

                                    The other day, large shrimp were on sale at Whole Foods for only $8.99/lb. I was cooking for one that night, so I bought six and it only cost $4.50. I wasn’t sure what I was going to do with them, but when I got home, I had a craving for garlic shrimp, one of my favorite tapas dishes. Call me lazy or call me a busy Mom, but I’m often in search of shortcuts in the kitchen. For this dish, I scooped out minced garlic from a jar that I had on hand, but you can feel free to peel and mince your own fresh garlic.

                                    Garlic Shrimp
                                    Serves 1

                                    Ingredients

                                    6 large shrimp, peeled and deveined
                                    2 Tbsp extra virgin olive oil
                                    2 tsp minced garlic

                                    Method

                                    1. Heat the olive oil in small frying pan over medium to medium-high heat. (You don’t want to scorch or burn the garlic). Add the garlic and sautée for 30 seconds so that it is nice and fragrant. Add the shrimp and sautée until the bottom halves start to turn pink. Flip them over and sautée until opaque. Total sautée time for the shrimp will be about 3 minutes. Don’t overcook them or them will be rubbery or tough.

                                    Serve immediately. I served mine with fresh corn salad this time, but they are great with other tapas dishes like Spanish tortilla, patatas bravas, or calamares fritos.

                                      Categories
                                      Appetizers Produce Soups and Stews Uncategorized

                                      Silky Smooth Cream of Broccoli Soup

                                        Cream of Broccoli Soup
                                        Cream of Broccoli Soup

                                        This week at the grocery store, I bought an enormous bag of broccoli florets and have since been adding broccoli to everything.

                                        Today I decided to make a more significant dent in the bag by making cream of broccoli soup. My husband loves cream of broccoli soup and even enjoys the Campbell’s version. In the past, I’ve added Campbell’s Cream of Broccoli soup to various chicken casseroles, but we’ve both watched as the cans have disappeared completely from store shelves throughout Northern California and the Sierras.

                                        It does still exist. But I was happy to find out today just how easy it is to make the good stuff from scratch at home.

                                        Here are my tips and tricks for making your best cream of broccoli soup yet:

                                        1) I use a potato to help thicken the soup. I do use heavy cream at the end, because I can’t resist the rich flavor and texture of cream, but adding the potato could have meant cutting back on the fat and using whole milk instead.

                                        2) To boost the flavor, I sautée onion and garlic first, then add the broccoli and chicken stock and bring to a boil.

                                        3) To make the soup really smooth (and not gritty) I use an immersion blender to liquefy the soup and then pass it through a fine strainer. Not once, but twice! I was inspired to do this by something I read in the French Laundry Cookbook
                                        where Thomas Keller describes how liquids don’t move from one pan to another in the French Laundry kitchen without passing through a strainer. Got it? Blender. Strainer. Strainer. Done.

                                        4) I also add spinach to boost the vibrant green color and add even more nutrients.

                                        5) Don’t have an immersion blender yet? It’s time to get one. It simplifies soup making so much.

                                        Broccoli
                                        Broccoli

                                        Silky Smooth Cream of Broccoli Soup
                                         
                                        Prep time
                                        Cook time
                                        Total time
                                         
                                        Super silky smooth cream of broccoli soup.
                                        Author:
                                        Recipe type: Soup
                                        Serves: 4-6
                                        Ingredients
                                        • ½ medium onion, diced
                                        • 3 large cloves of garlic, sliced thinly
                                        • 2 Tbsp butter
                                        • 1 medium potato, peeled and chopped into 1-inch pieces
                                        • 5 cups broccoli florets
                                        • 6 cups chicken stock
                                        • 1 tsp salt
                                        • ½ cup raw baby spinach leaves (packed)
                                        • ¾ cup heavy cream
                                        • ½ cup sour cream
                                        Instructions
                                        1. Melt the butter in a large stock pot over medium heat. Add onion and garlic and sautée gently until softened and translucent - about 3 minutes.
                                        2. Add potato, broccoli and chicken stock and bring to a boil. Reduce heat, cover and simmer for 20 minutes. Add salt and baby spinach leaves. The heat from the soup will wilt the leaves down right away.
                                        3. Let the soup cool a bit before adding it in batches to a blender. Return soup to pan through a strainer. Not all of the contents will make it through the strainer. Reserve the thick parts that won't strain and put them back into the blender. Then pour back into the soup.
                                        4. While reheating soup gently, add cream. Add more salt and pepper to taste. Once soup is hot again (but not boiling!) whisk in sour cream and blend completely.
                                        5. Serve with a garnish of parsley or mini broccoli spears or a tablespoon of shredded cheddar cheese or even another dollop of sour cream. Enjoy!


                                        Blog Widget by LinkWithin